FREE UK TRACKED SHIPPING on all orders over £50 Trusted by modellers worldwide Secure checkout


Complete Vinyl Sticker and Transfer Set (1:6)
£84.00 incl VAT
In stock
What others have to say about this:
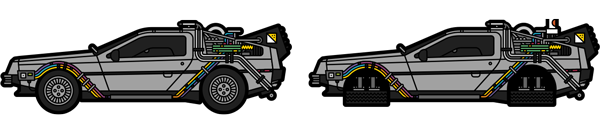
![]() Fully compatible with both the original BTTF and new BTTF2 Hot Toys DeLorean
Fully compatible with both the original BTTF and new BTTF2 Hot Toys DeLorean
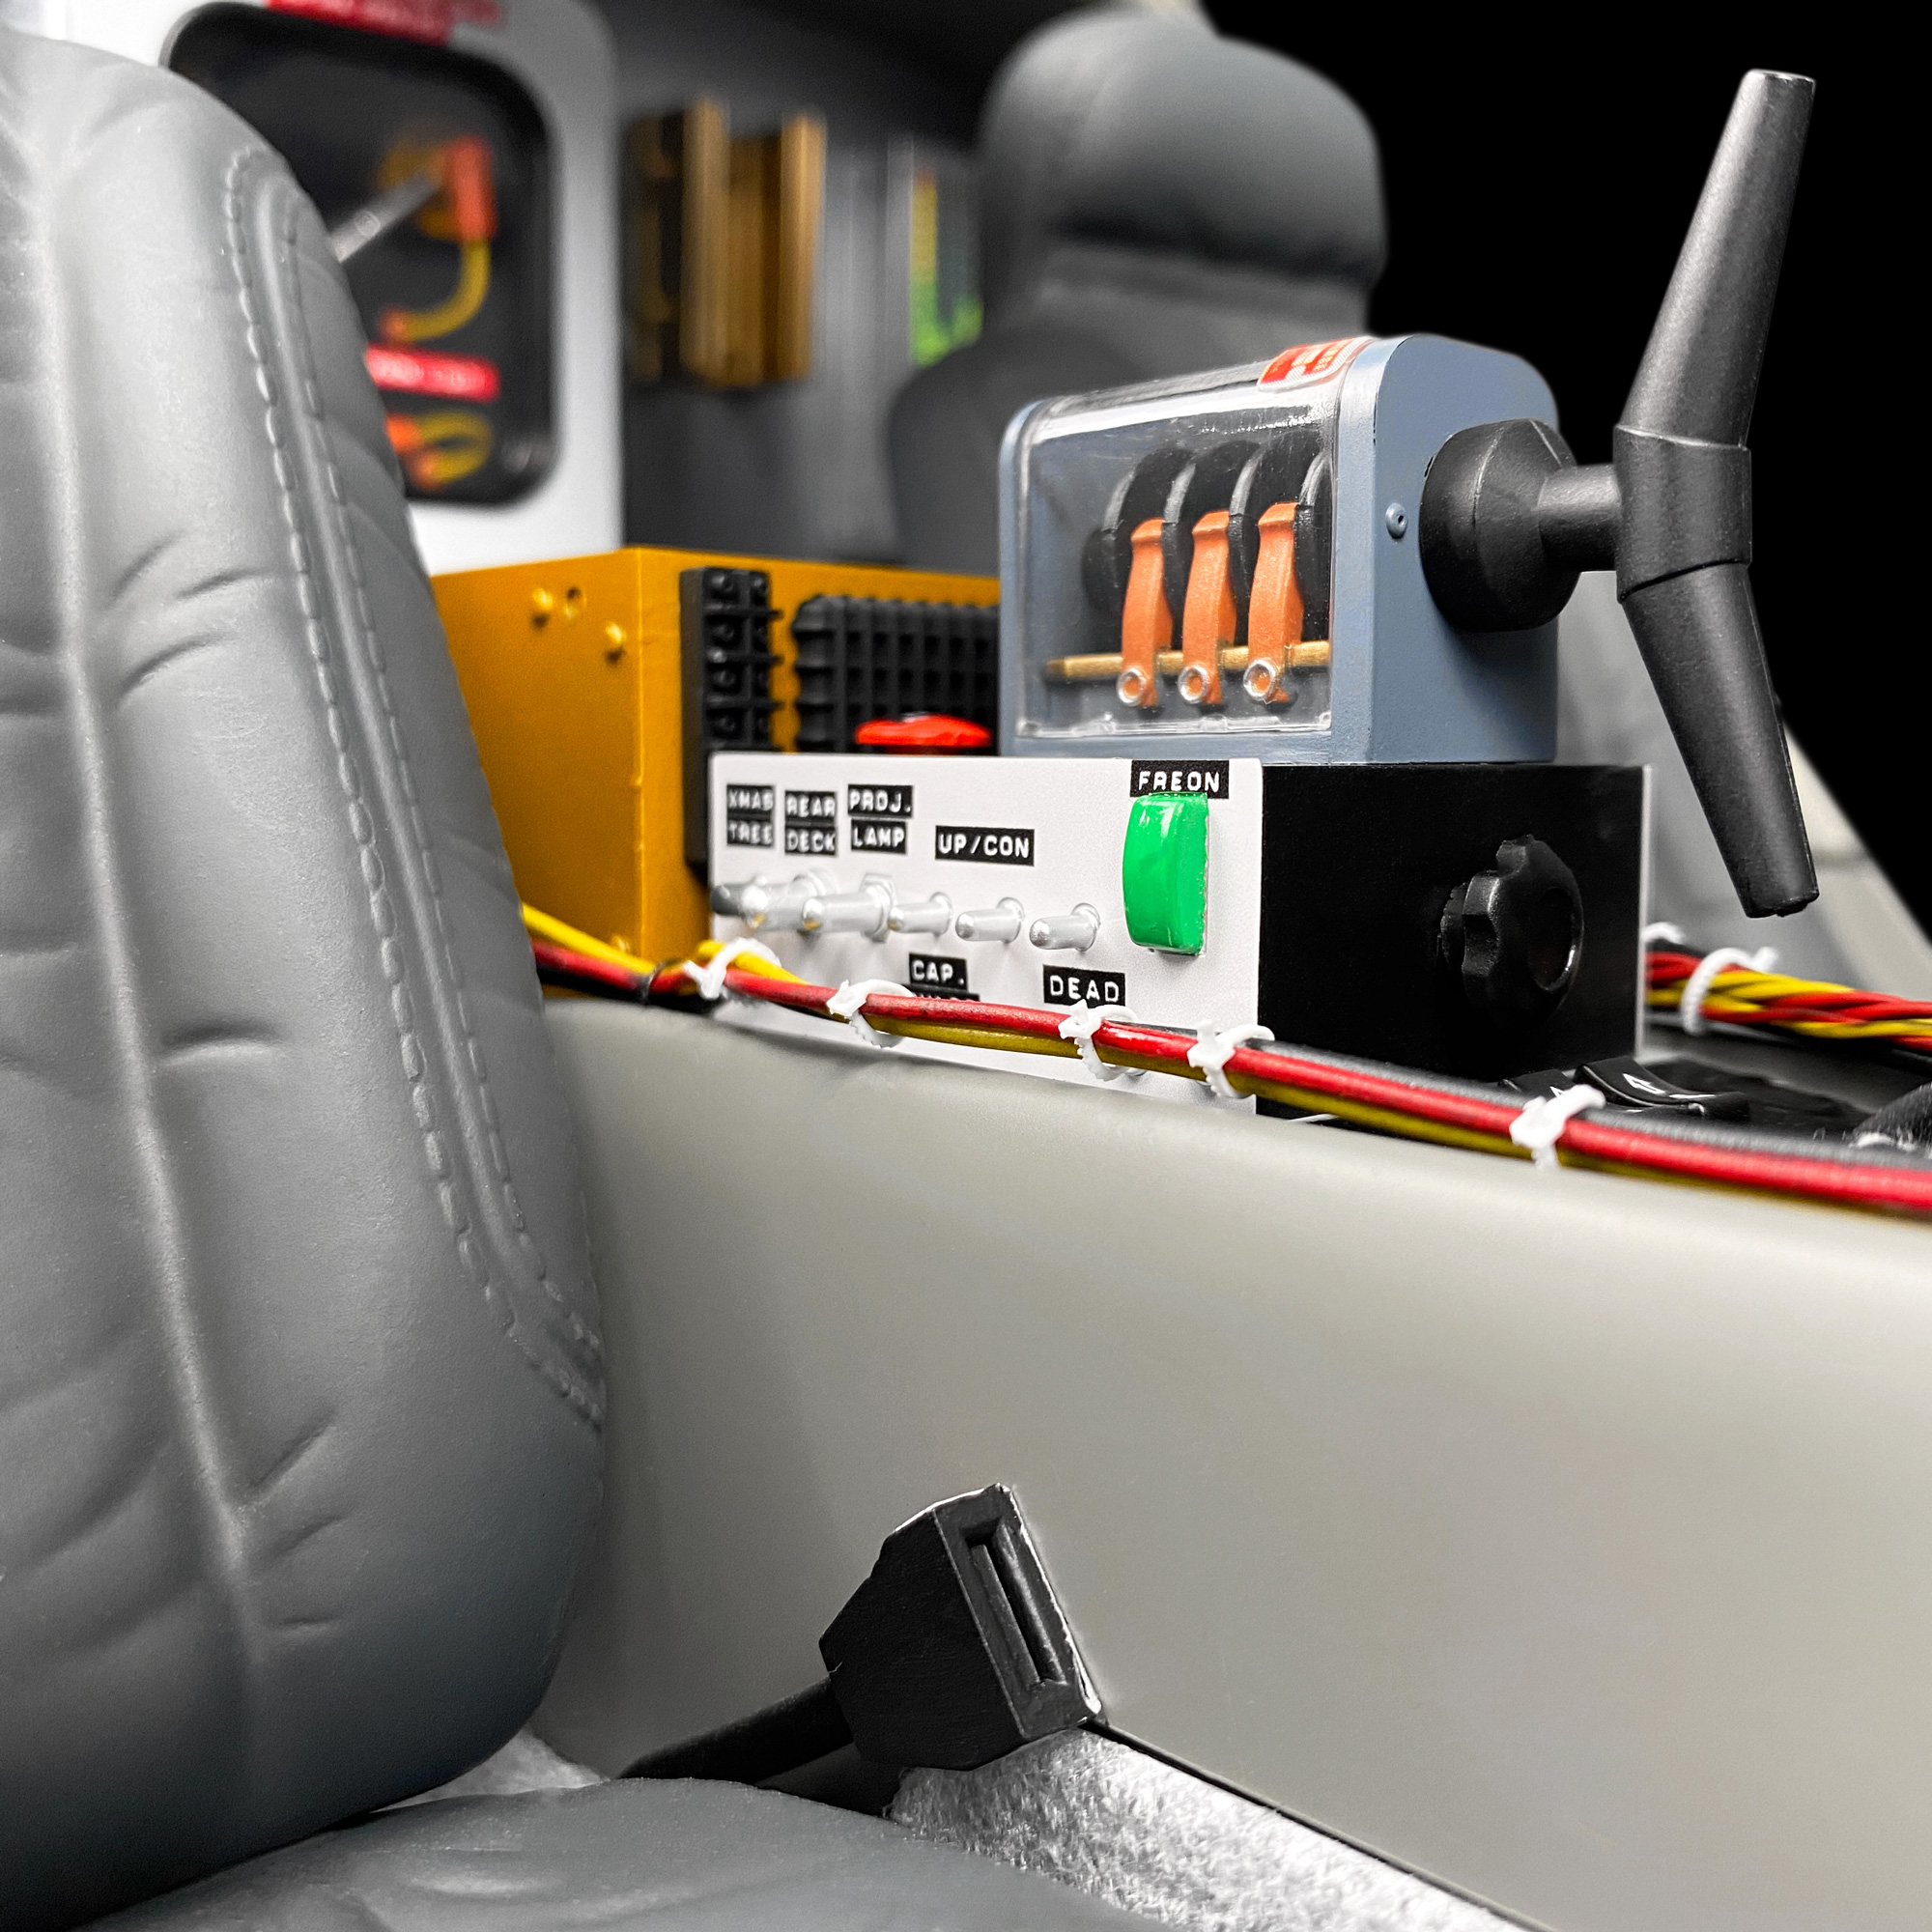
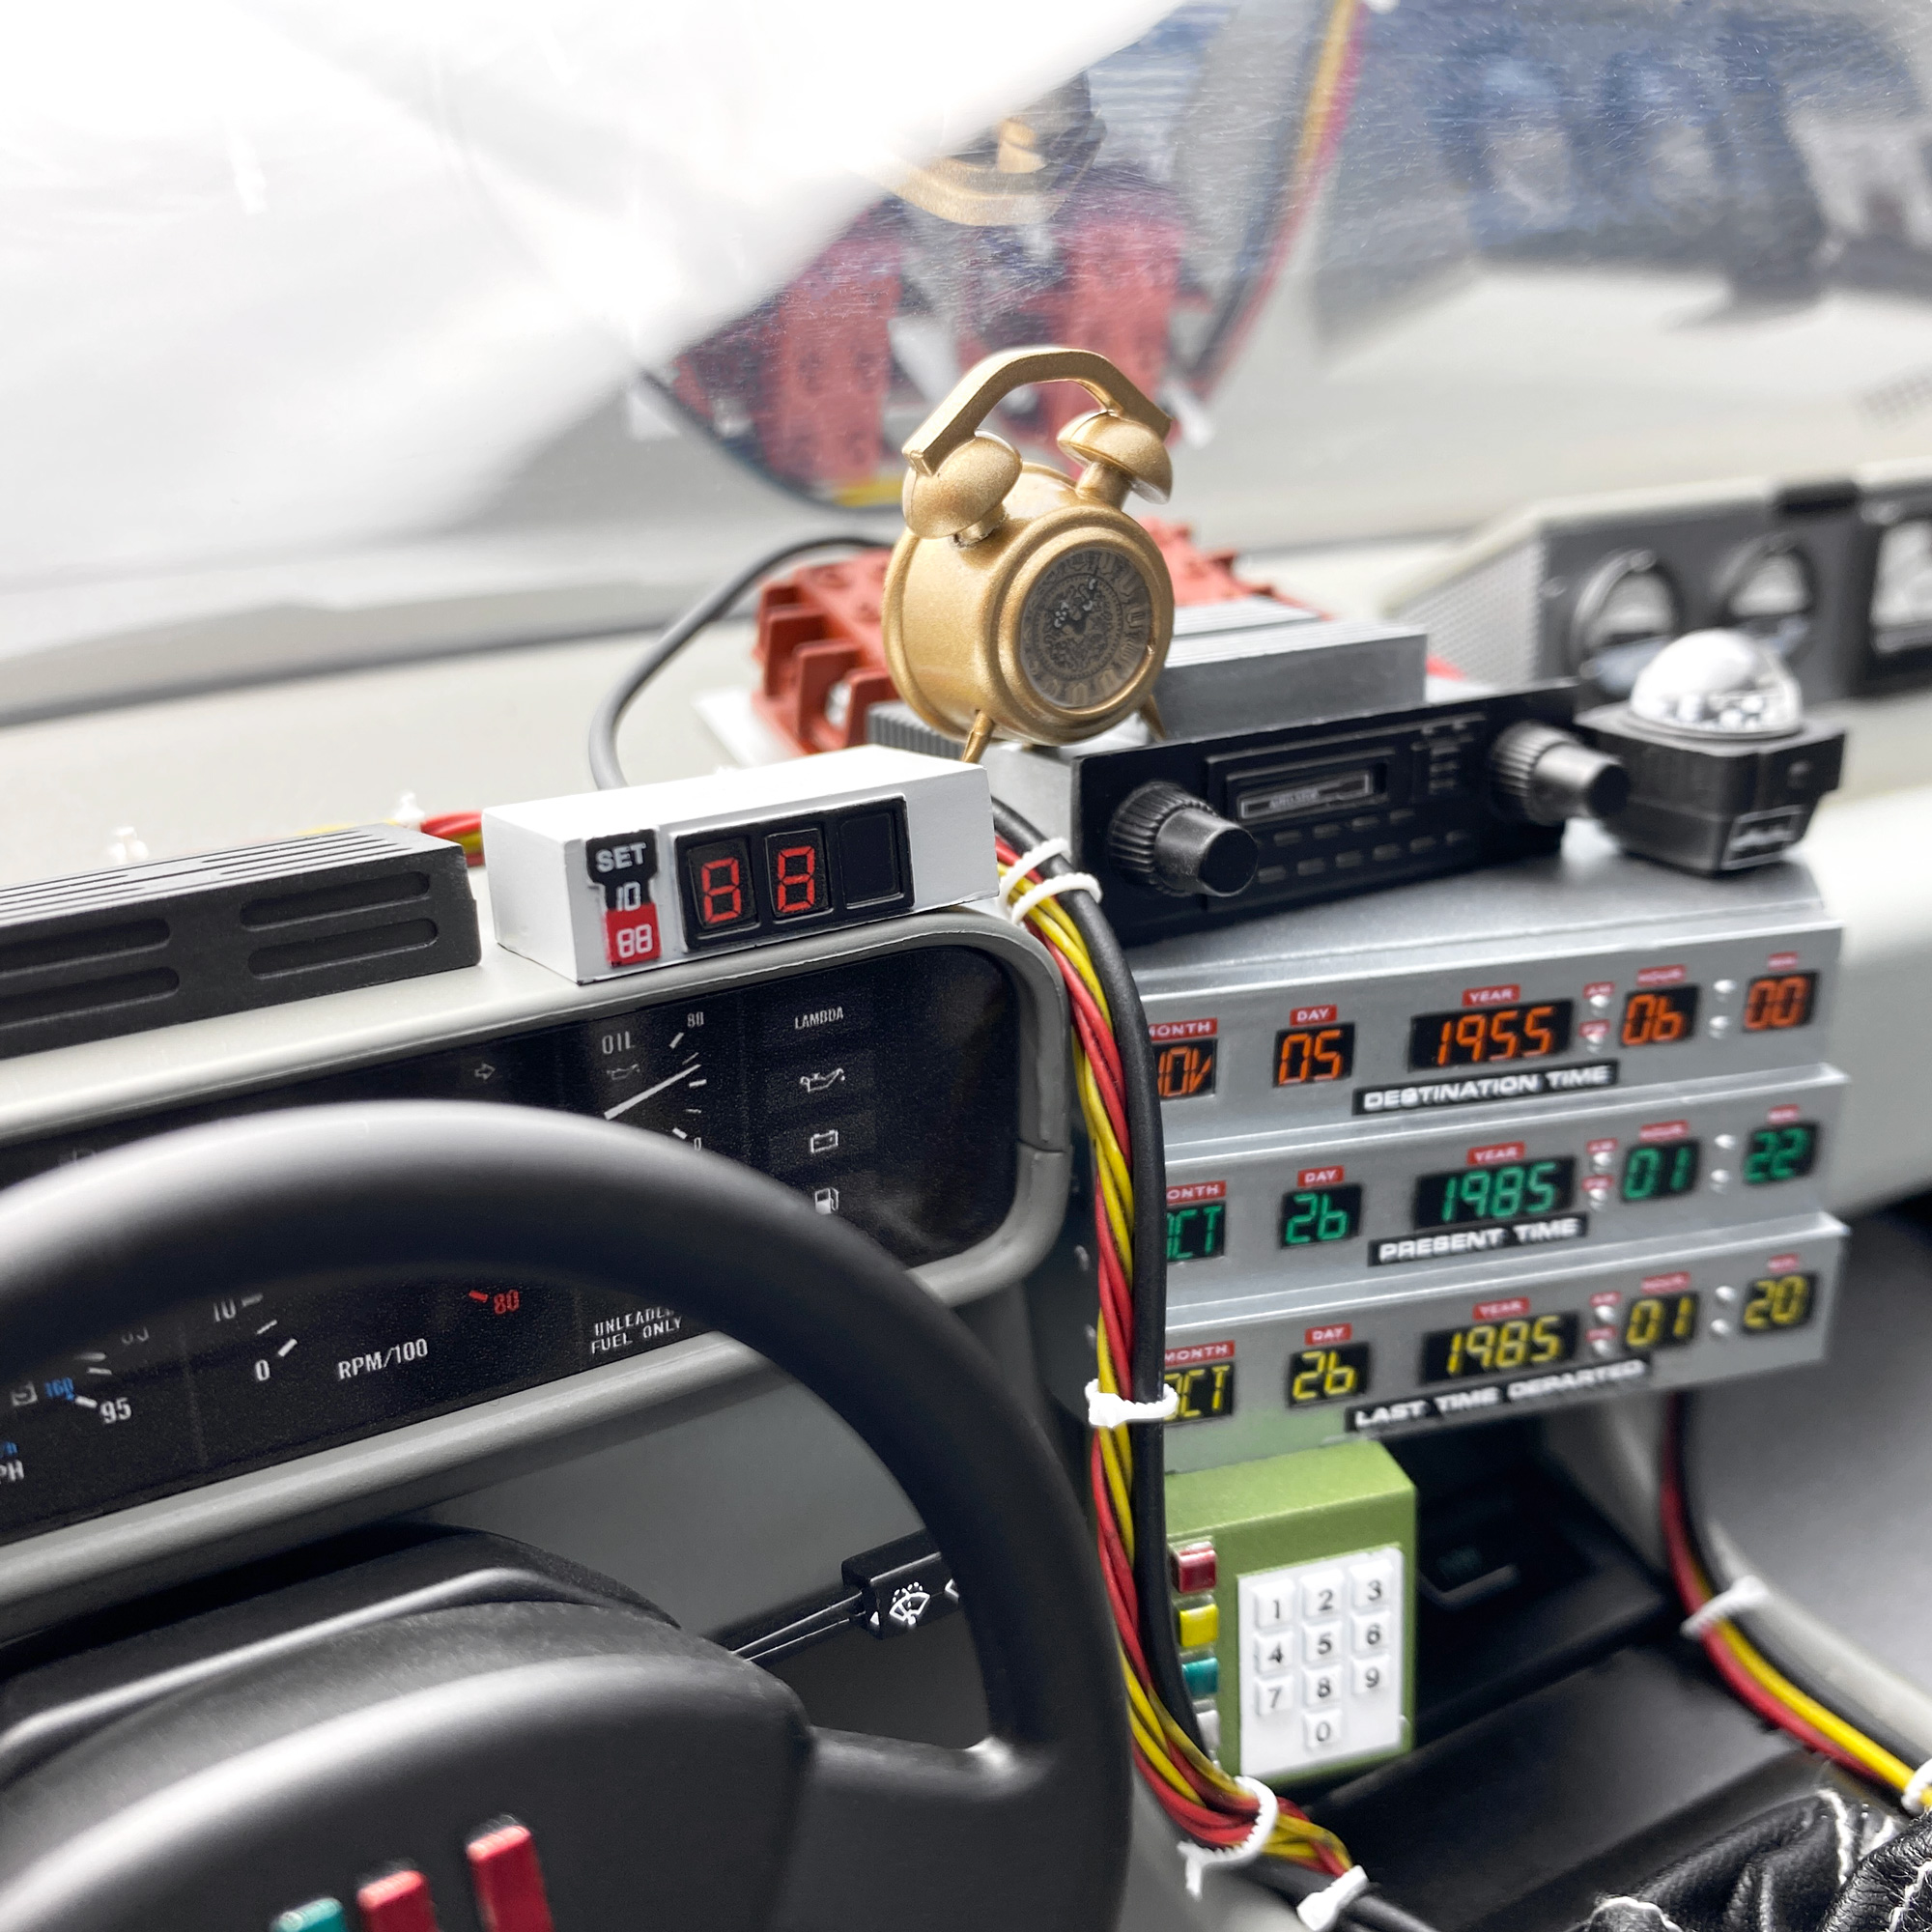
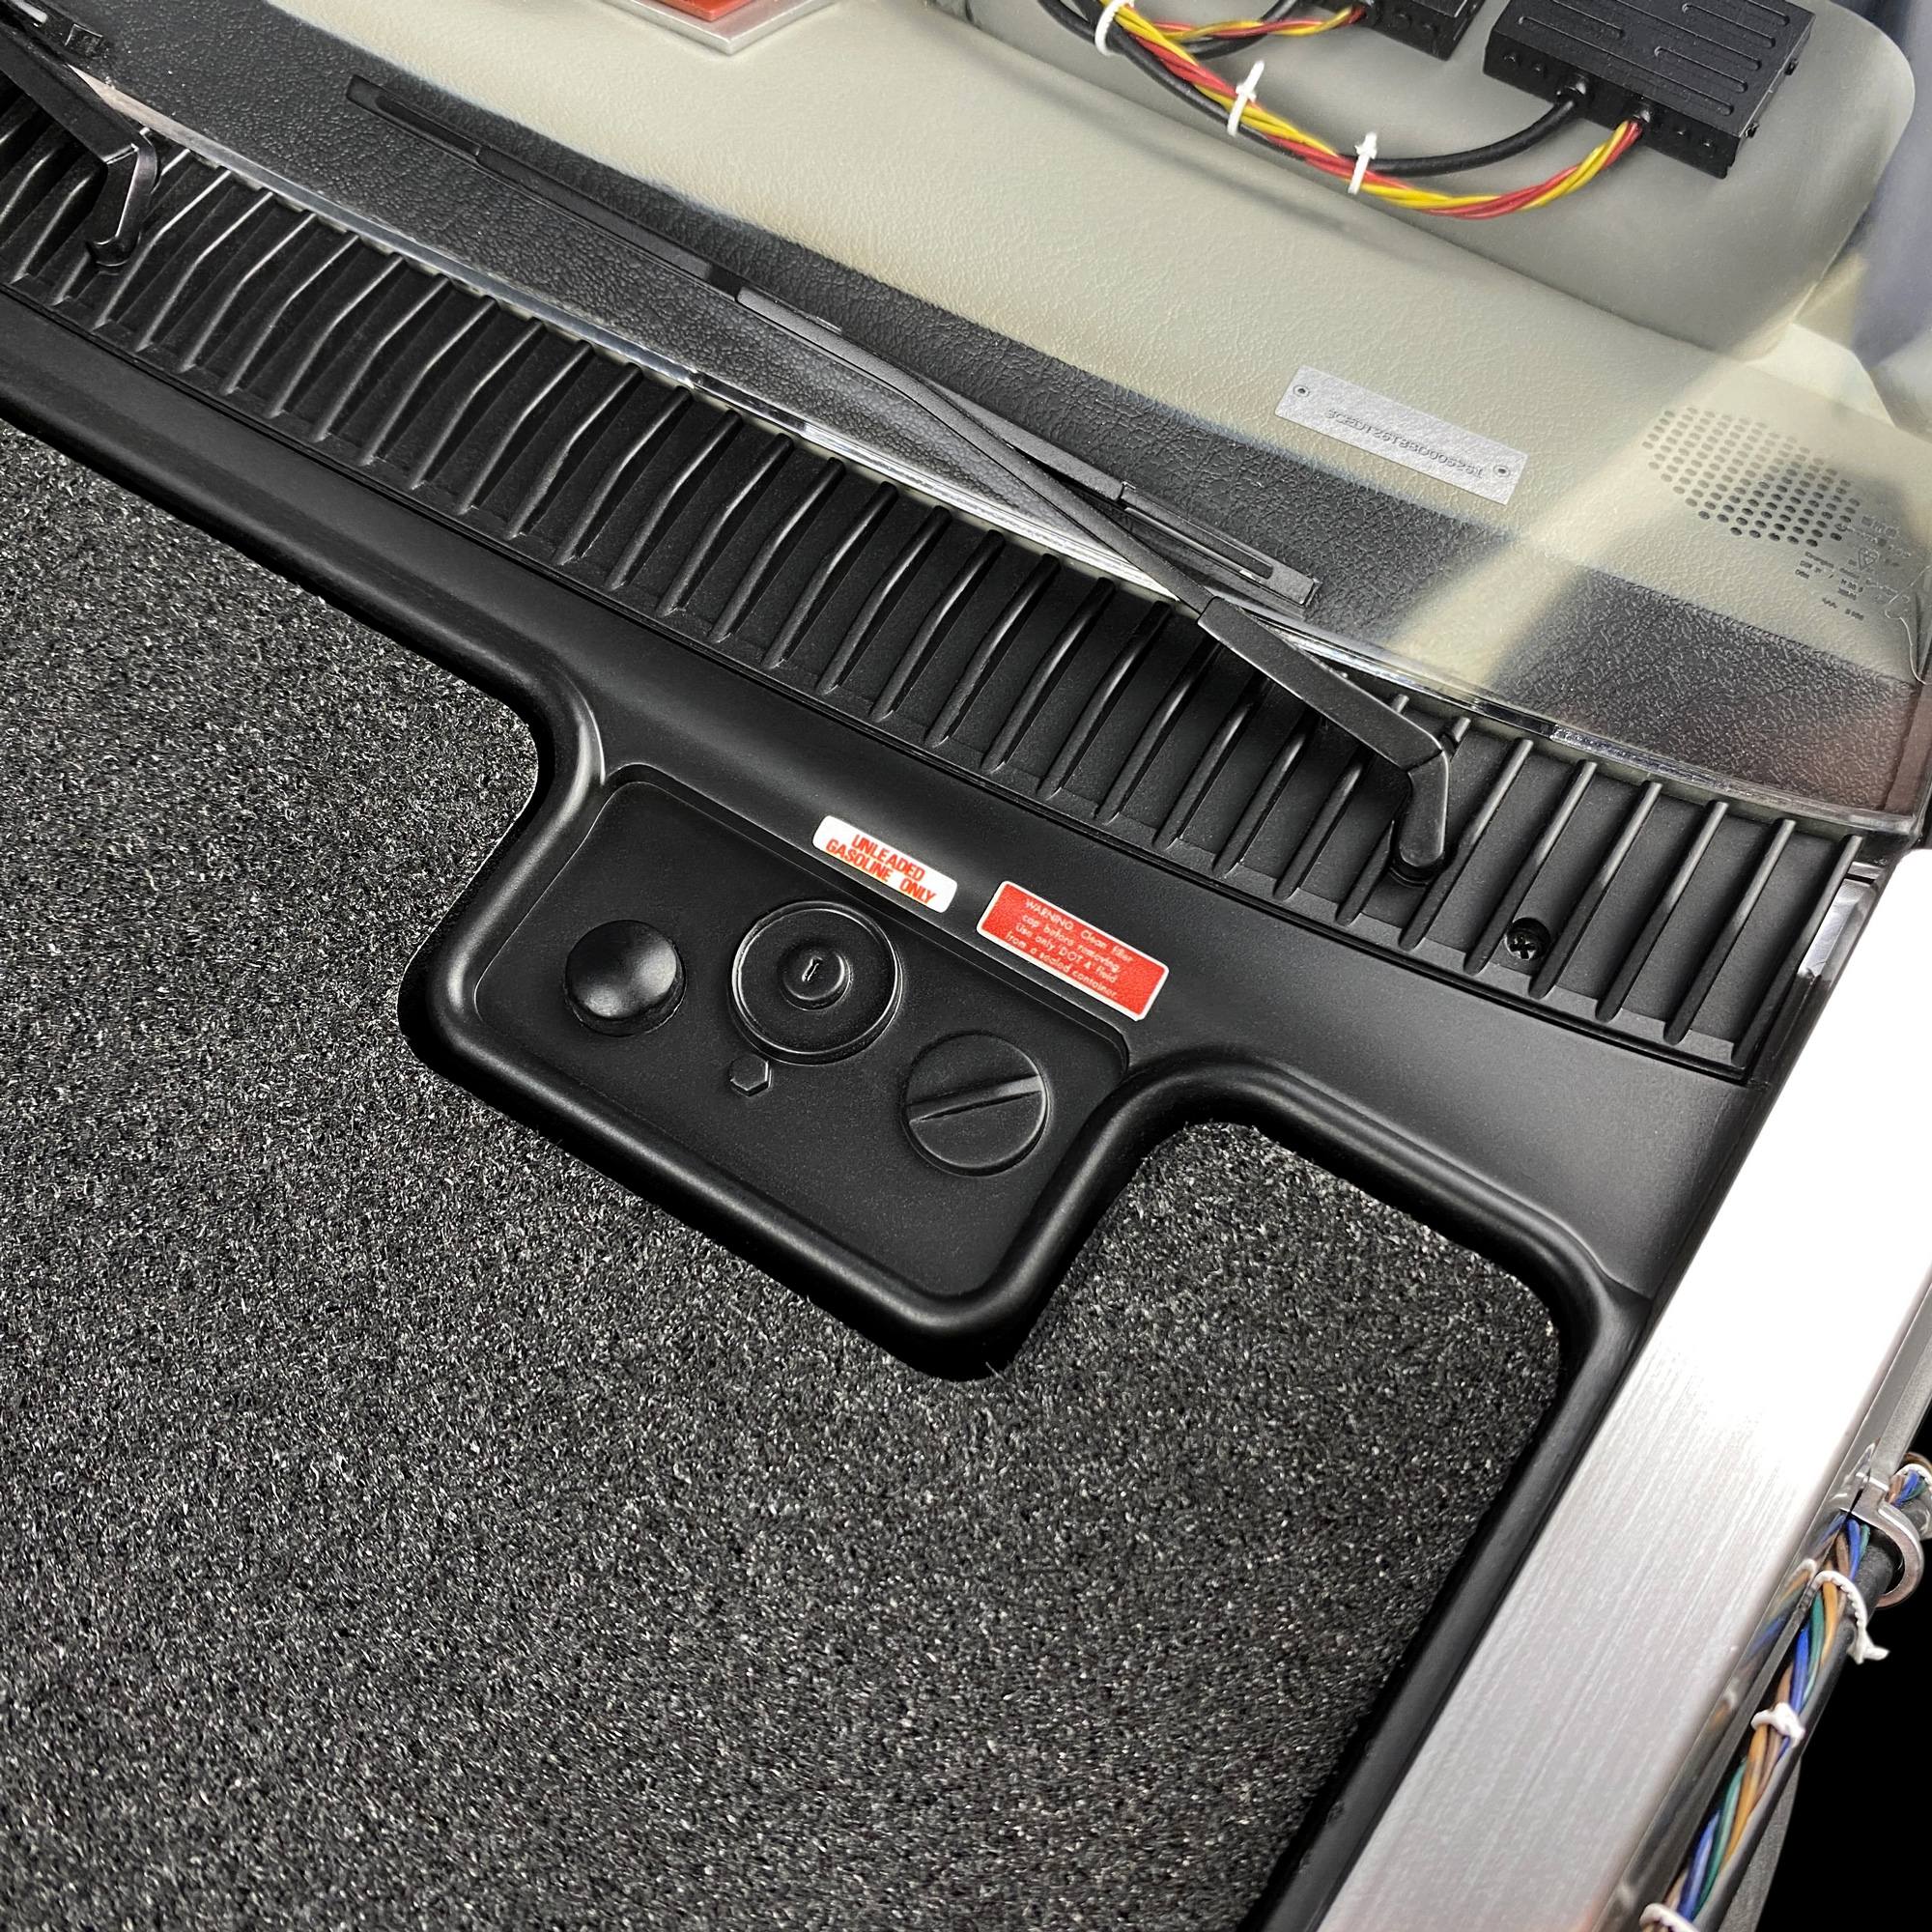
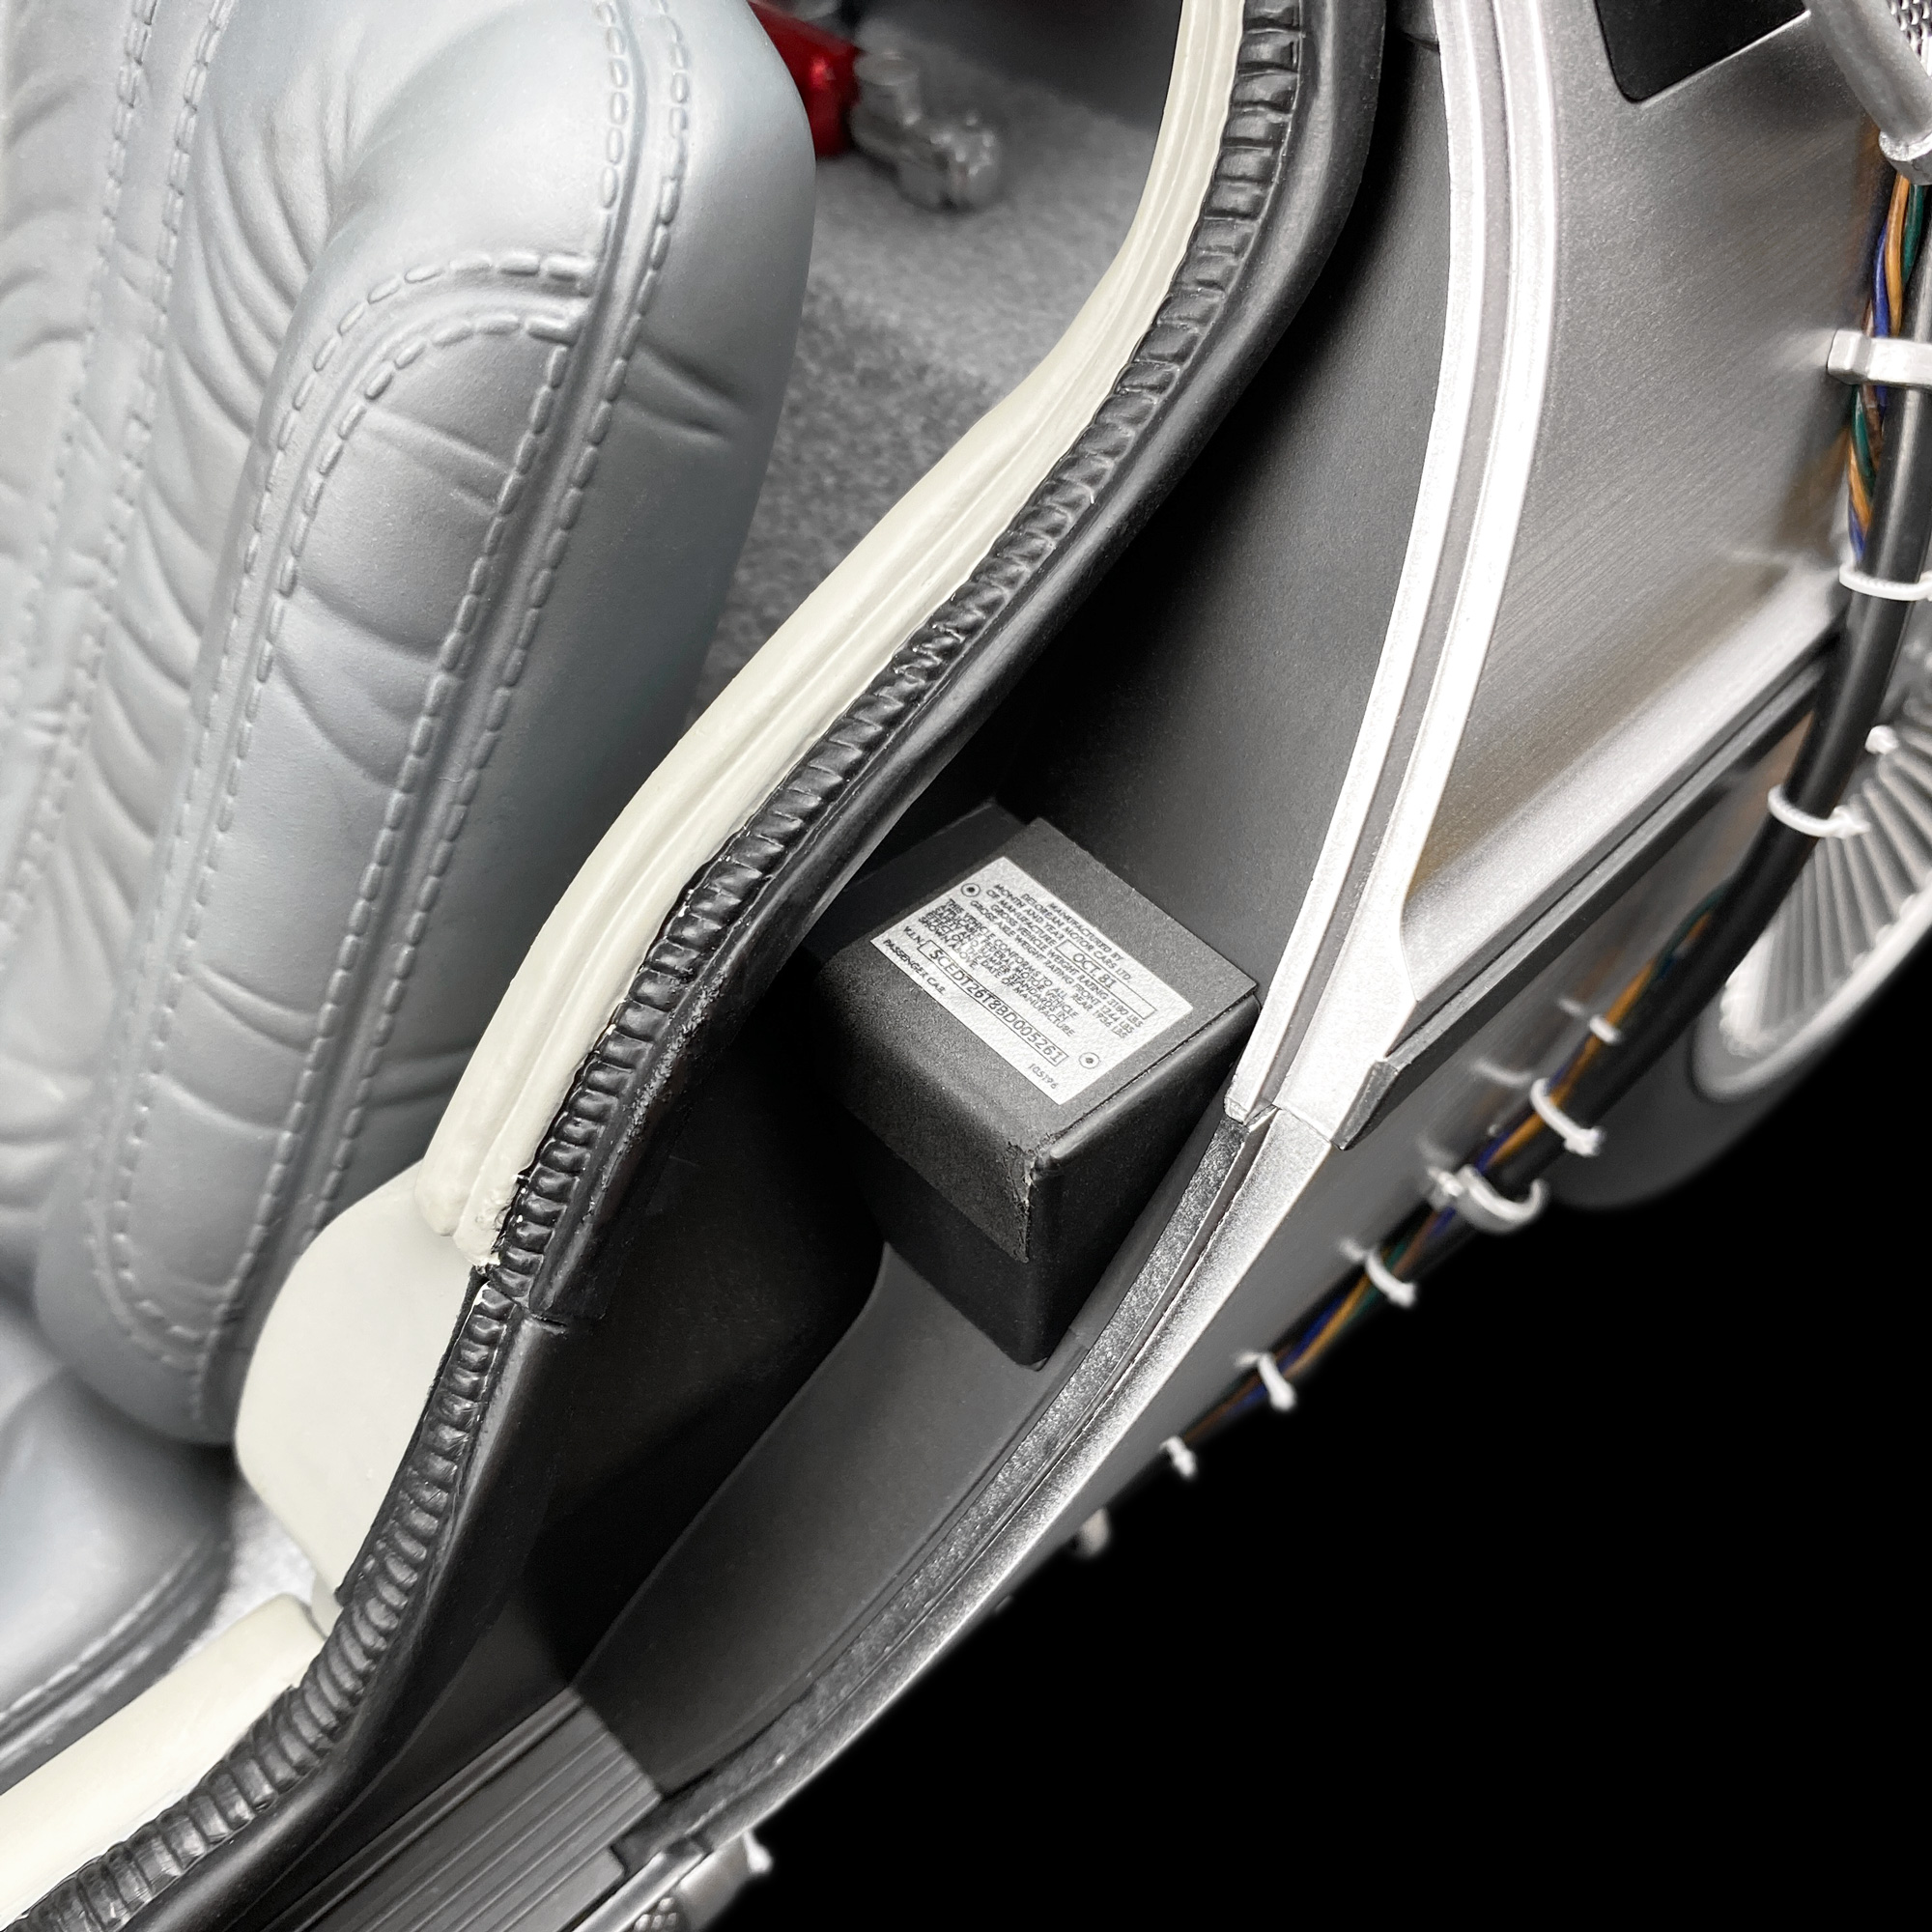
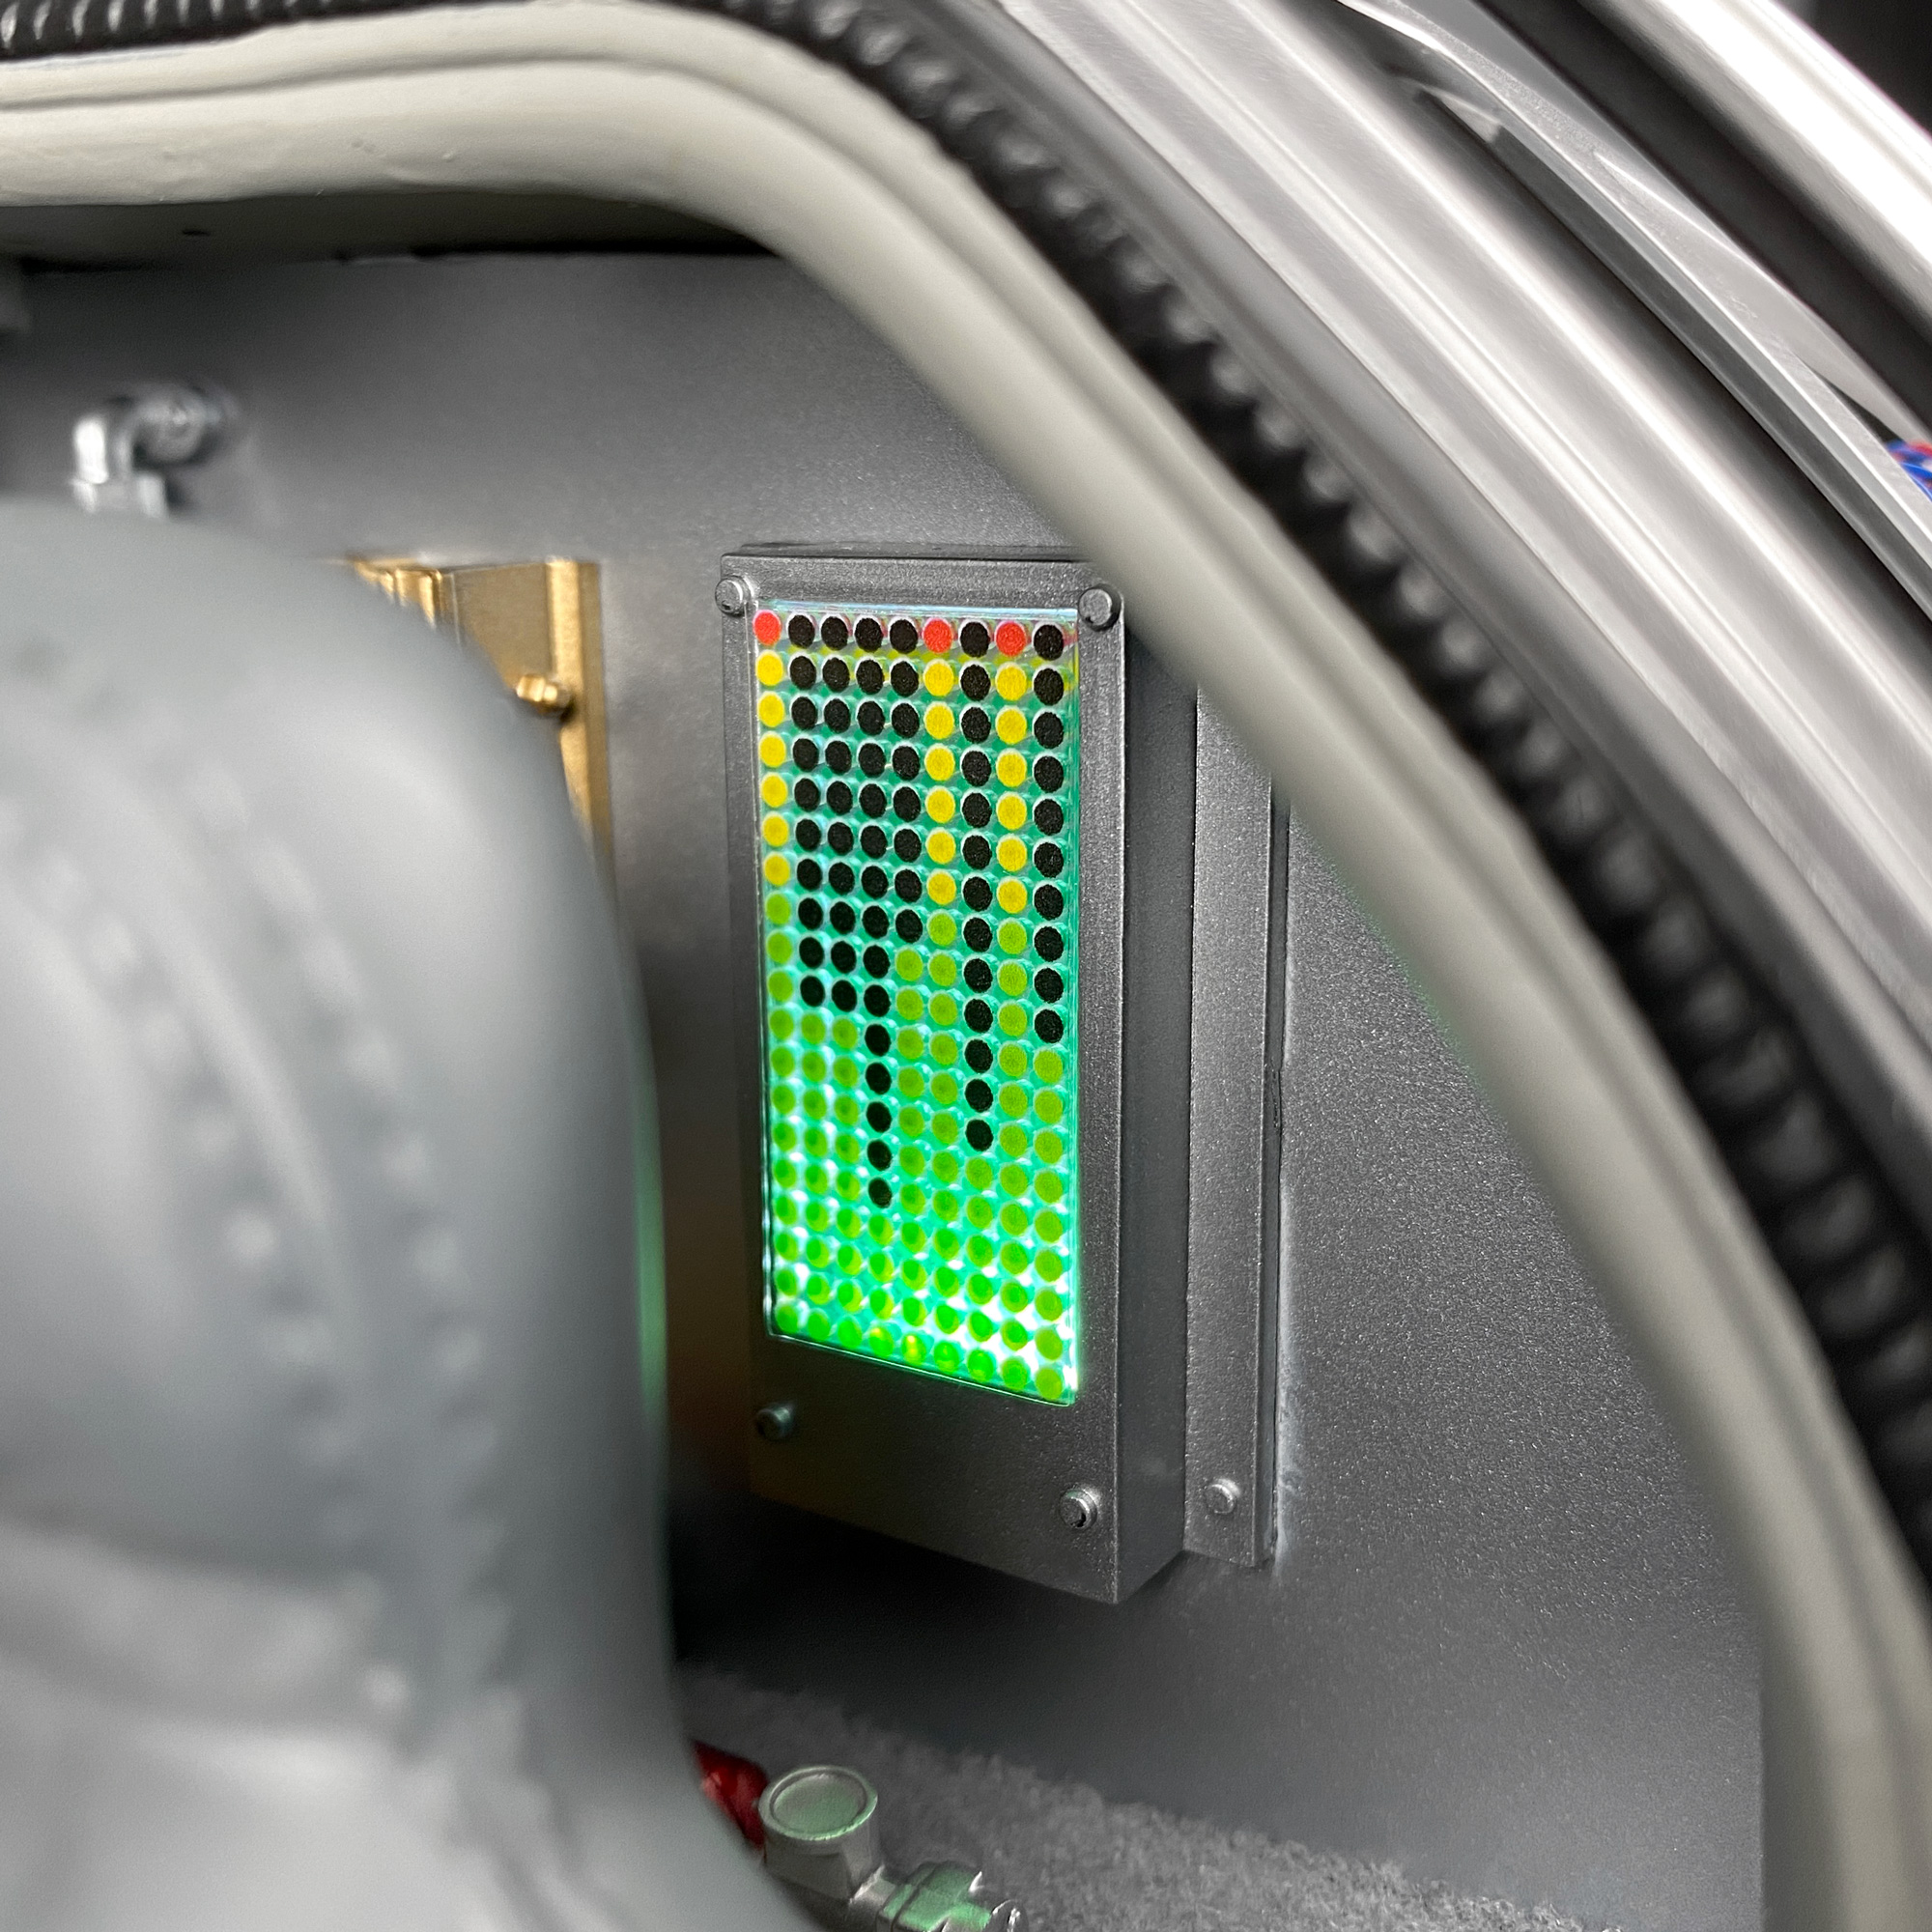
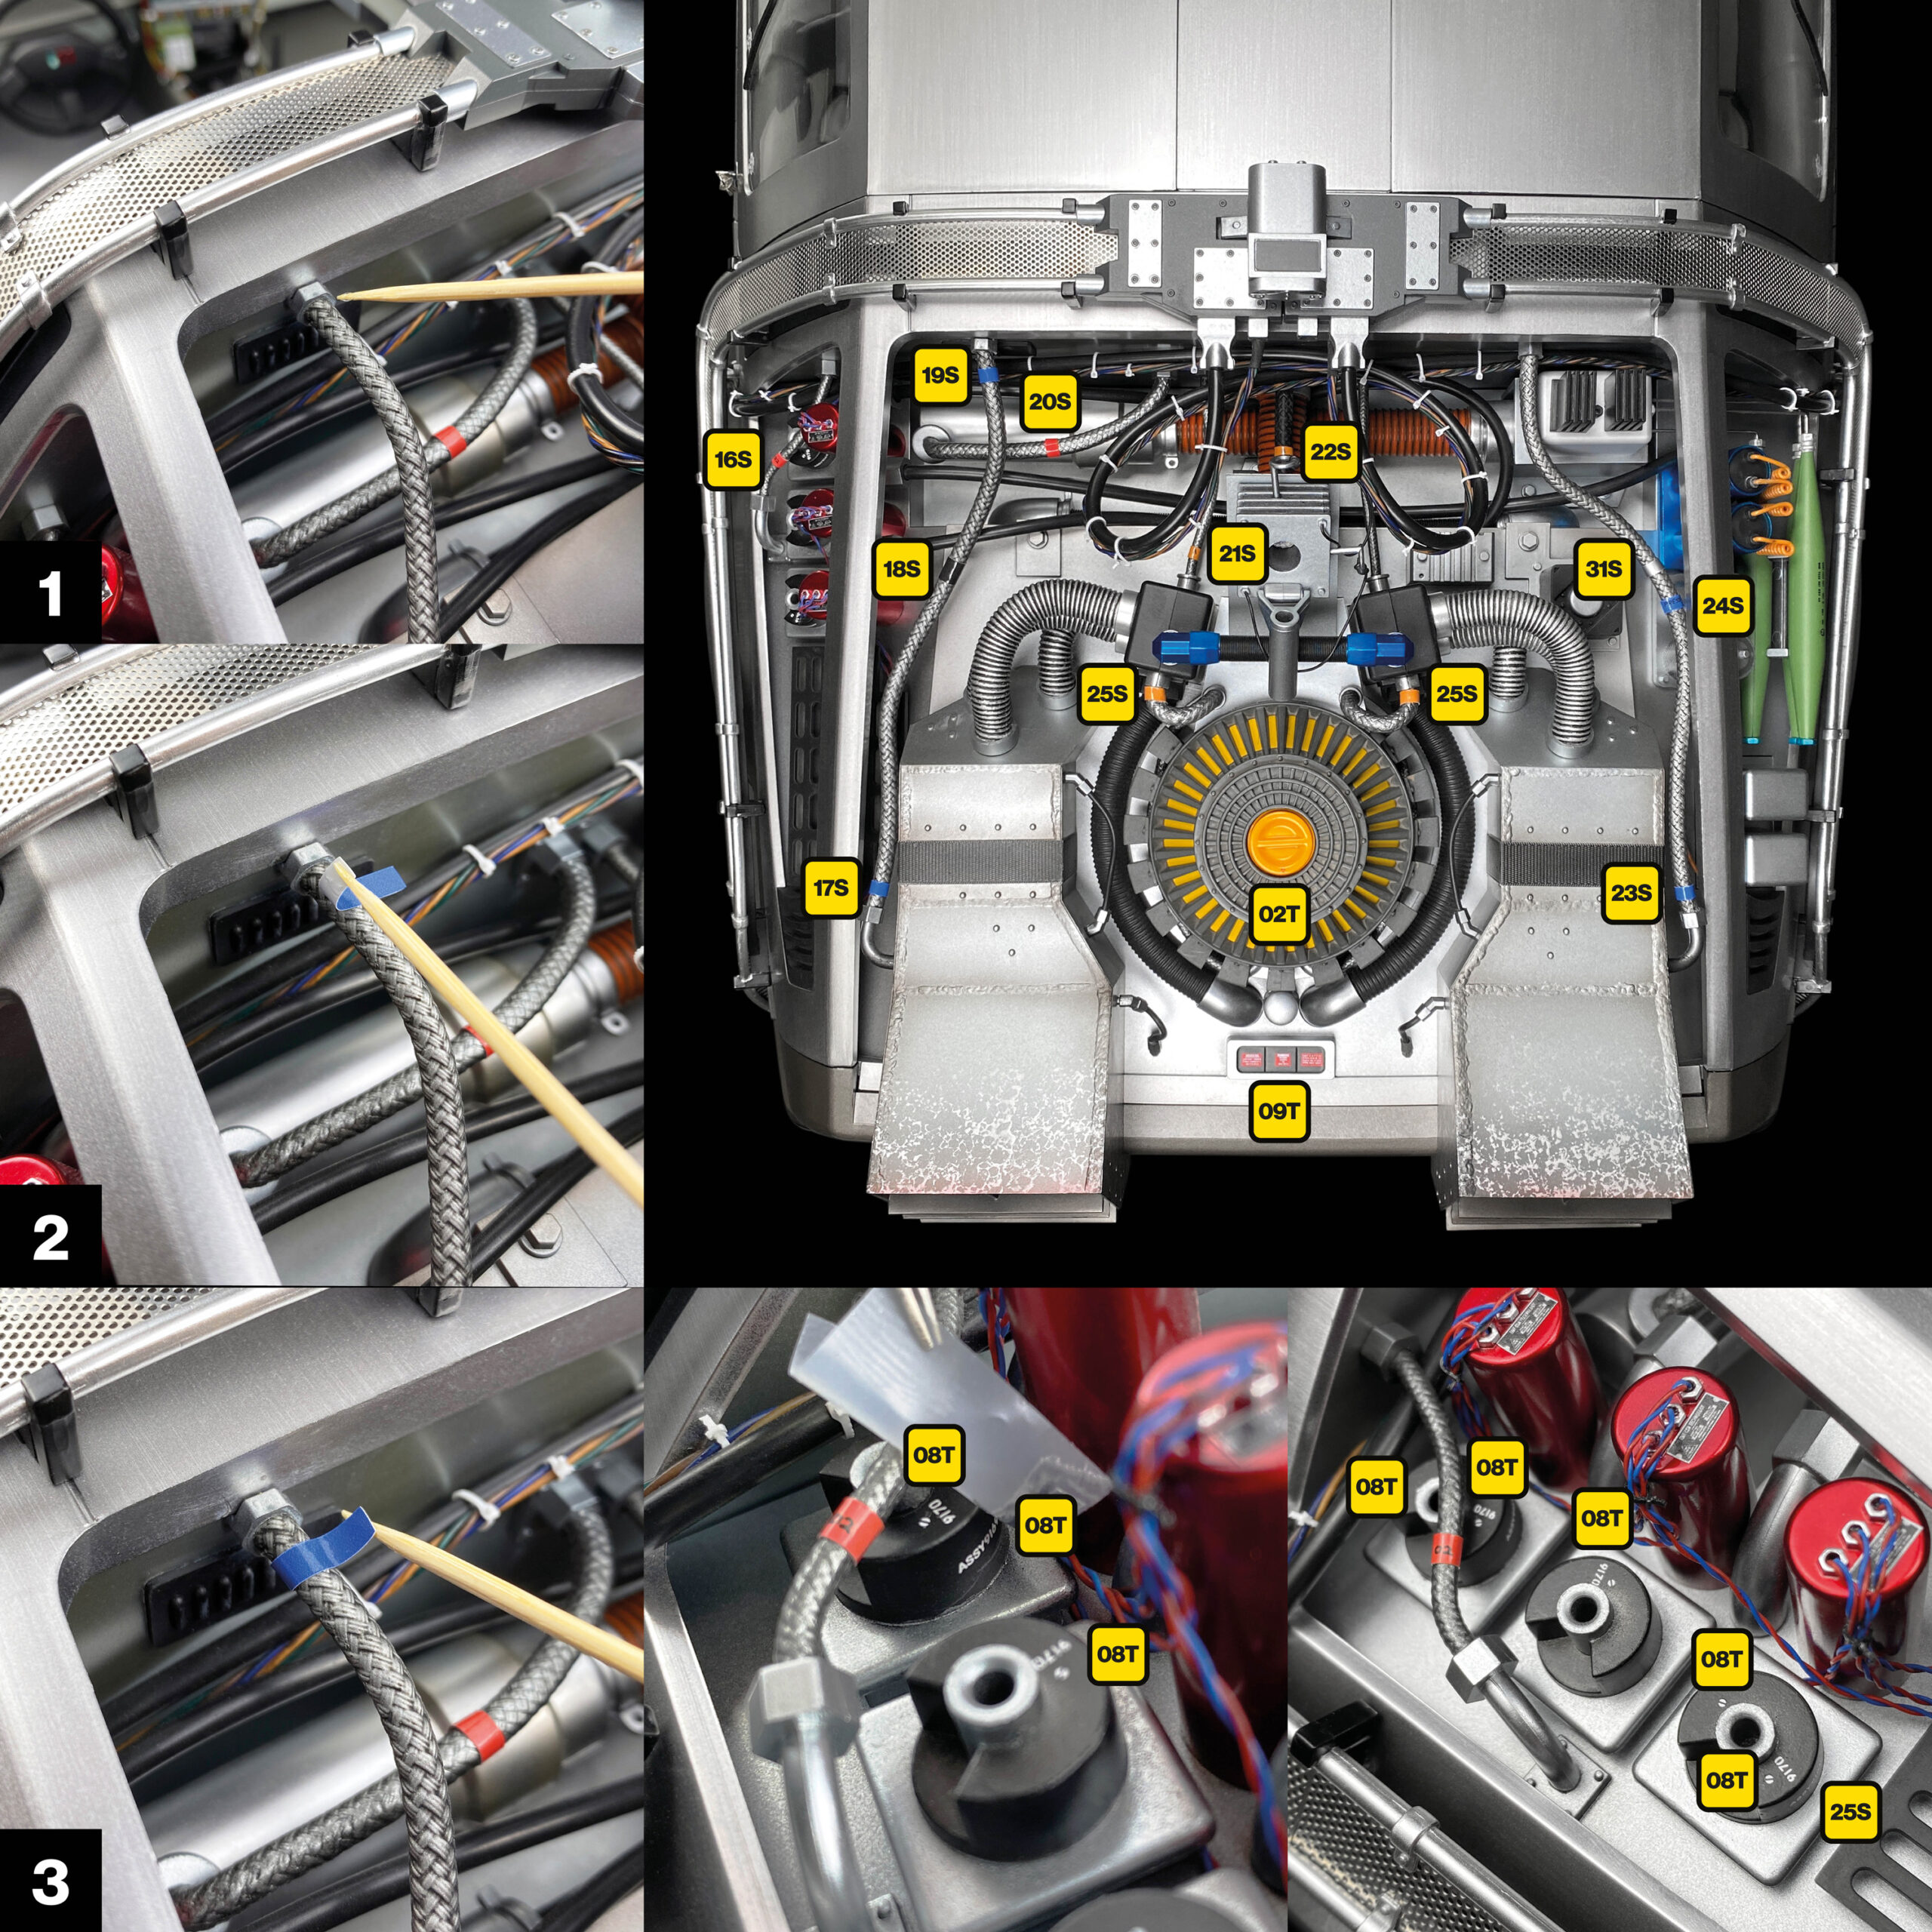
For sticker positioning, please refer to the photos on this page.
Before you start, please read the following tips which will help to make application easier, more enjoyable and more successful.
Tools and materials required
To aid installation, I recommend having the following tools available to hand before starting this project:
- Angled tipped tweezers
- Straight tweezers
- Loctite Super Glue
- Cocktail sticks/toothpicks (for accurate application of super glue)
- Scotch Magic Tape (for applying the rub-on transfers)
- Craft knife (for cutting the rub-on transfers)
- Sharp pencil (for application of rub-on transfers)
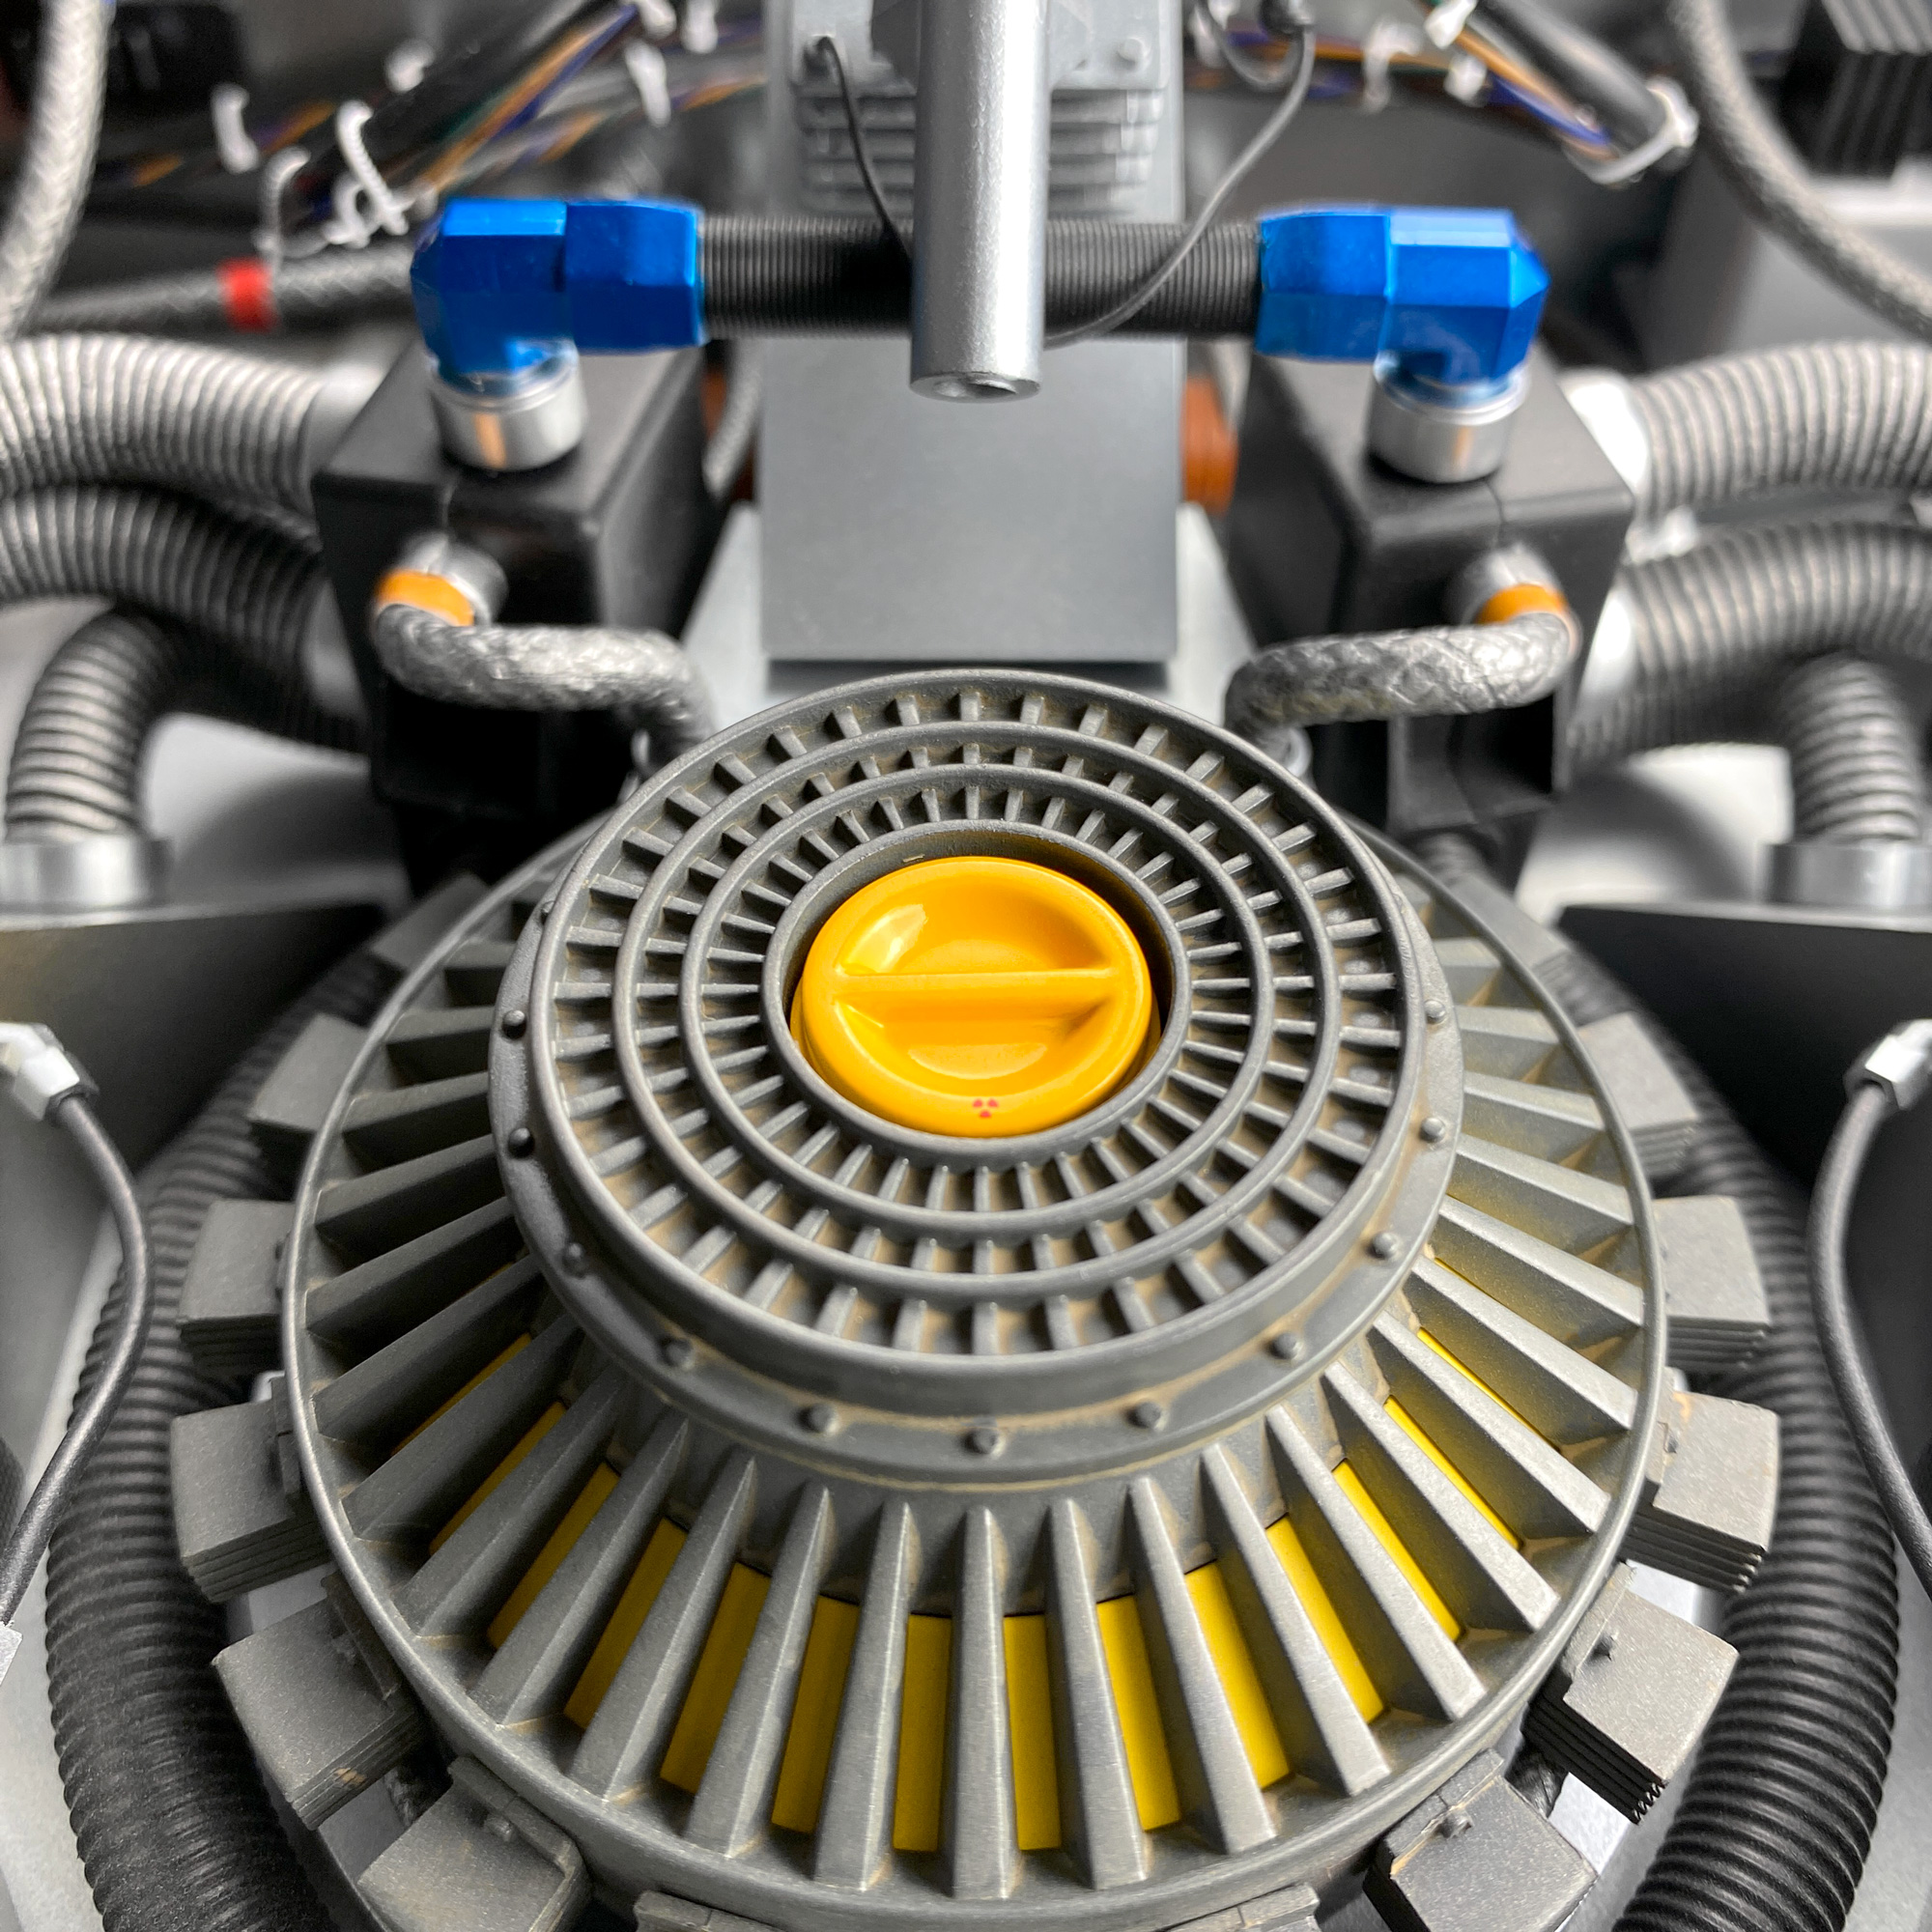
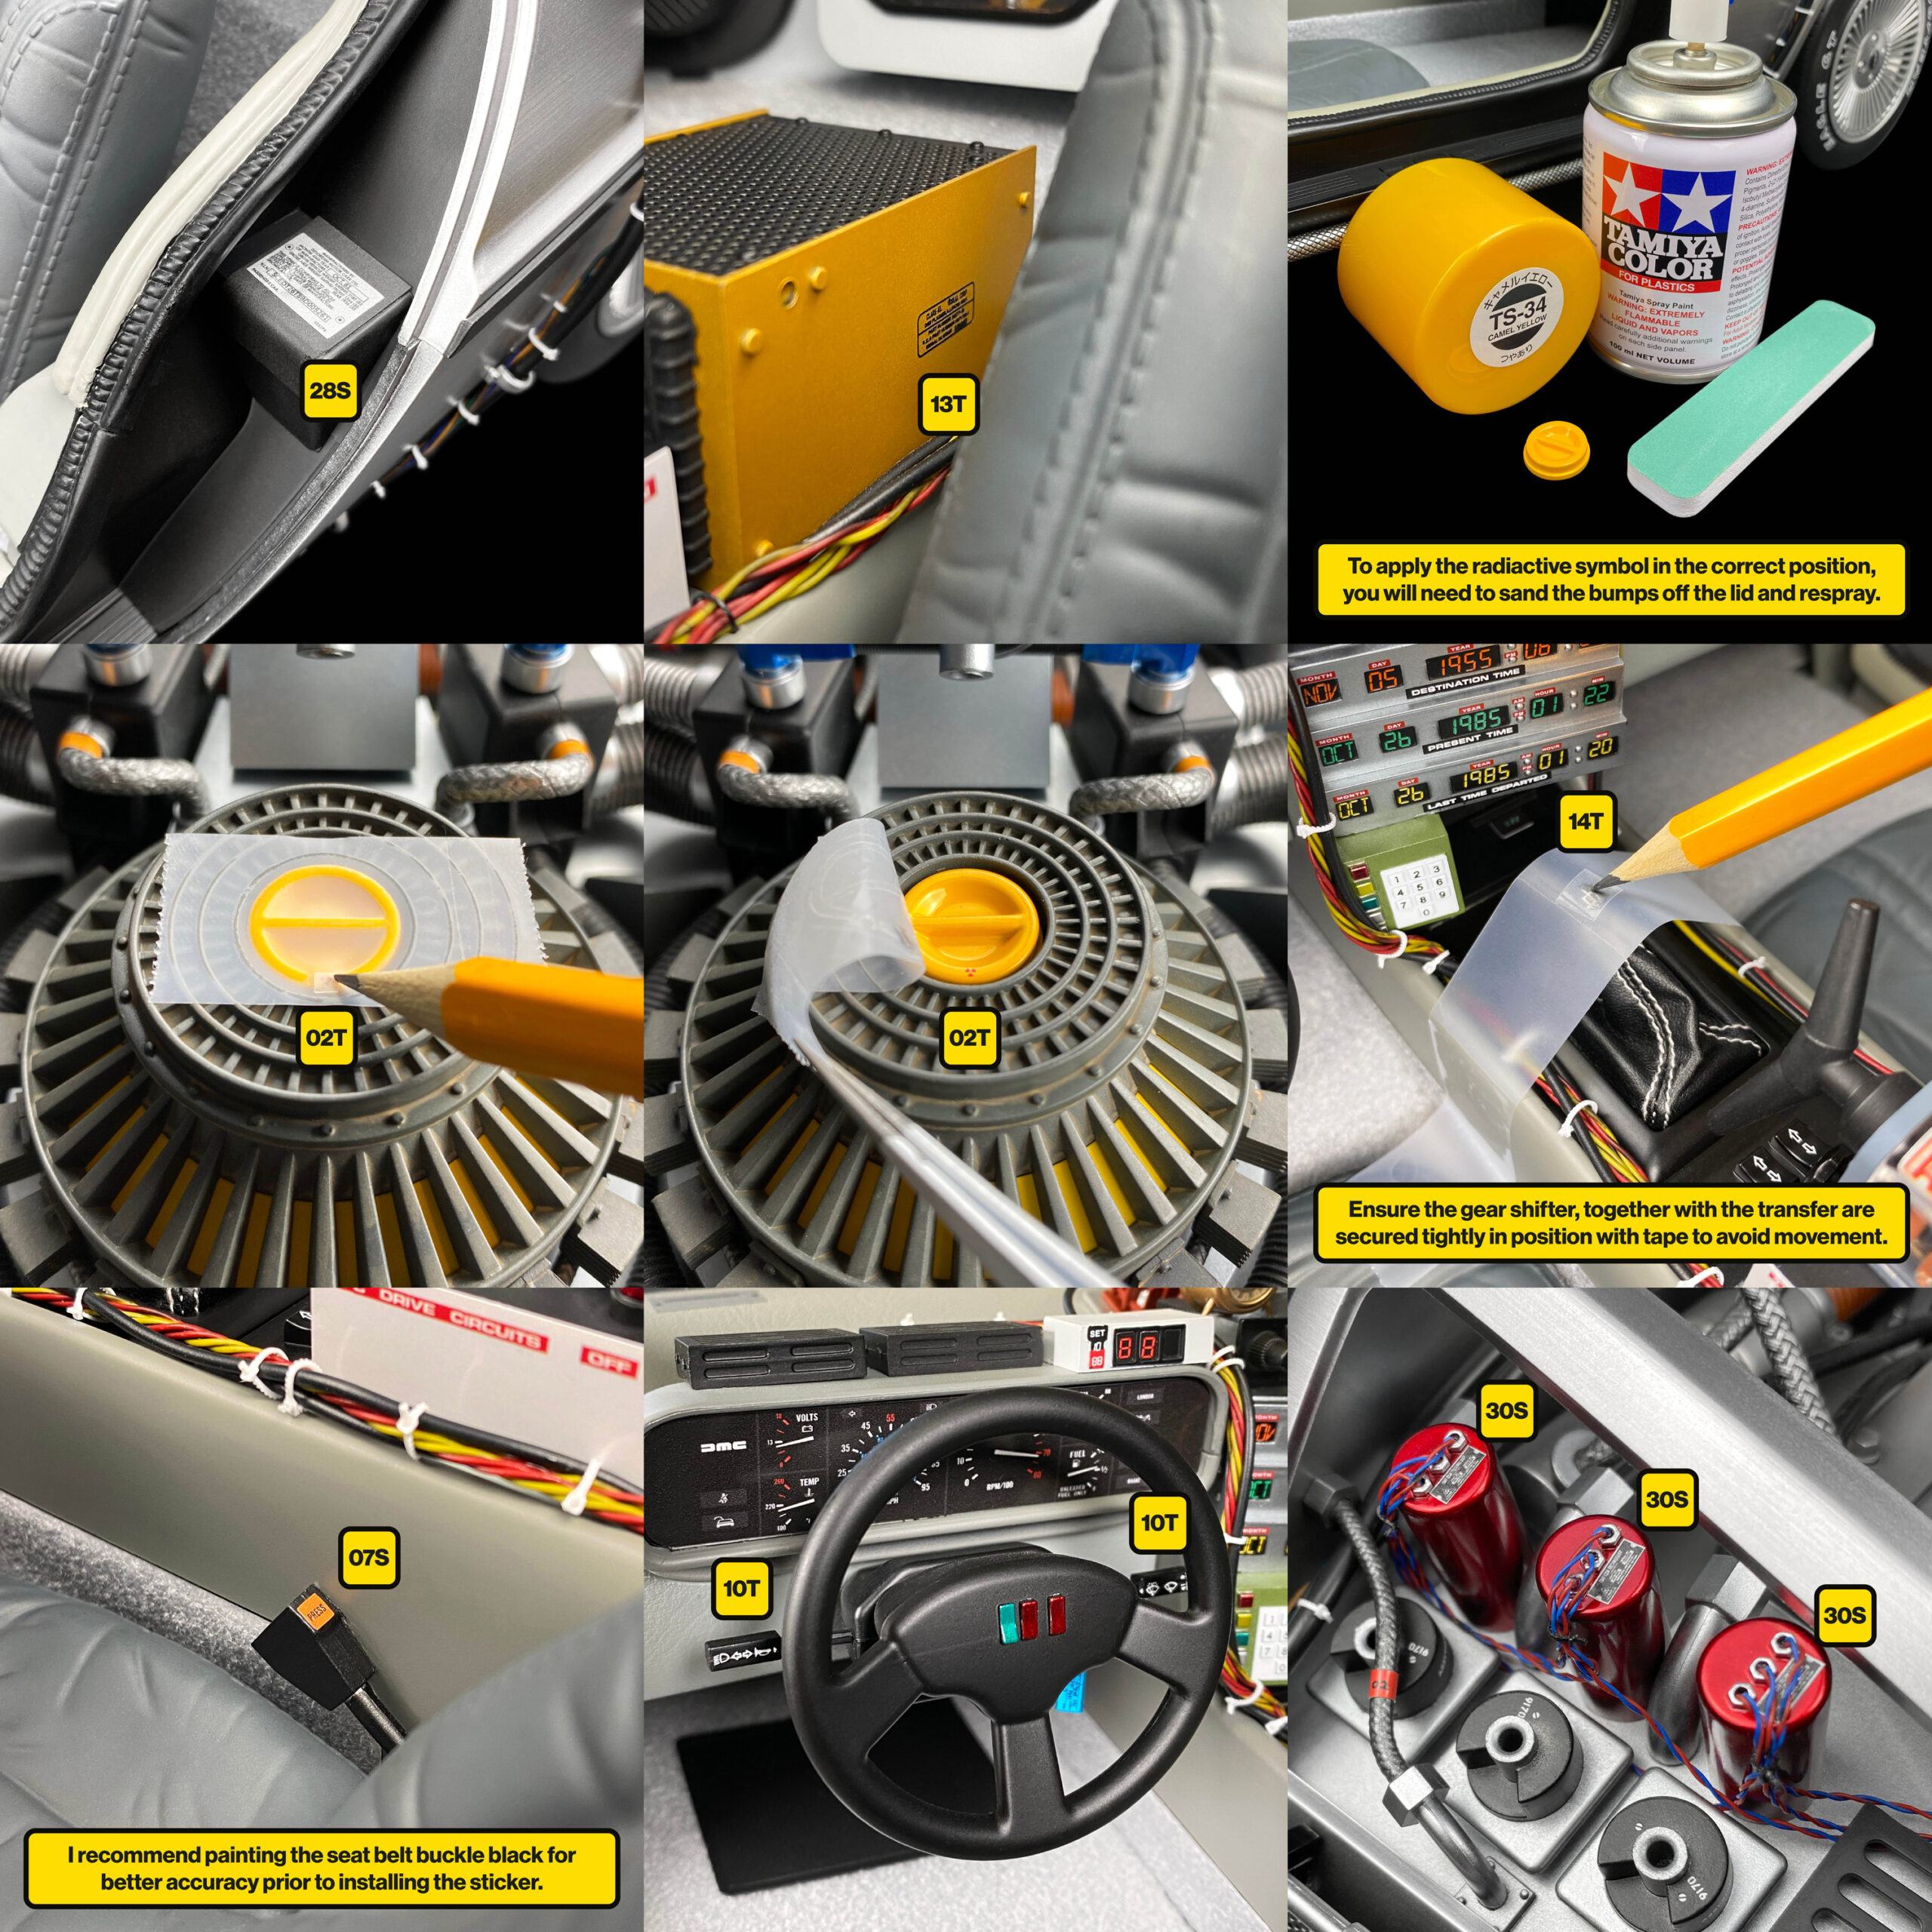
- Tamiya TS-34 Spray Paint (if you wish to sand and repaint the plutonium chamber lid as demonstrated in the photos)
Top tips
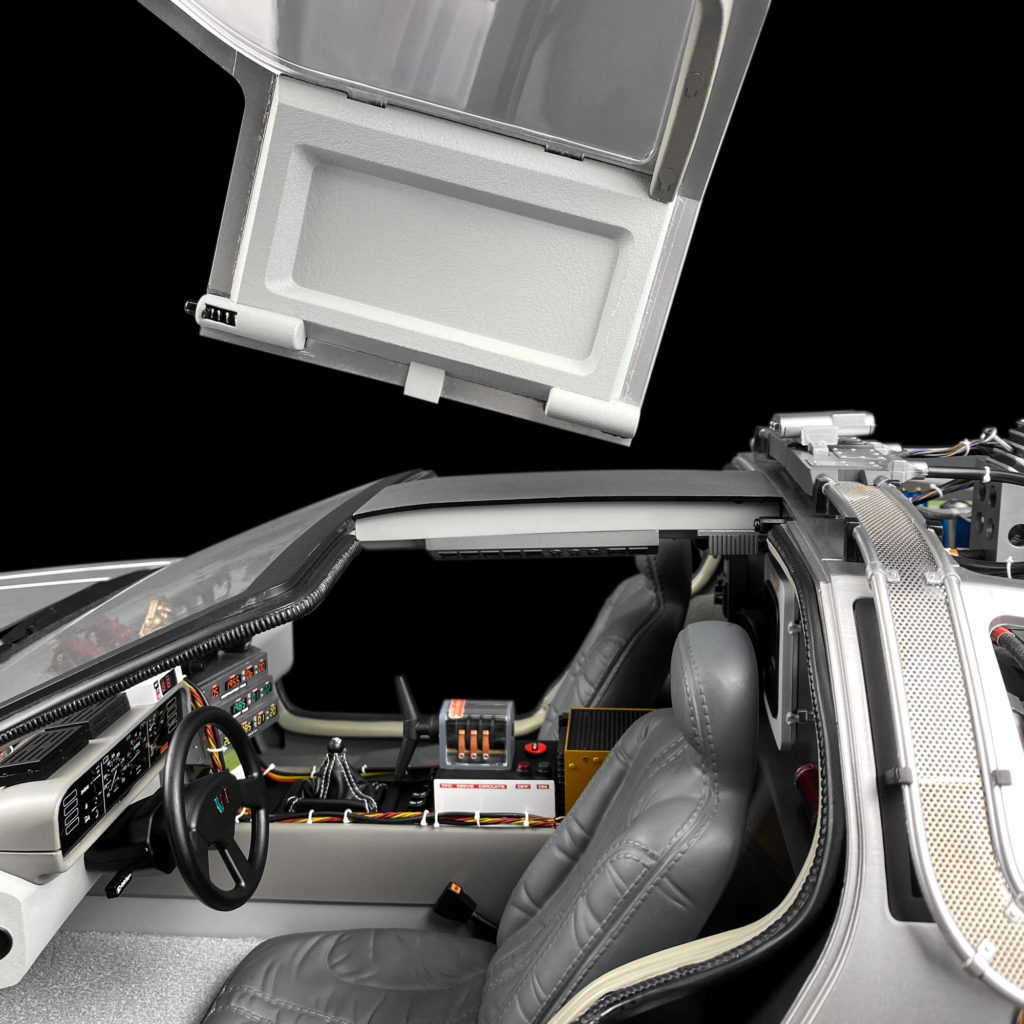
1) Remove the doors
This step isn’t critical, but I highly recommend removing the doors before you start. This gives better access to the interior and makes application a lot easier.
To remove the doors, you’ll find a release mechanism inside the springs of the door hinges. Simply pull the mechanism and spring back using the supplied nylon spudger tool and then pull the door gently up and out towards the front of the car. To re-install the door, essentially do the same but in reverse. Please see below:
2) Get yourself a good set of tweezers
Given their size, application of some of the details can be a little fiddly, especially for some of the smaller transfers, due to restricted access to the parts.
Unlike the Eaglemoss DeLorean, which you can disassemble for easy access, the Hot Toys model is fully built, making application of some of the stickers a little more challenging.
I recommend obtaining a good set of modelling tweezers before tackling this project. I have detailed everything you will require in the ‘Tools required’ list.
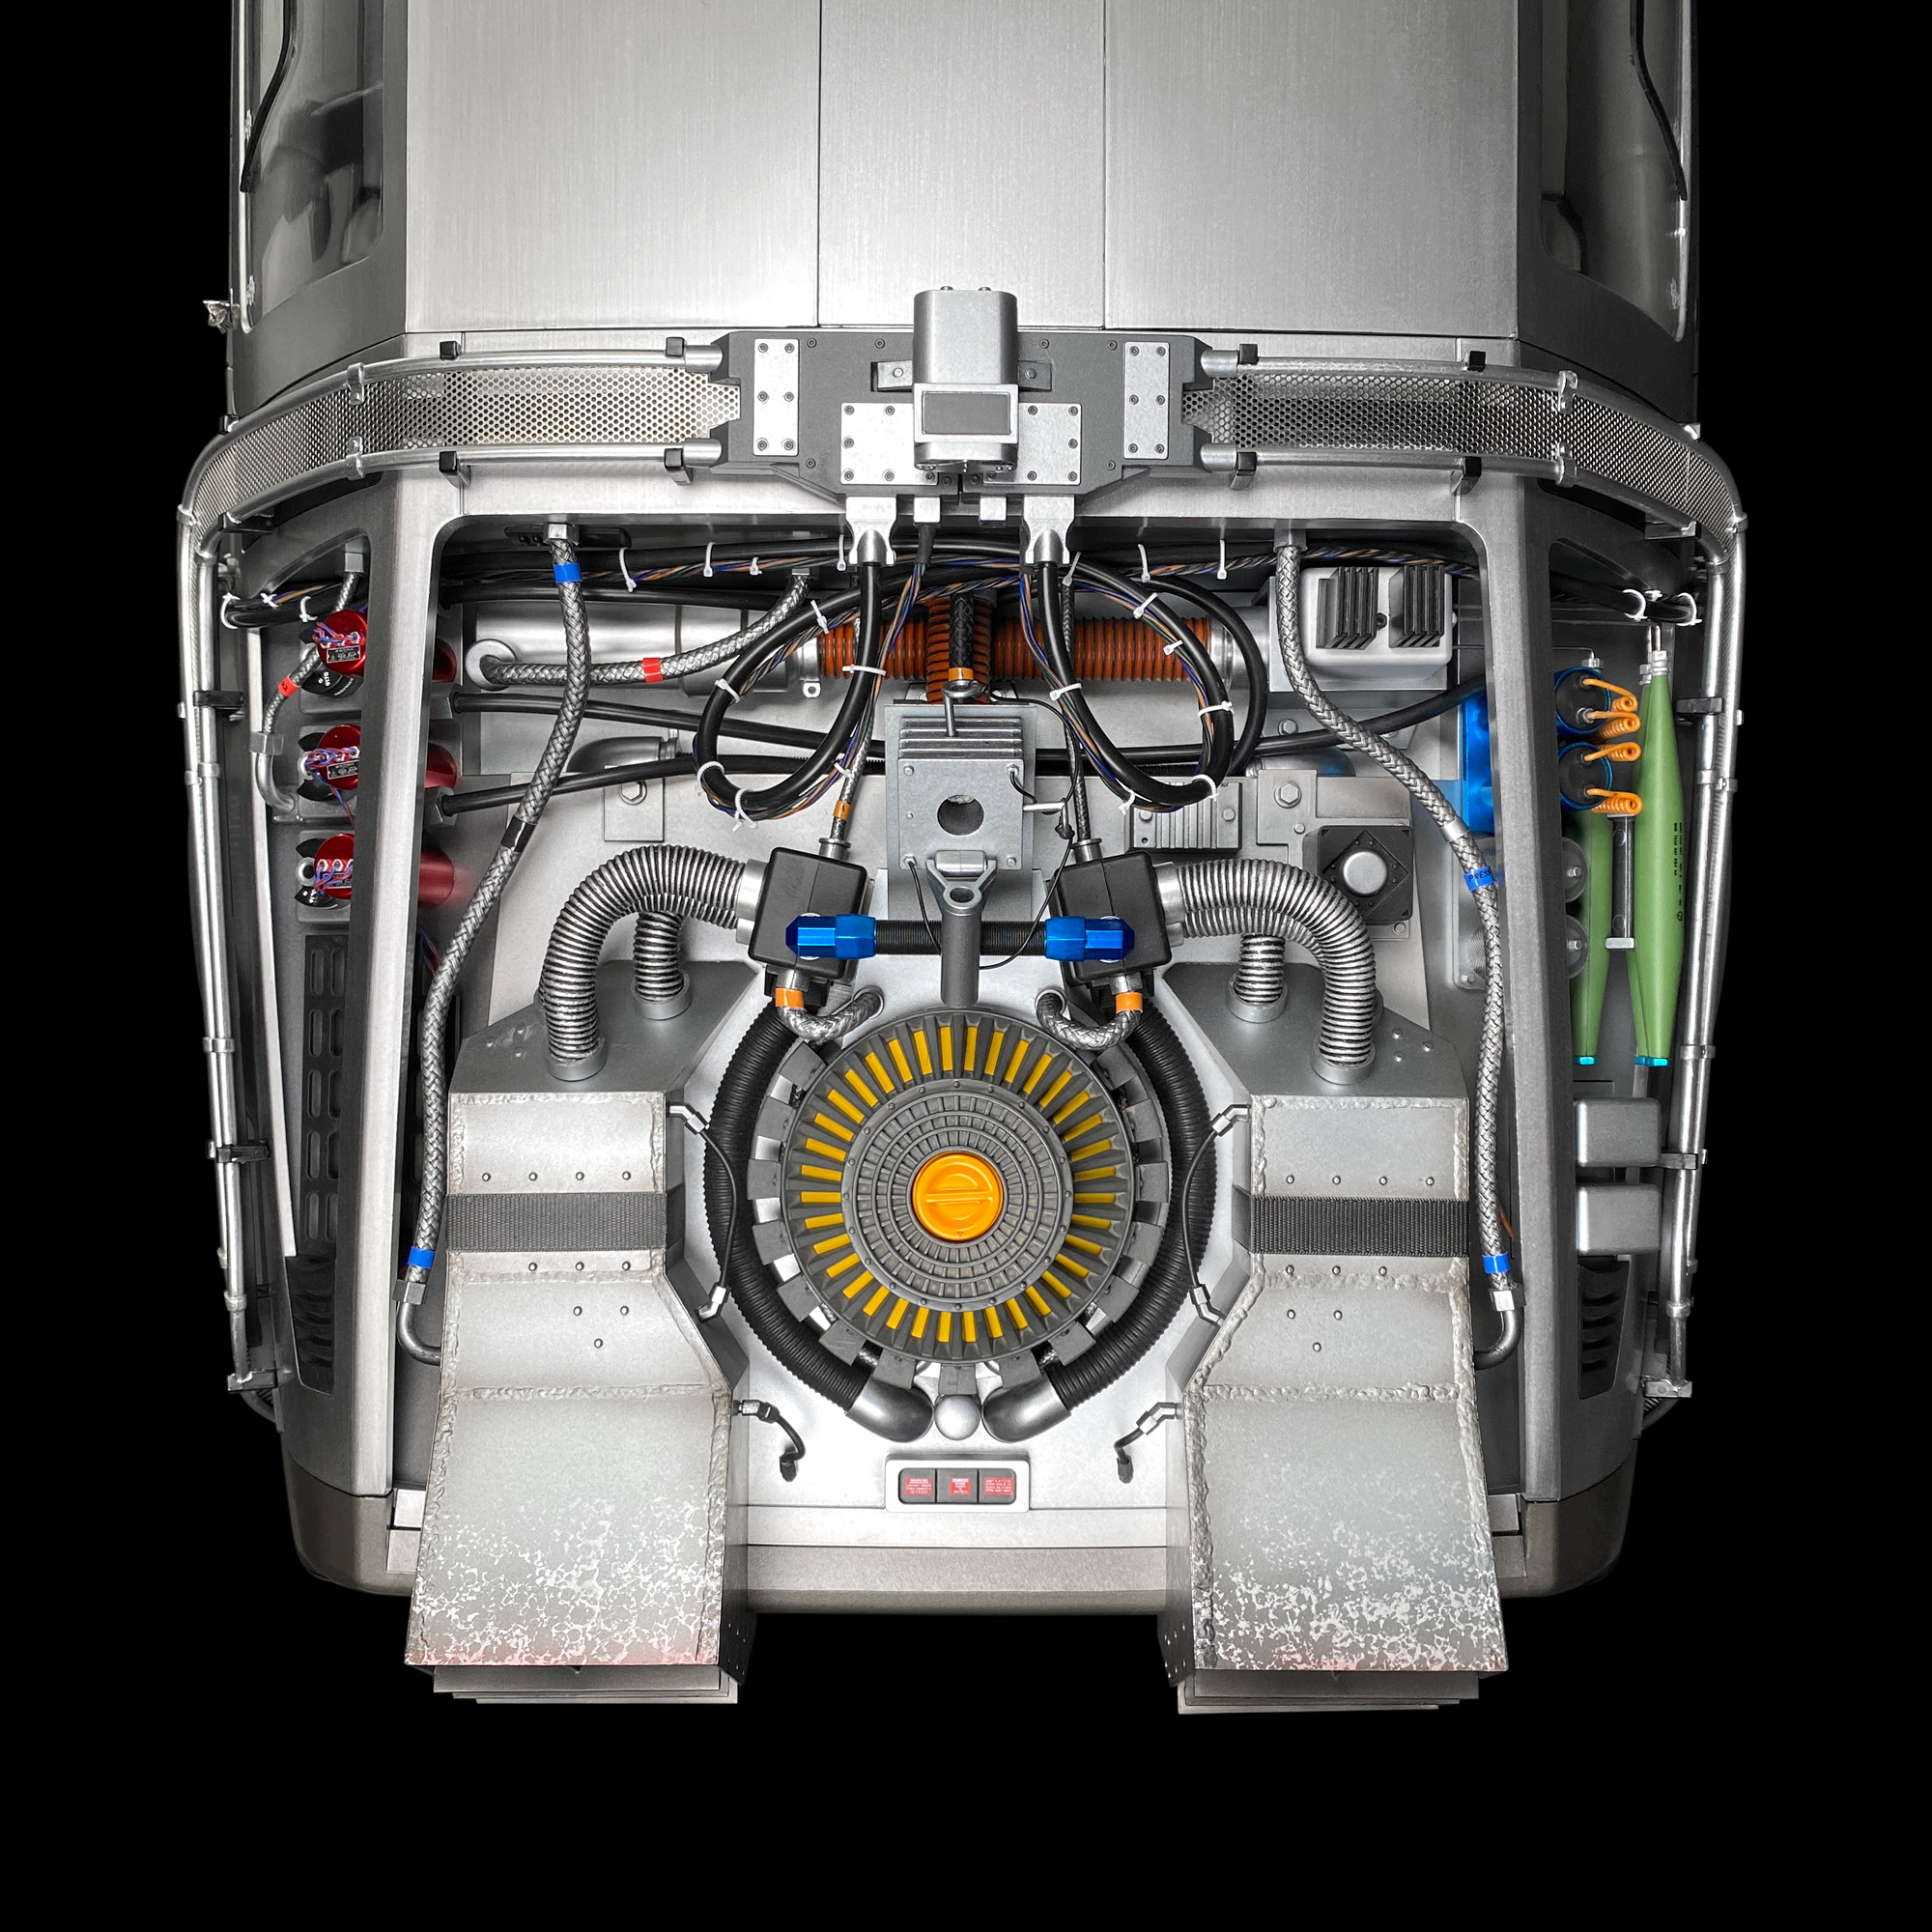
3) Glue the reactor deck hose stickers
For the hose stickers on the reactor deck, you will require some Loctite Super Glue to aid installation and help secure them into place. Without glue, application is extremely difficult and the stickers will also be more likely to unravel. As demonstrated in the photos, using a small dot of glue under the sticker to hold it in place before wrapping makes application a lot easier, and then a small dot under each end of the sticker will hold it securely in place.
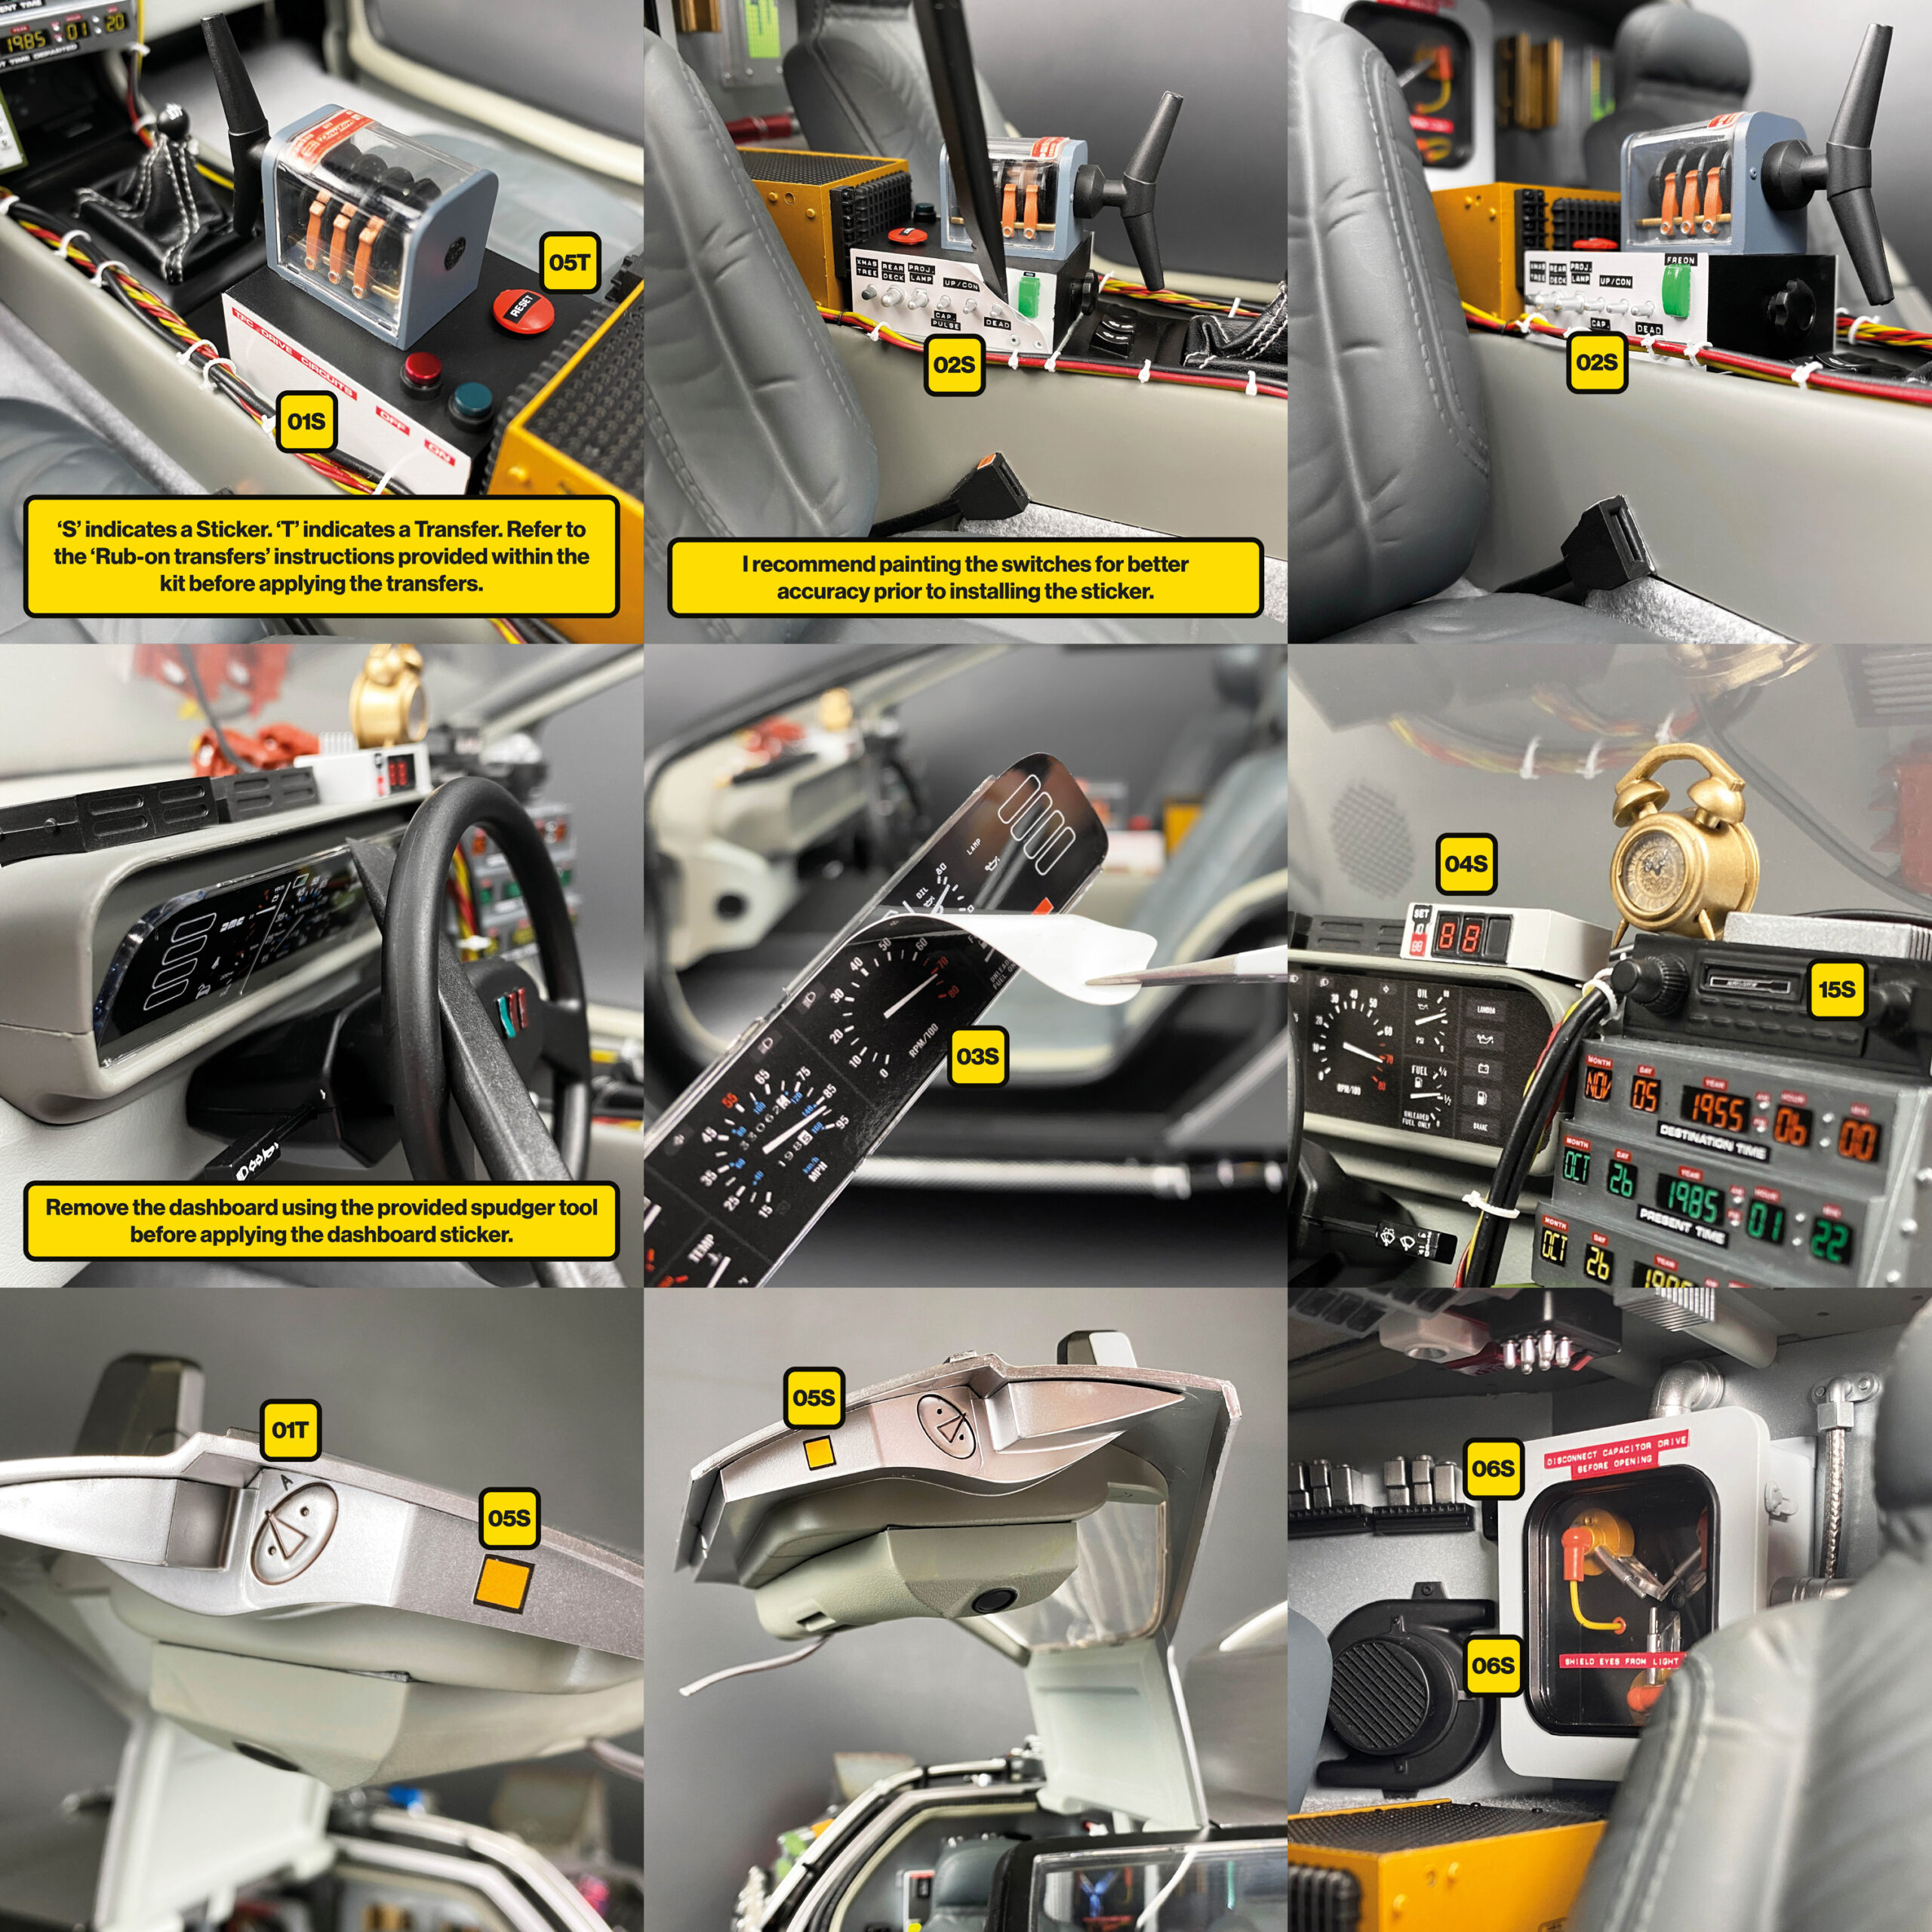
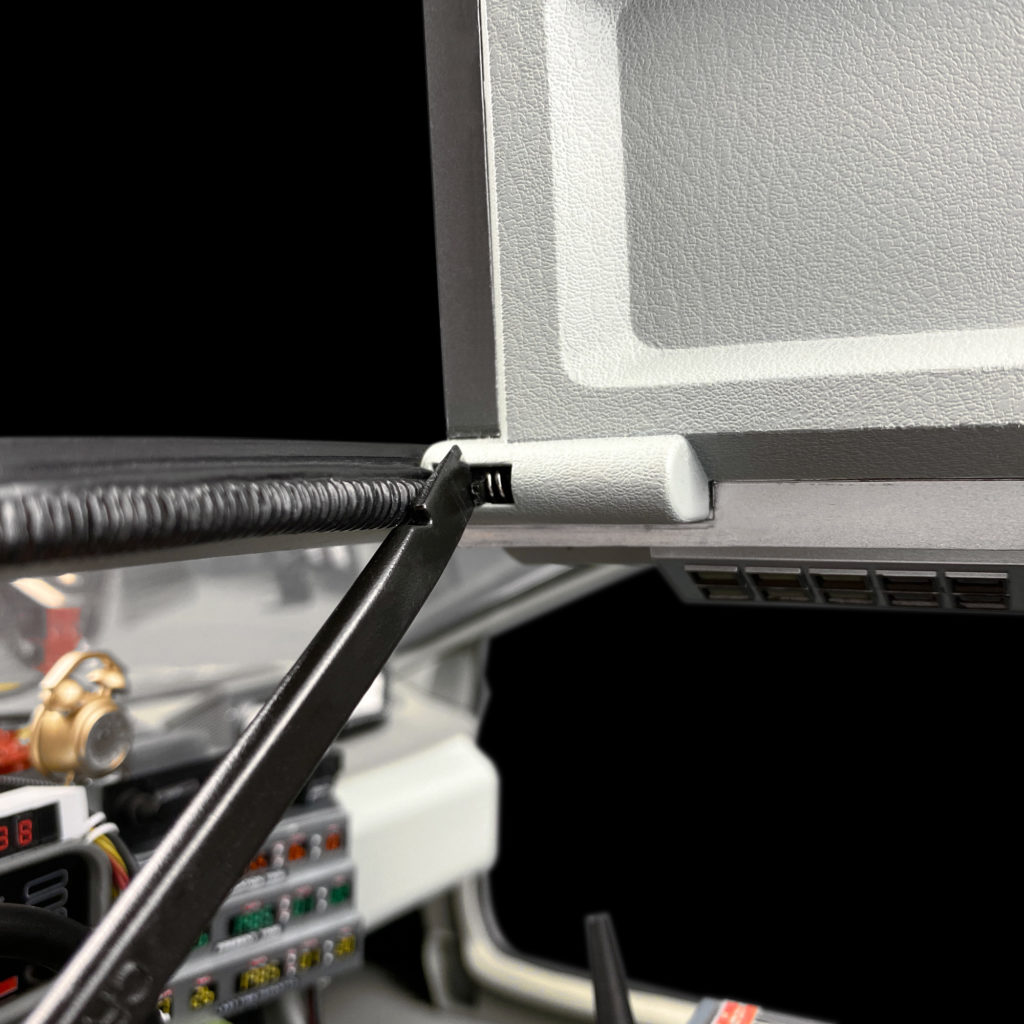
4) Remove the dashboard using the spudger tool before applying the sticker
I recommend removing the dashboard before applying the sticker as it makes application a lot easier. Removal of the dashboard is straightforward and simple using the supplied nylon spudger tool. Please refer to the photos on this page for a demonstration of this process.
Other advice
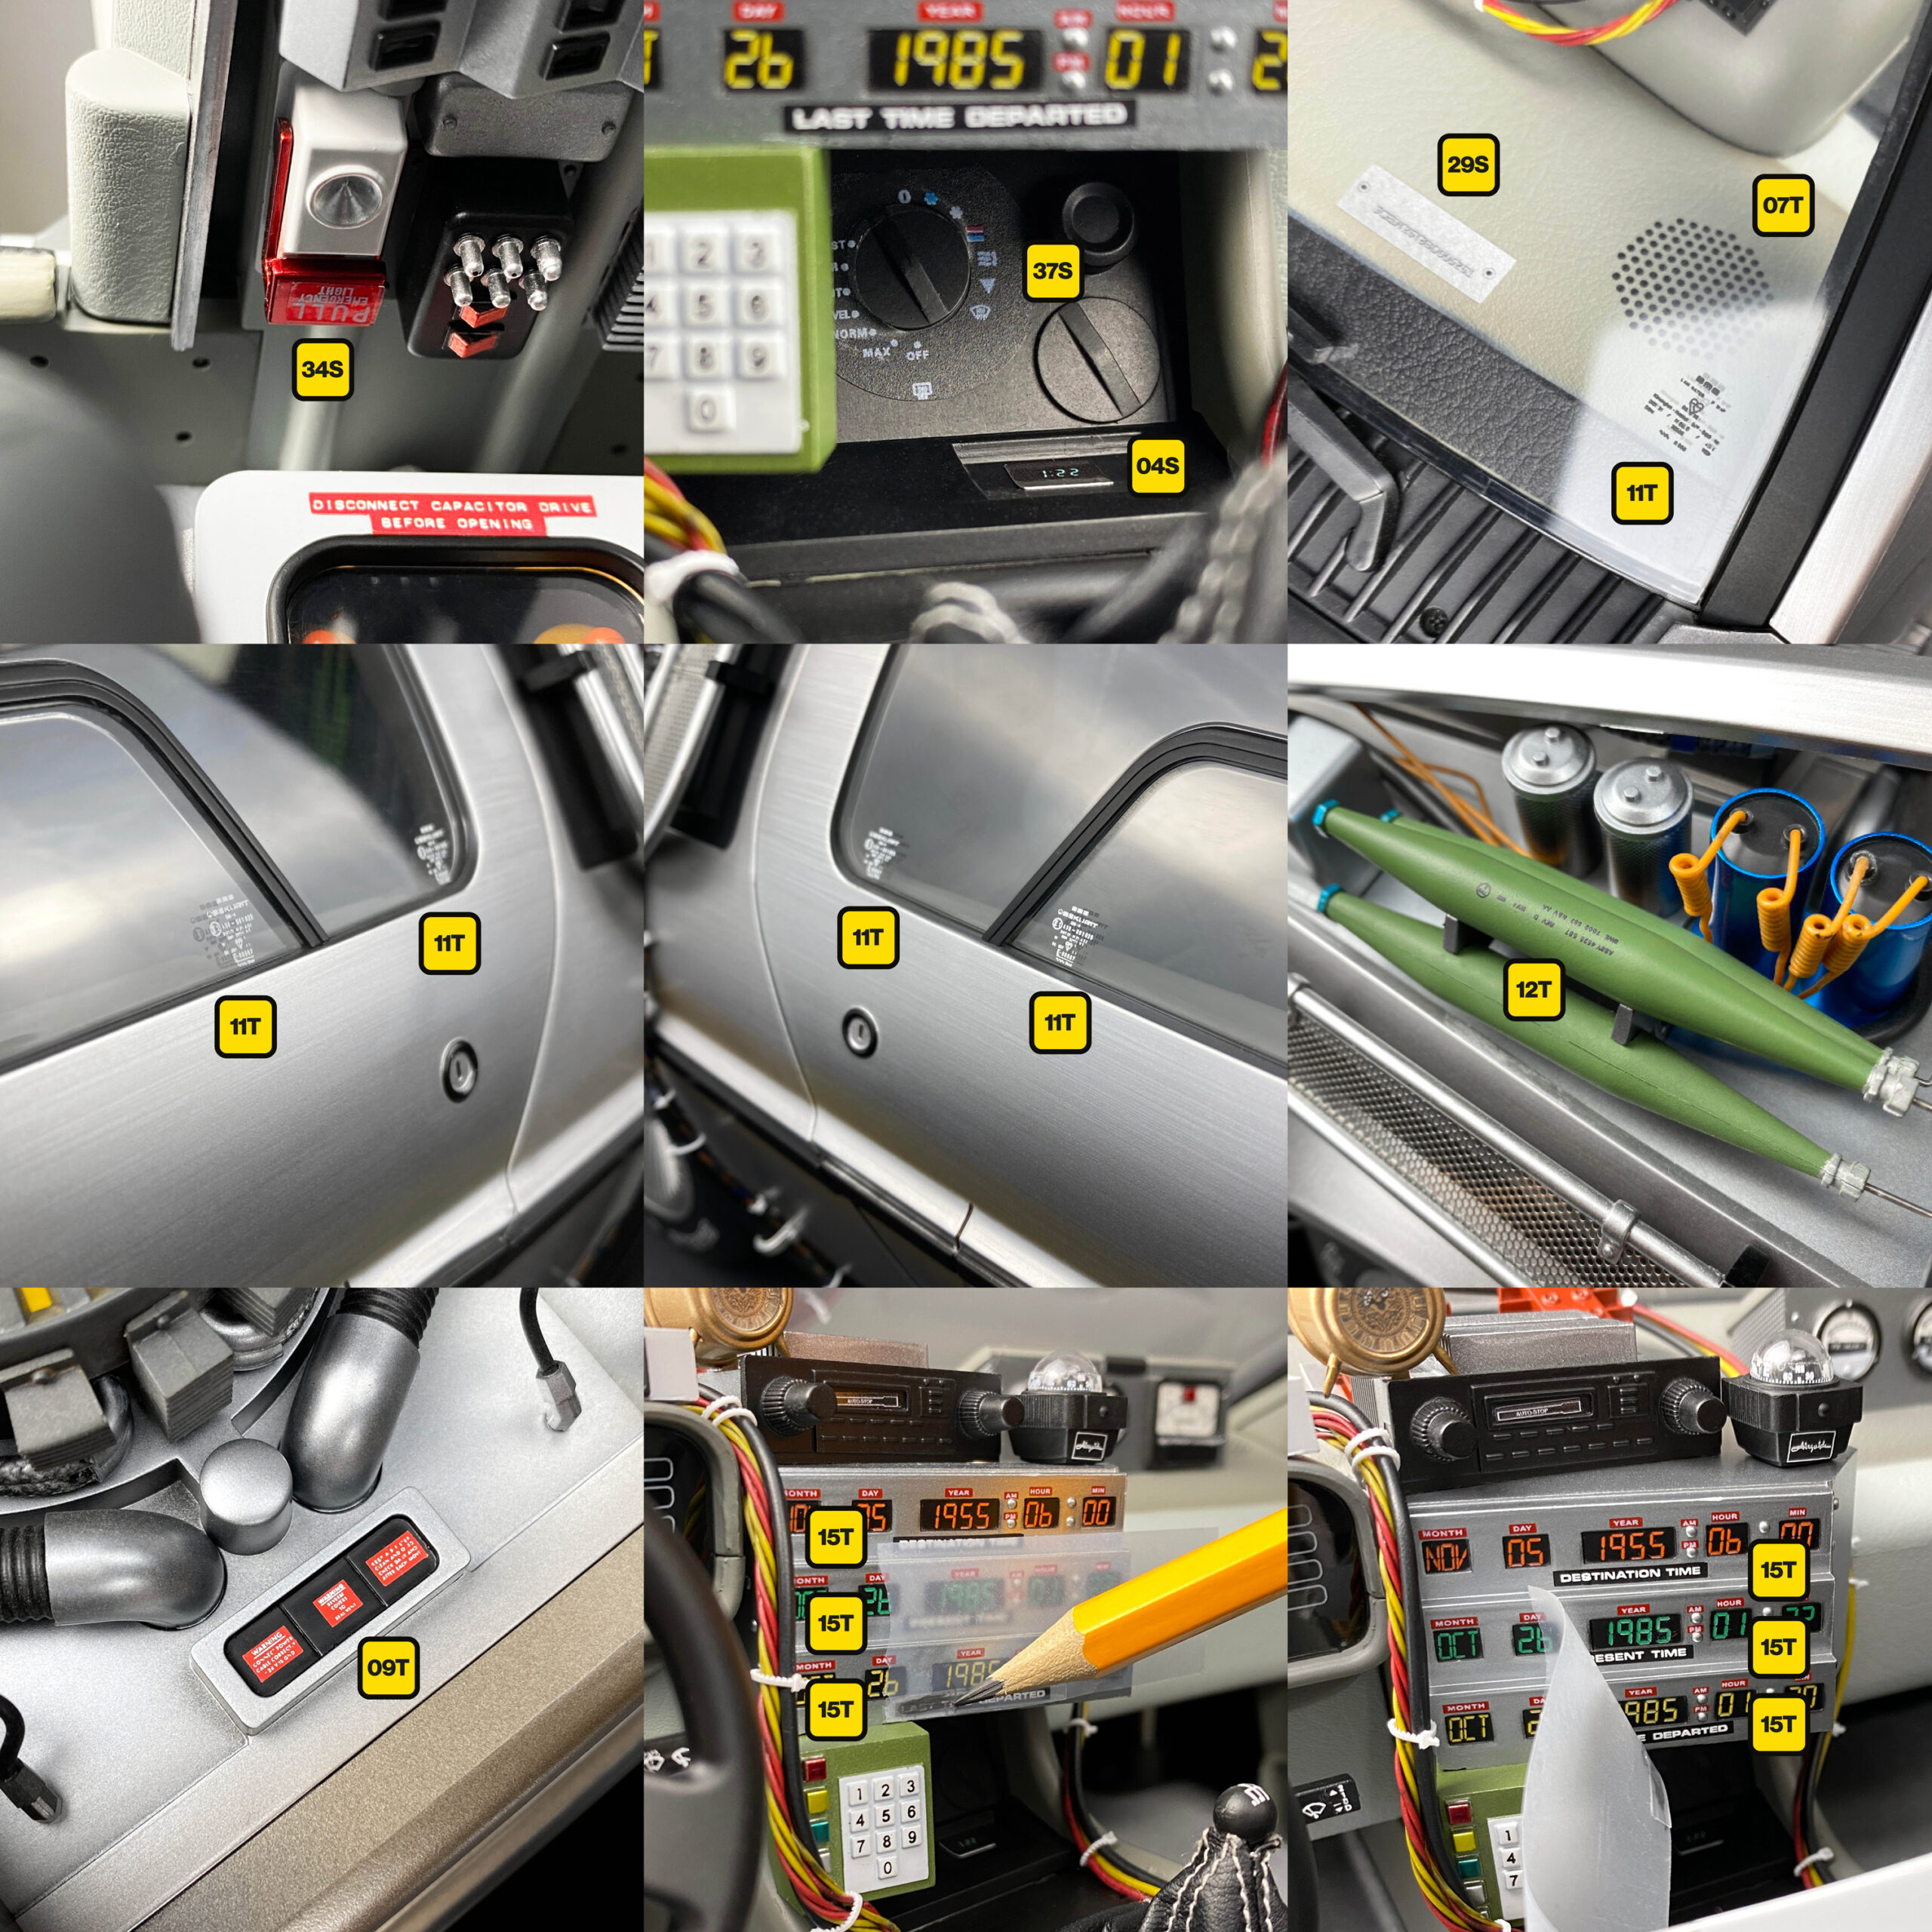
Transfers 16T, 15T, and 13T
These transfers (the gear knob and indicator details) are particularly difficult to apply due to their size and the restricted access within the model. Please don’t be disappointed if you are unable to apply these. Spares are provided, and with patience and planning they are certainly possible as you’ll see from the photos. The key to applying them successfully is to plan ahead, making sure they don’t move and securing them into position using tape.
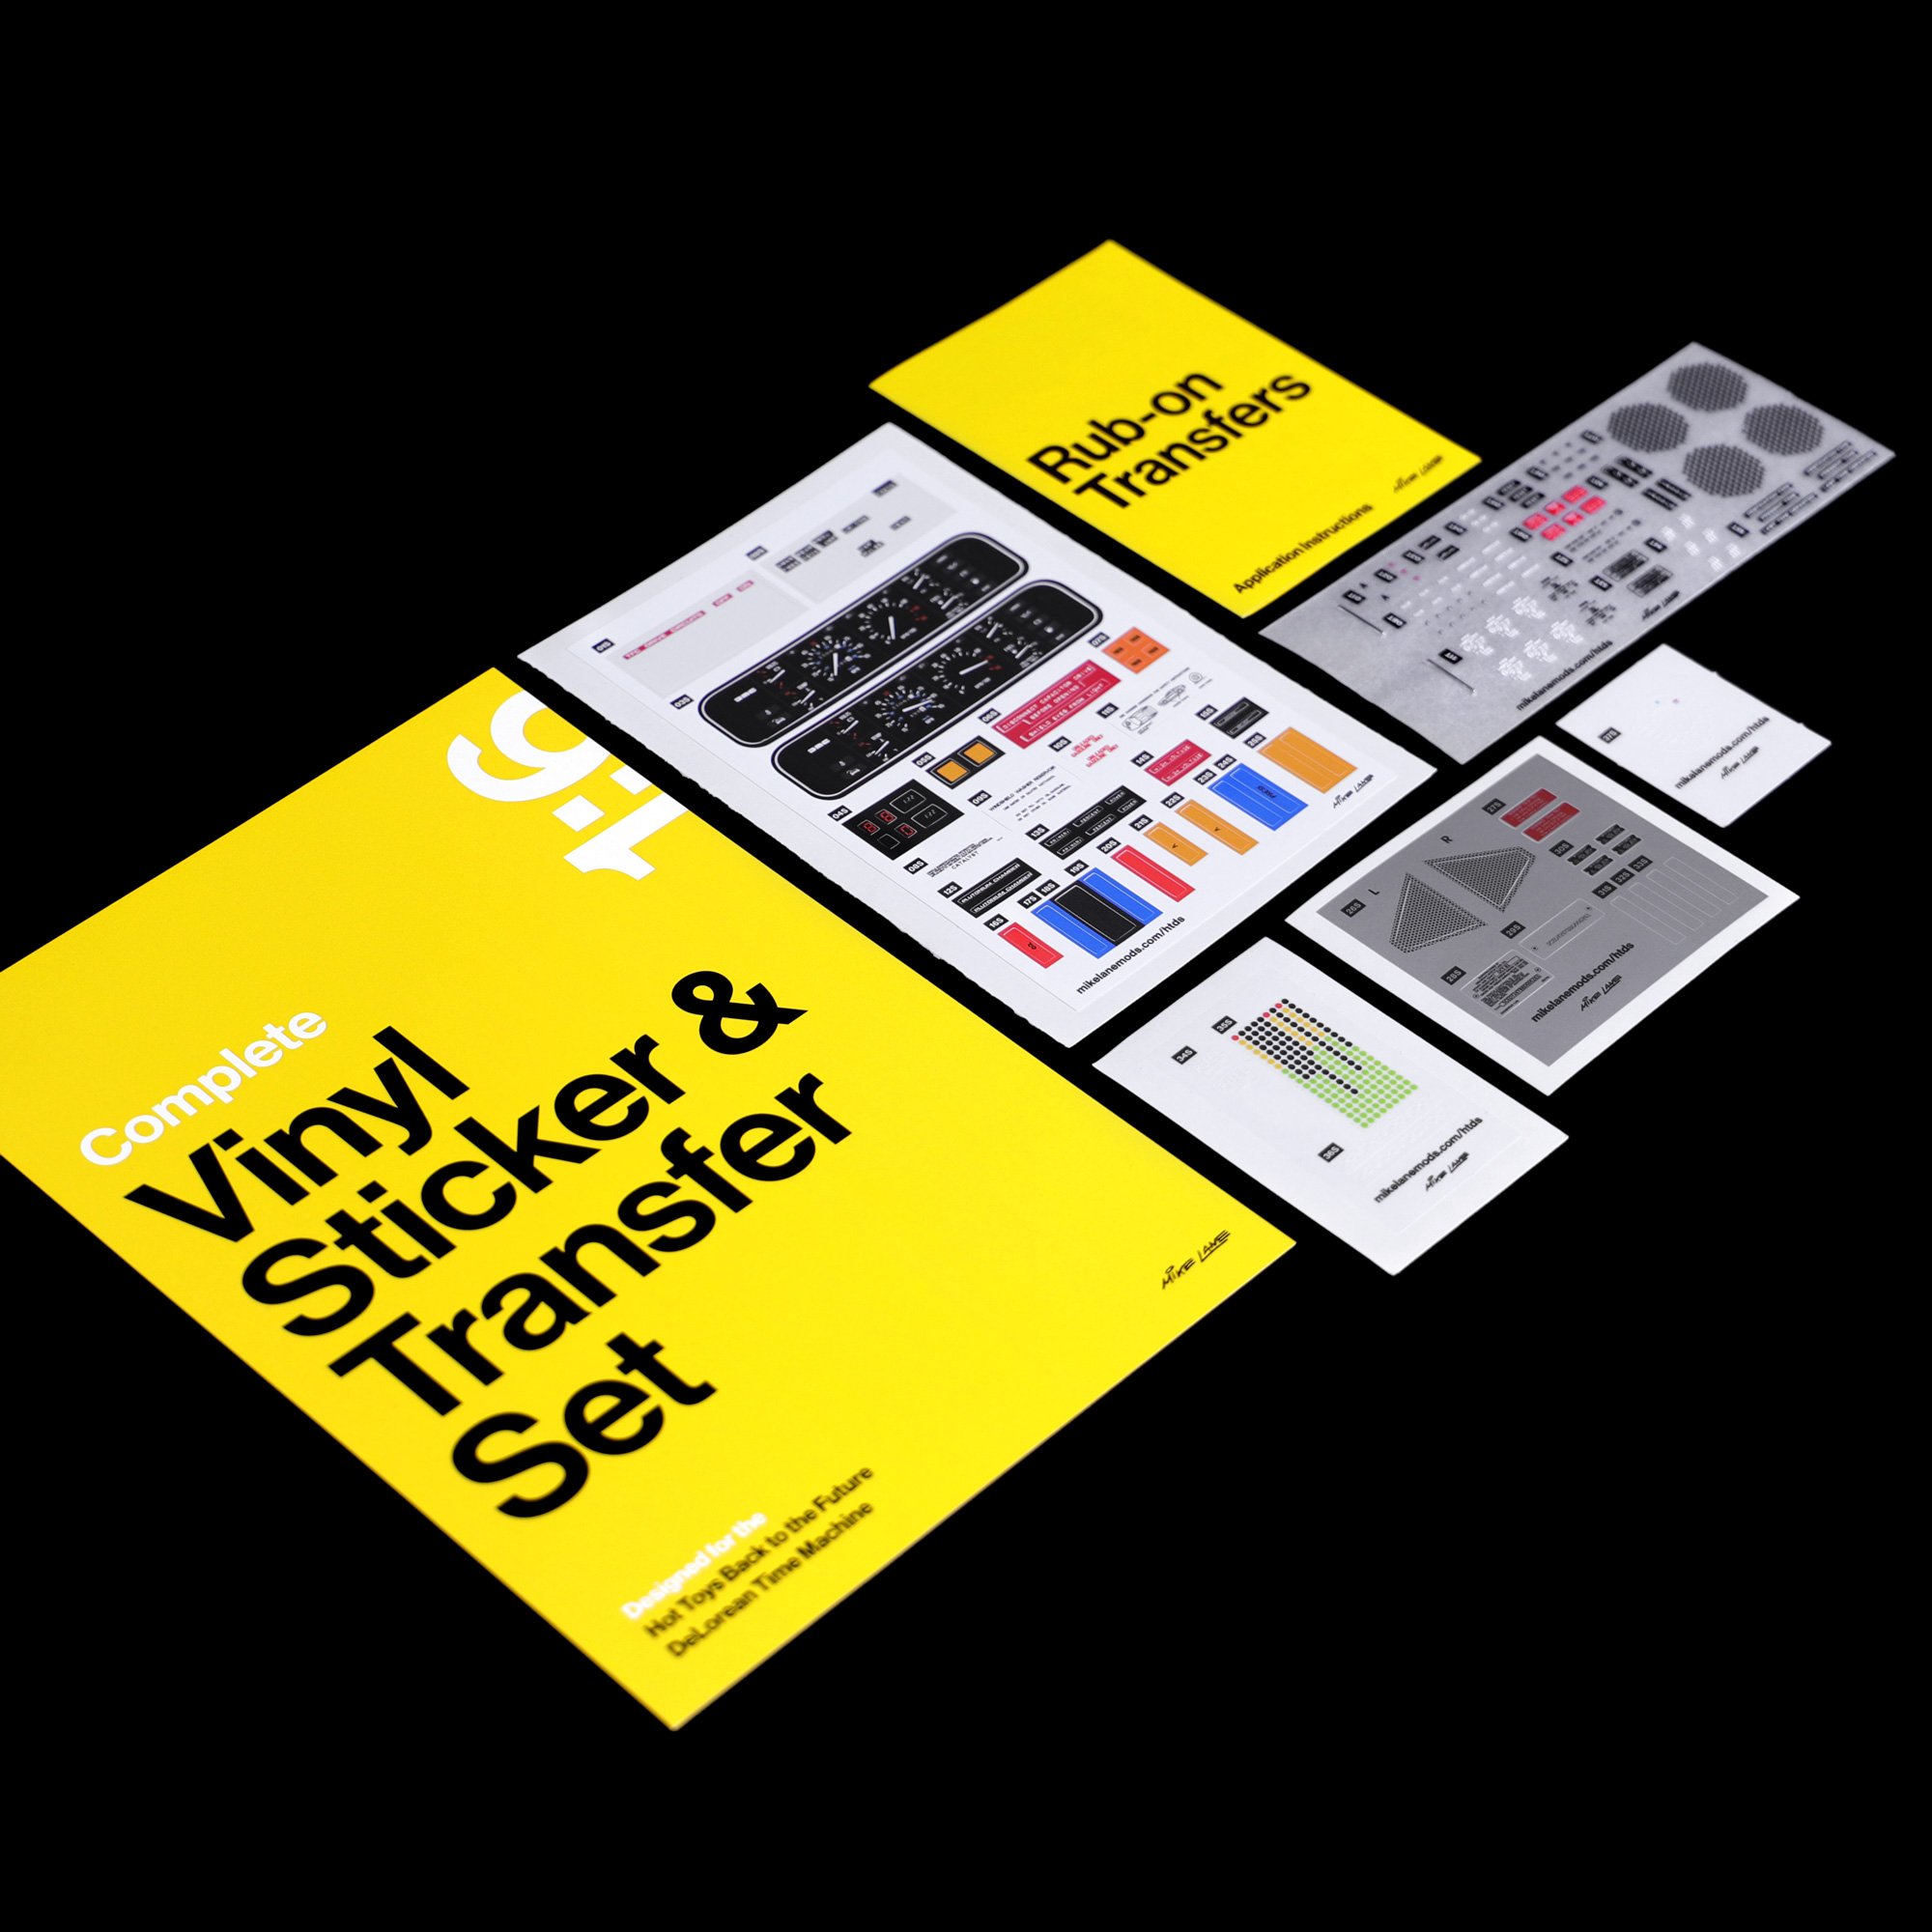
With over 60 stickers and over 80 premium rub-on transfers, this unique, comprehensive set includes all the missing details you need to upgrade your 1:6 Hot Toys Back to the Future DeLorean Time Machine.
Professionally printed on a variety of high-quality materials, ranging from gloss and metallic vinyl to a collection of premium rub-on transfers.
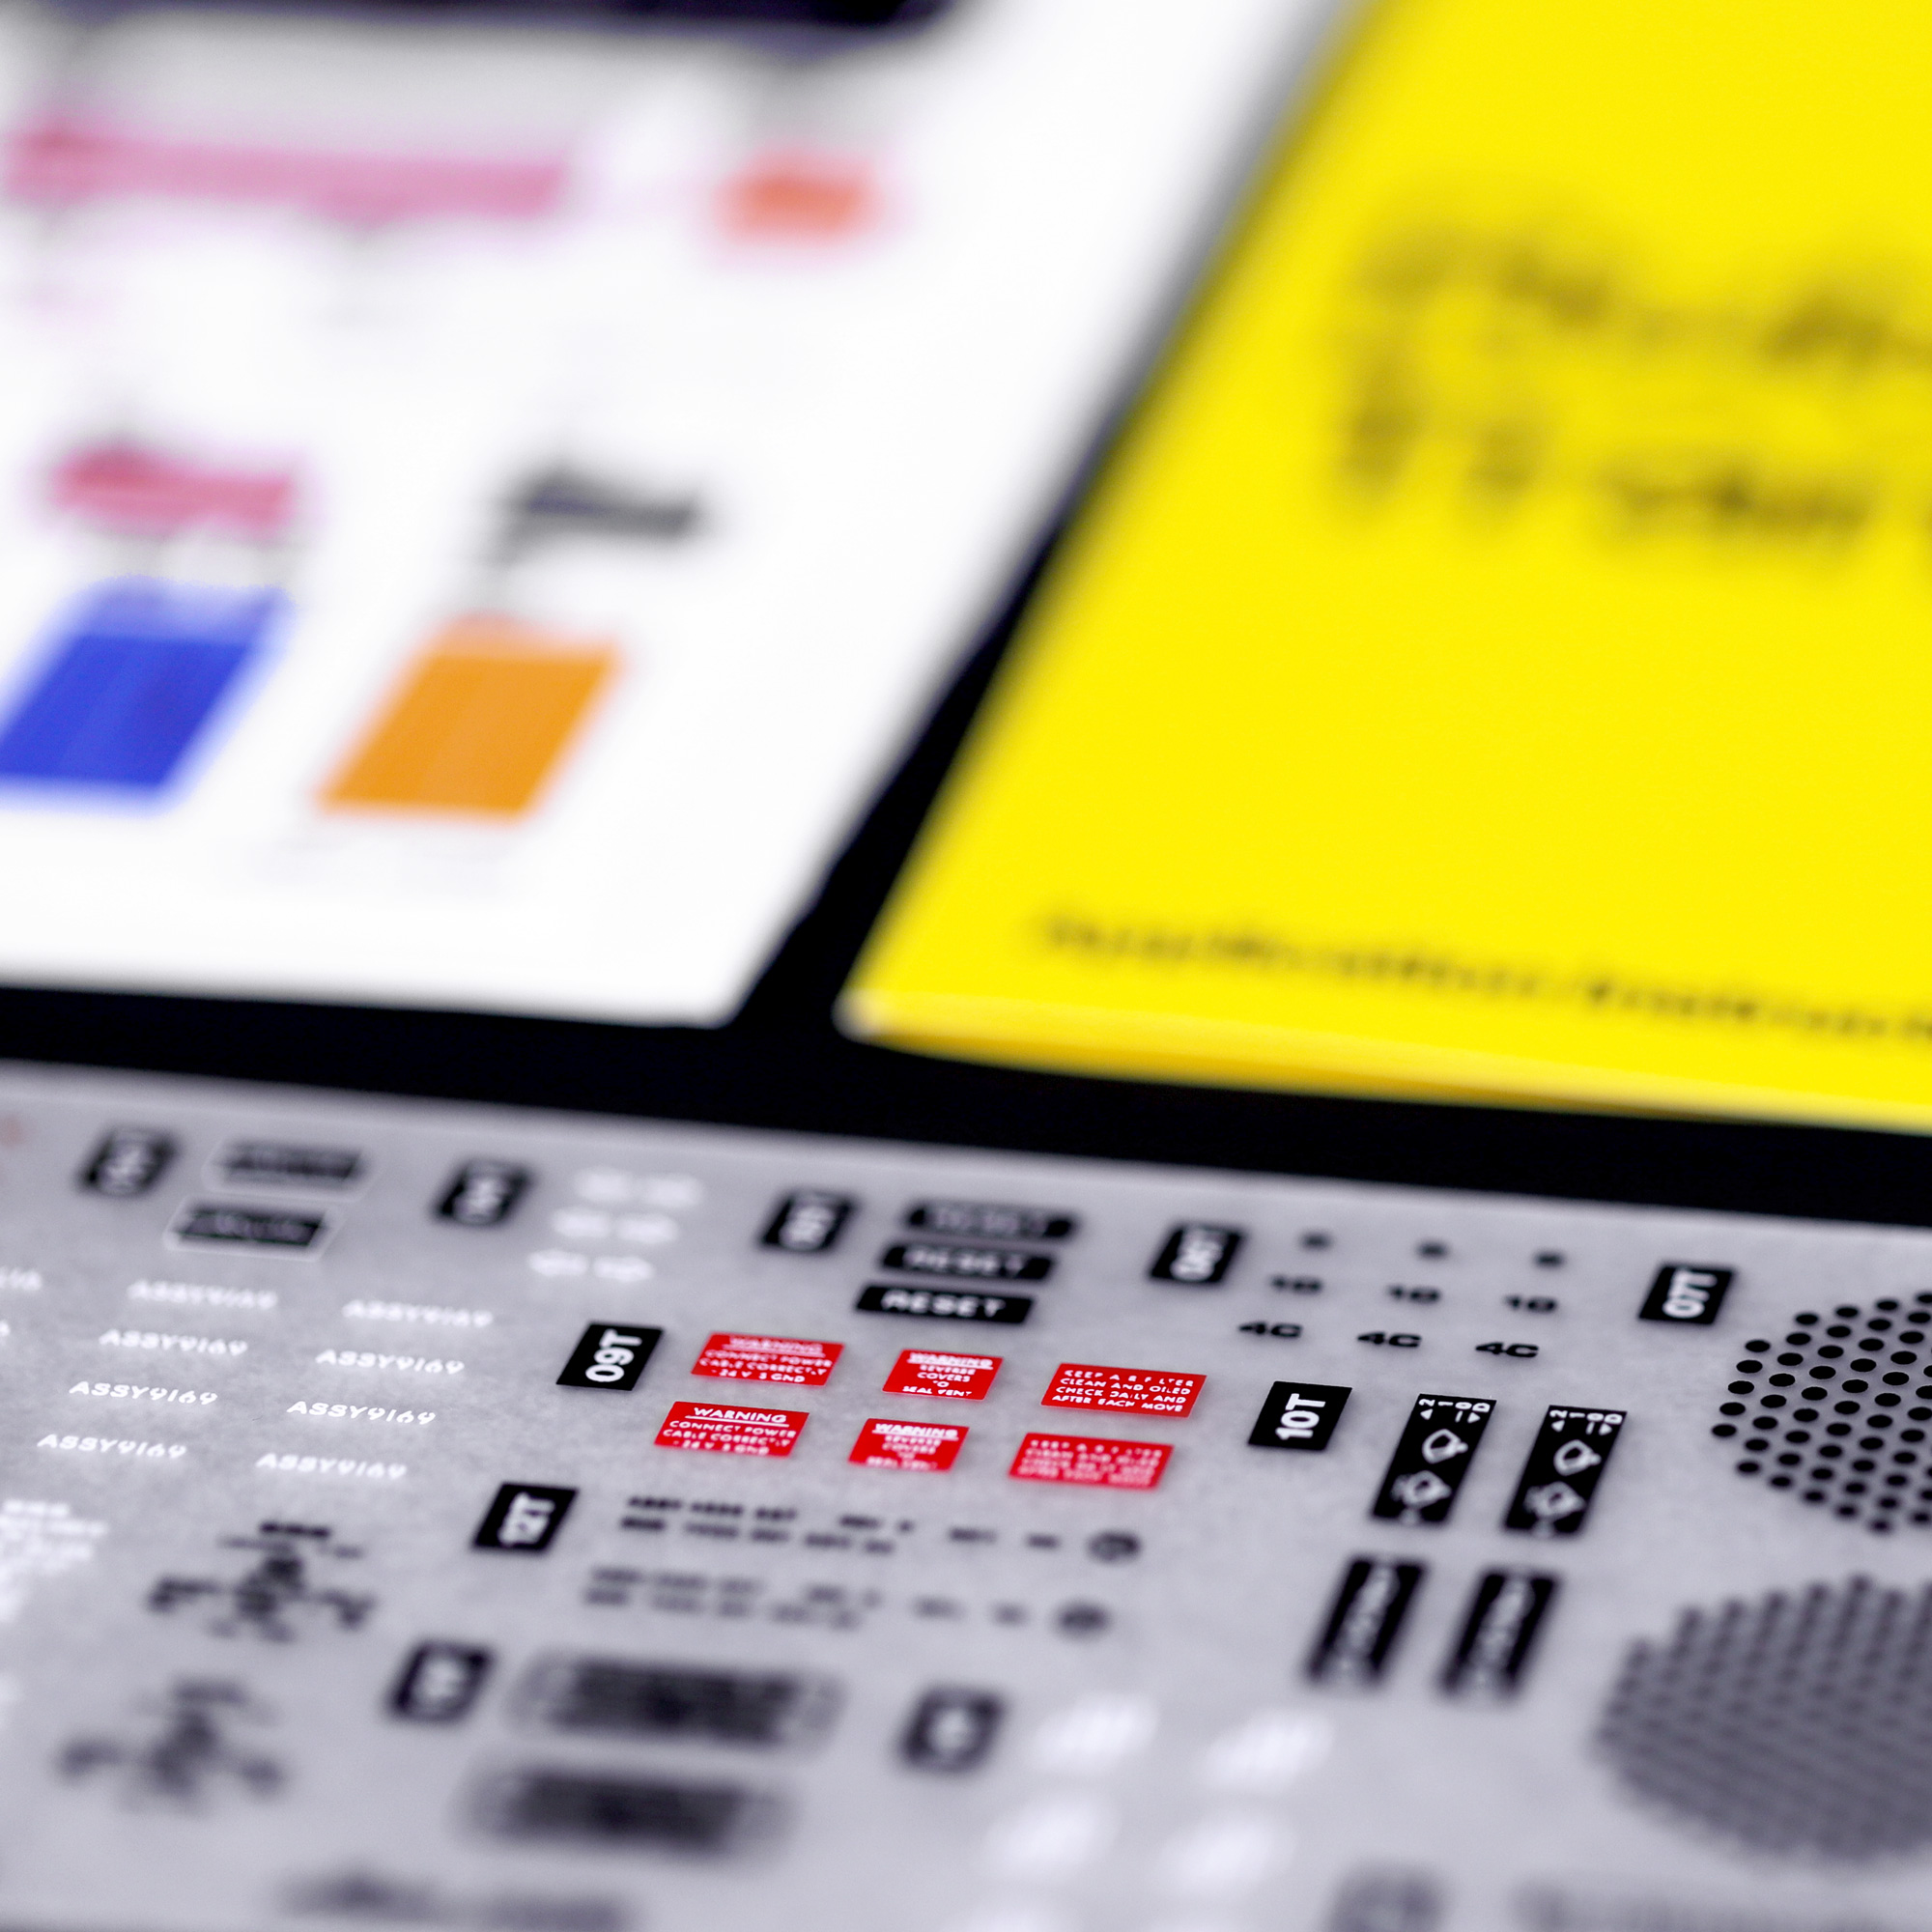
Every design has been faithfully reproduced to exactly match the original details on the DeLorean Time Machine Hero ‘A’ Car, even down to the handwriting on the hose tape.
Each sticker uses the most appropriate material for each design, carefully selected to look as close to the real thing as possible.
The stickers are also individually numbered so you can cross-reference against the photos here for easy placement.
Application of the rub-on transfers is as easy as affixing the transfer to the model with tape (Scotch Magic Tape recommended) and then rubbing over the design with a pencil. This will transfer the design directly to the surface. Application instructions are included within this kit.
What’s included:
- 1 x Gloss vinyl sticker sheet
- 1 x Gloss clear vinyl sticker sheet
- 1 x Matt clear vinyl sticker sheet
- 1 x Matt silver metallic vinyl sticker sheet
- 1 x Rub-on transfer sheet
- 1 x Nylon spudger tool (to aid removal of the doors and dashboard, and also aid sticker/transfer application in some of the harder-to-reach areas)
All other model parts and accessories shown in the photos outside of the ‘What’s included’ list above are not included and are shown purely for demonstration and application purposes.
![]() Fully compatible with both the original BTTF and new BTTF2 Hot Toys DeLorean
Fully compatible with both the original BTTF and new BTTF2 Hot Toys DeLorean
For sticker positioning, please refer to the photos on this page.
Before you start, please read the following tips which will help to make application easier, more enjoyable and more successful.
Tools and materials required
To aid installation, I recommend having the following tools available to hand before starting this project:
- Angled tipped tweezers
- Straight tweezers
- Loctite Super Glue
- Cocktail sticks/toothpicks (for accurate application of super glue)
- Scotch Magic Tape (for applying the rub-on transfers)
- Craft knife (for cutting the rub-on transfers)
- Sharp pencil (for application of rub-on transfers)
- Tamiya TS-34 Spray Paint (if you wish to sand and repaint the plutonium chamber lid as demonstrated in the photos)
Top tips
1) Remove the doors
This step isn’t critical, but I highly recommend removing the doors before you start. This gives better access to the interior and makes application a lot easier.
To remove the doors, you’ll find a release mechanism inside the springs of the door hinges. Simply pull the mechanism and spring back using the supplied nylon spudger tool and then pull the door gently up and out towards the front of the car. To re-install the door, essentially do the same but in reverse. Please see below:
2) Get yourself a good set of tweezers
Given their size, application of some of the details can be a little fiddly, especially for some of the smaller transfers, due to restricted access to the parts.
Unlike the Eaglemoss DeLorean, which you can disassemble for easy access, the Hot Toys model is fully built, making application of some of the stickers a little more challenging.
I recommend obtaining a good set of modelling tweezers before tackling this project. I have detailed everything you will require in the ‘Tools required’ list.
3) Glue the reactor deck hose stickers
For the hose stickers on the reactor deck, you will require some Loctite Super Glue to aid installation and help secure them into place. Without glue, application is extremely difficult and the stickers will also be more likely to unravel. As demonstrated in the photos, using a small dot of glue under the sticker to hold it in place before wrapping makes application a lot easier, and then a small dot under each end of the sticker will hold it securely in place.
4) Remove the dashboard using the spudger tool before applying the sticker
I recommend removing the dashboard before applying the sticker as it makes application a lot easier. Removal of the dashboard is straightforward and simple using the supplied nylon spudger tool. Please refer to the photos on this page for a demonstration of this process.
Other advice
Transfers 16T, 15T, and 13T
These transfers (the gear knob and indicator details) are particularly difficult to apply due to their size and the restricted access within the model. Please don’t be disappointed if you are unable to apply these. Spares are provided, and with patience and planning they are certainly possible as you’ll see from the photos. The key to applying them successfully is to plan ahead, making sure they don’t move and securing them into position using tape.
With over 60 stickers and over 80 premium rub-on transfers, this unique, comprehensive set includes all the missing details you need to upgrade your 1:6 Hot Toys Back to the Future DeLorean Time Machine.
Professionally printed on a variety of high-quality materials, ranging from gloss and metallic vinyl to a collection of premium rub-on transfers.
Every design has been faithfully reproduced to exactly match the original details on the DeLorean Time Machine Hero ‘A’ Car, even down to the handwriting on the hose tape.
Each sticker uses the most appropriate material for each design, carefully selected to look as close to the real thing as possible.
The stickers are also individually numbered so you can cross-reference against the photos here for easy placement.
Application of the rub-on transfers is as easy as affixing the transfer to the model with tape (Scotch Magic Tape recommended) and then rubbing over the design with a pencil. This will transfer the design directly to the surface. Application instructions are included within this kit.
What’s included:
- 1 x Gloss vinyl sticker sheet
- 1 x Gloss clear vinyl sticker sheet
- 1 x Matt clear vinyl sticker sheet
- 1 x Matt silver metallic vinyl sticker sheet
- 1 x Rub-on transfer sheet
- 1 x Nylon spudger tool (to aid removal of the doors and dashboard, and also aid sticker/transfer application in some of the harder-to-reach areas)
All other model parts and accessories shown in the photos outside of the ‘What’s included’ list above are not included and are shown purely for demonstration and application purposes.
Reviews
There are no reviews yet.