Reviews (4)
You must be logged in to post a review.


£36.00 – £156.00 incl VAT
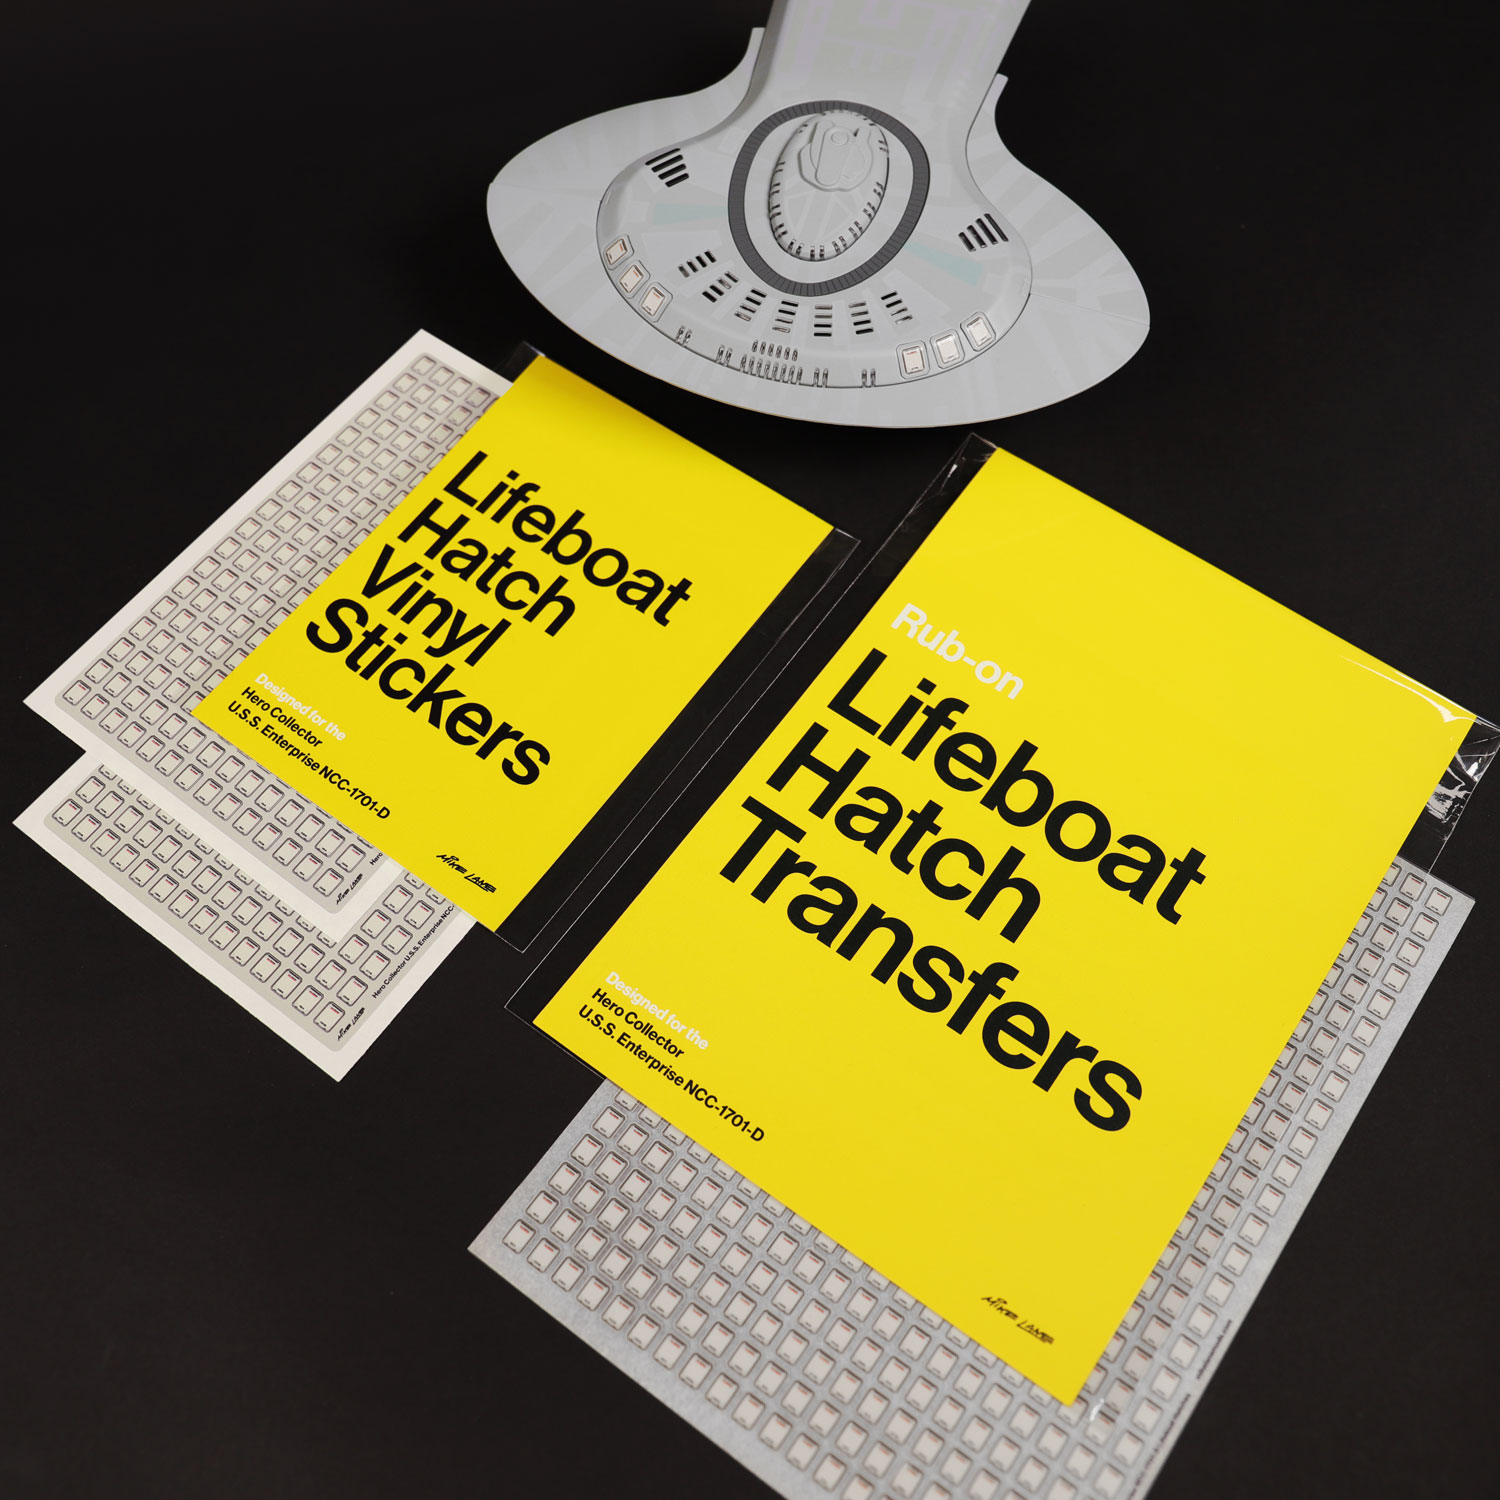
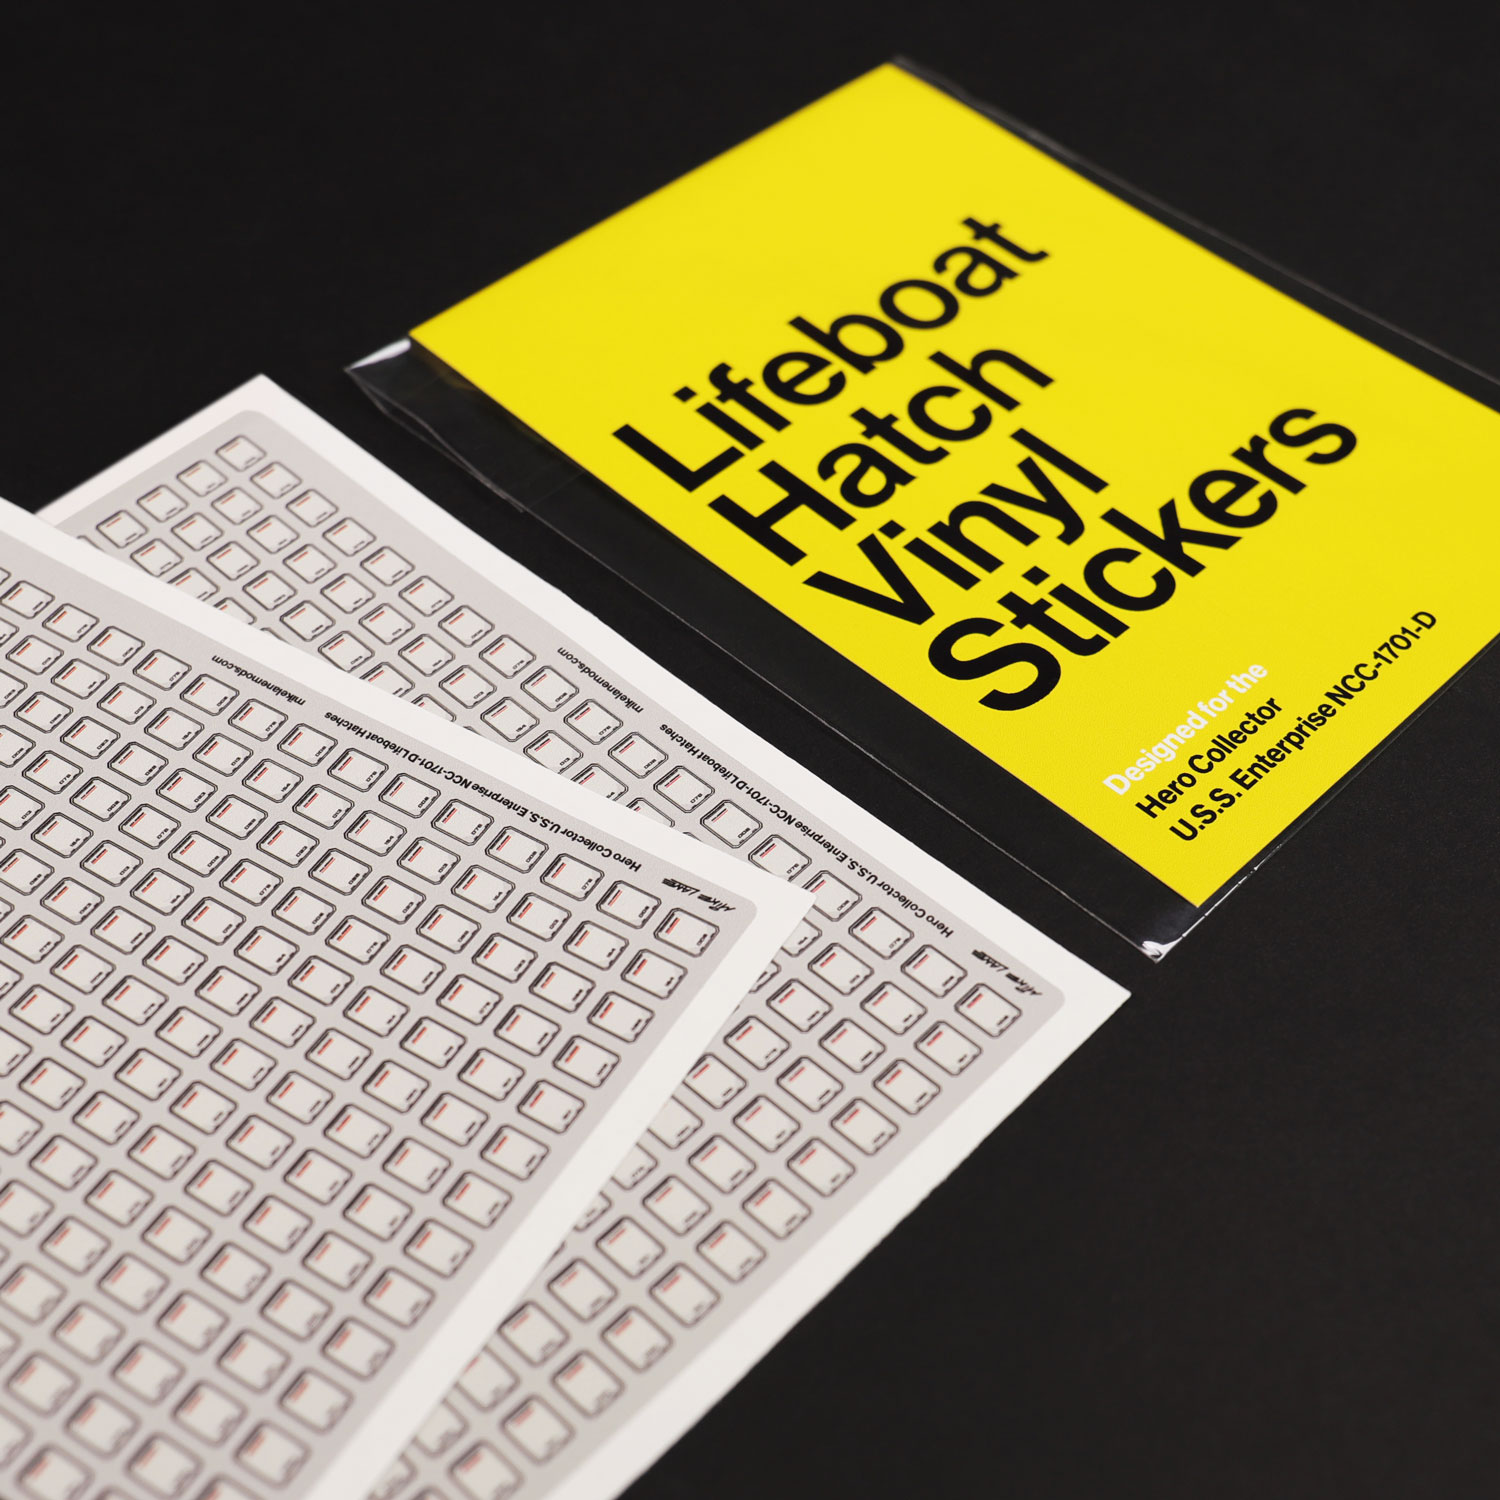
Using detailed blueprints and hundreds of close-up reference photos to ensure maximum accuracy, these sets add essential detail missing from the standard lifeboat hatches, also known as escape pods.
Easy to apply and hugely transformative, they immediately give the already impressive two-foot long U.S.S. Enterprise NCC-1701-D model by Hero Collector added realism and authenticity.
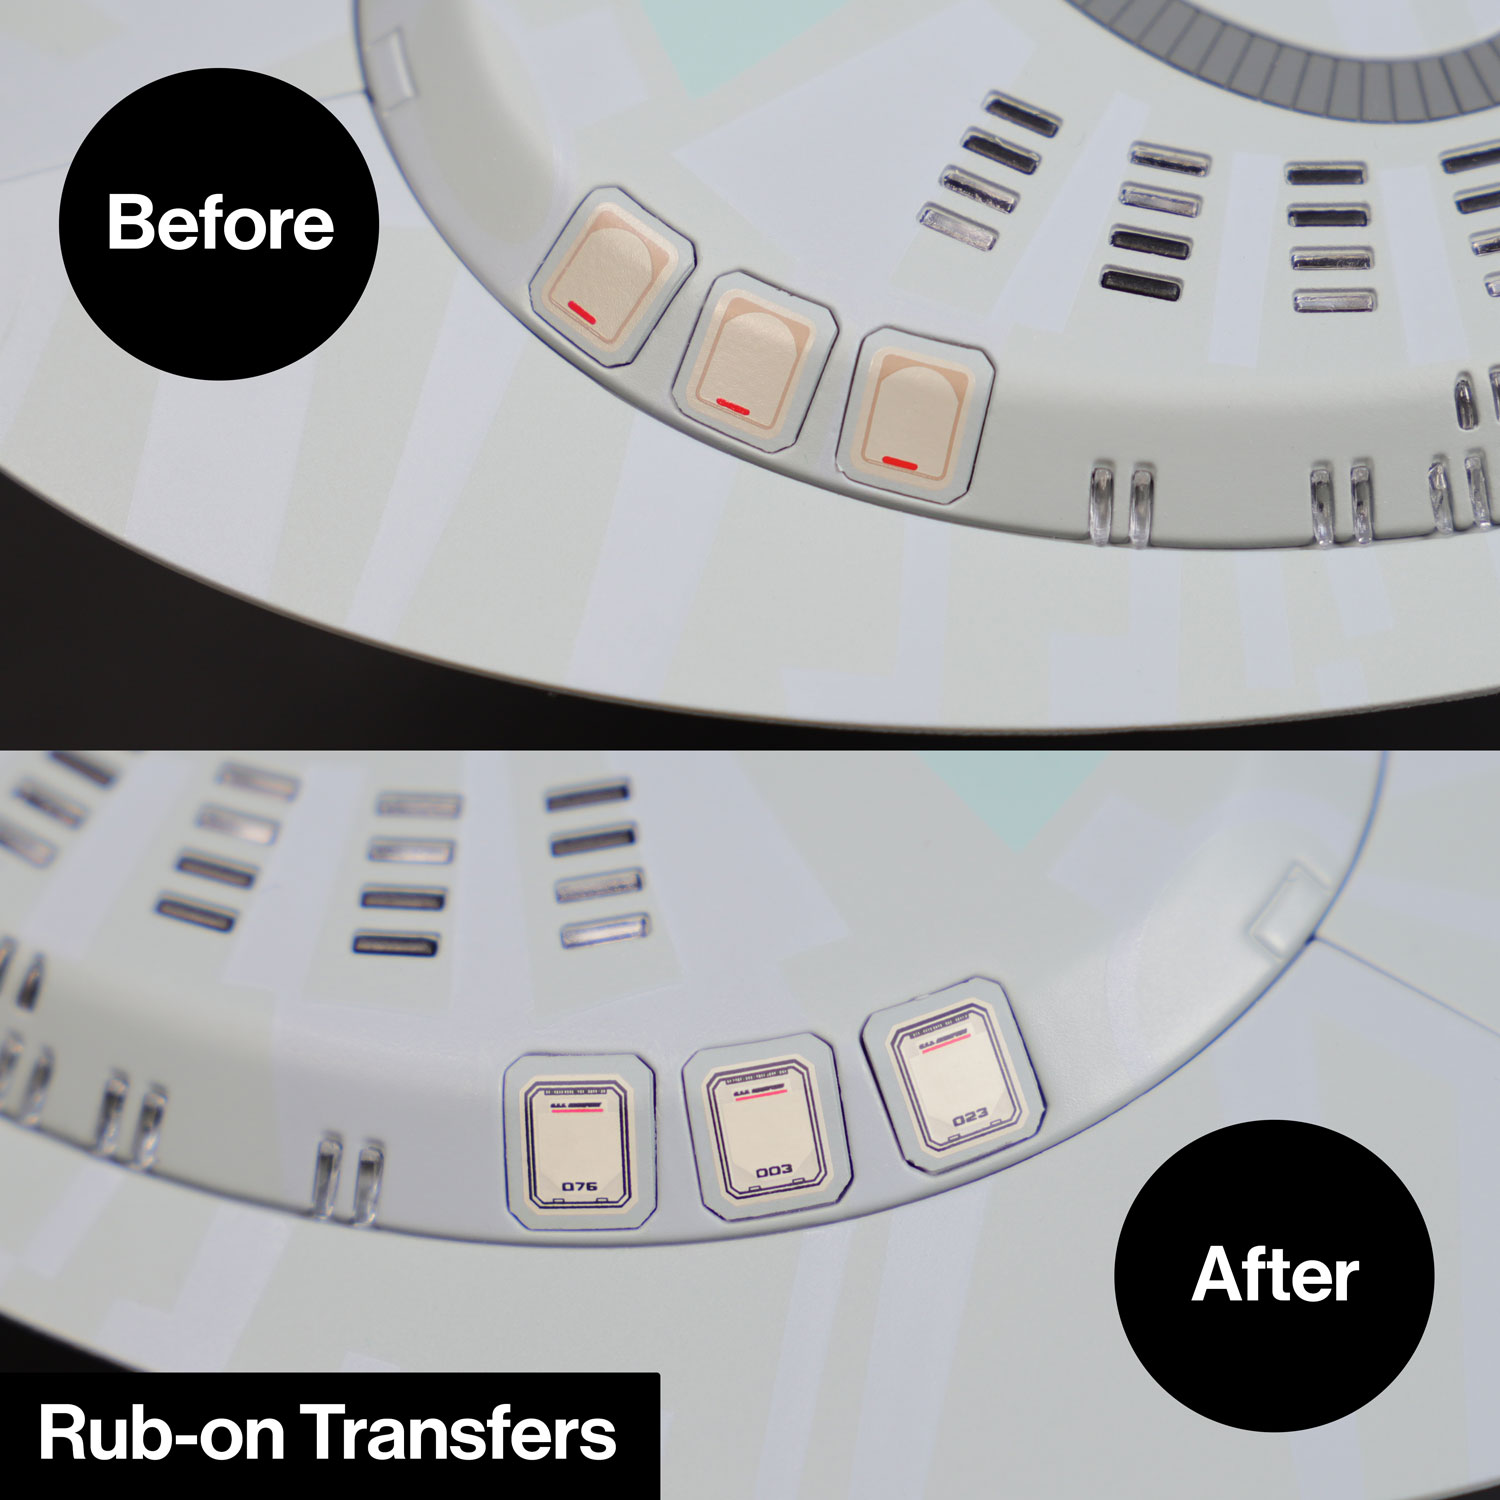
With over 430 hatches across the starship, the hatch covers are numerous and very prominent, so more than ever the small details really matter.
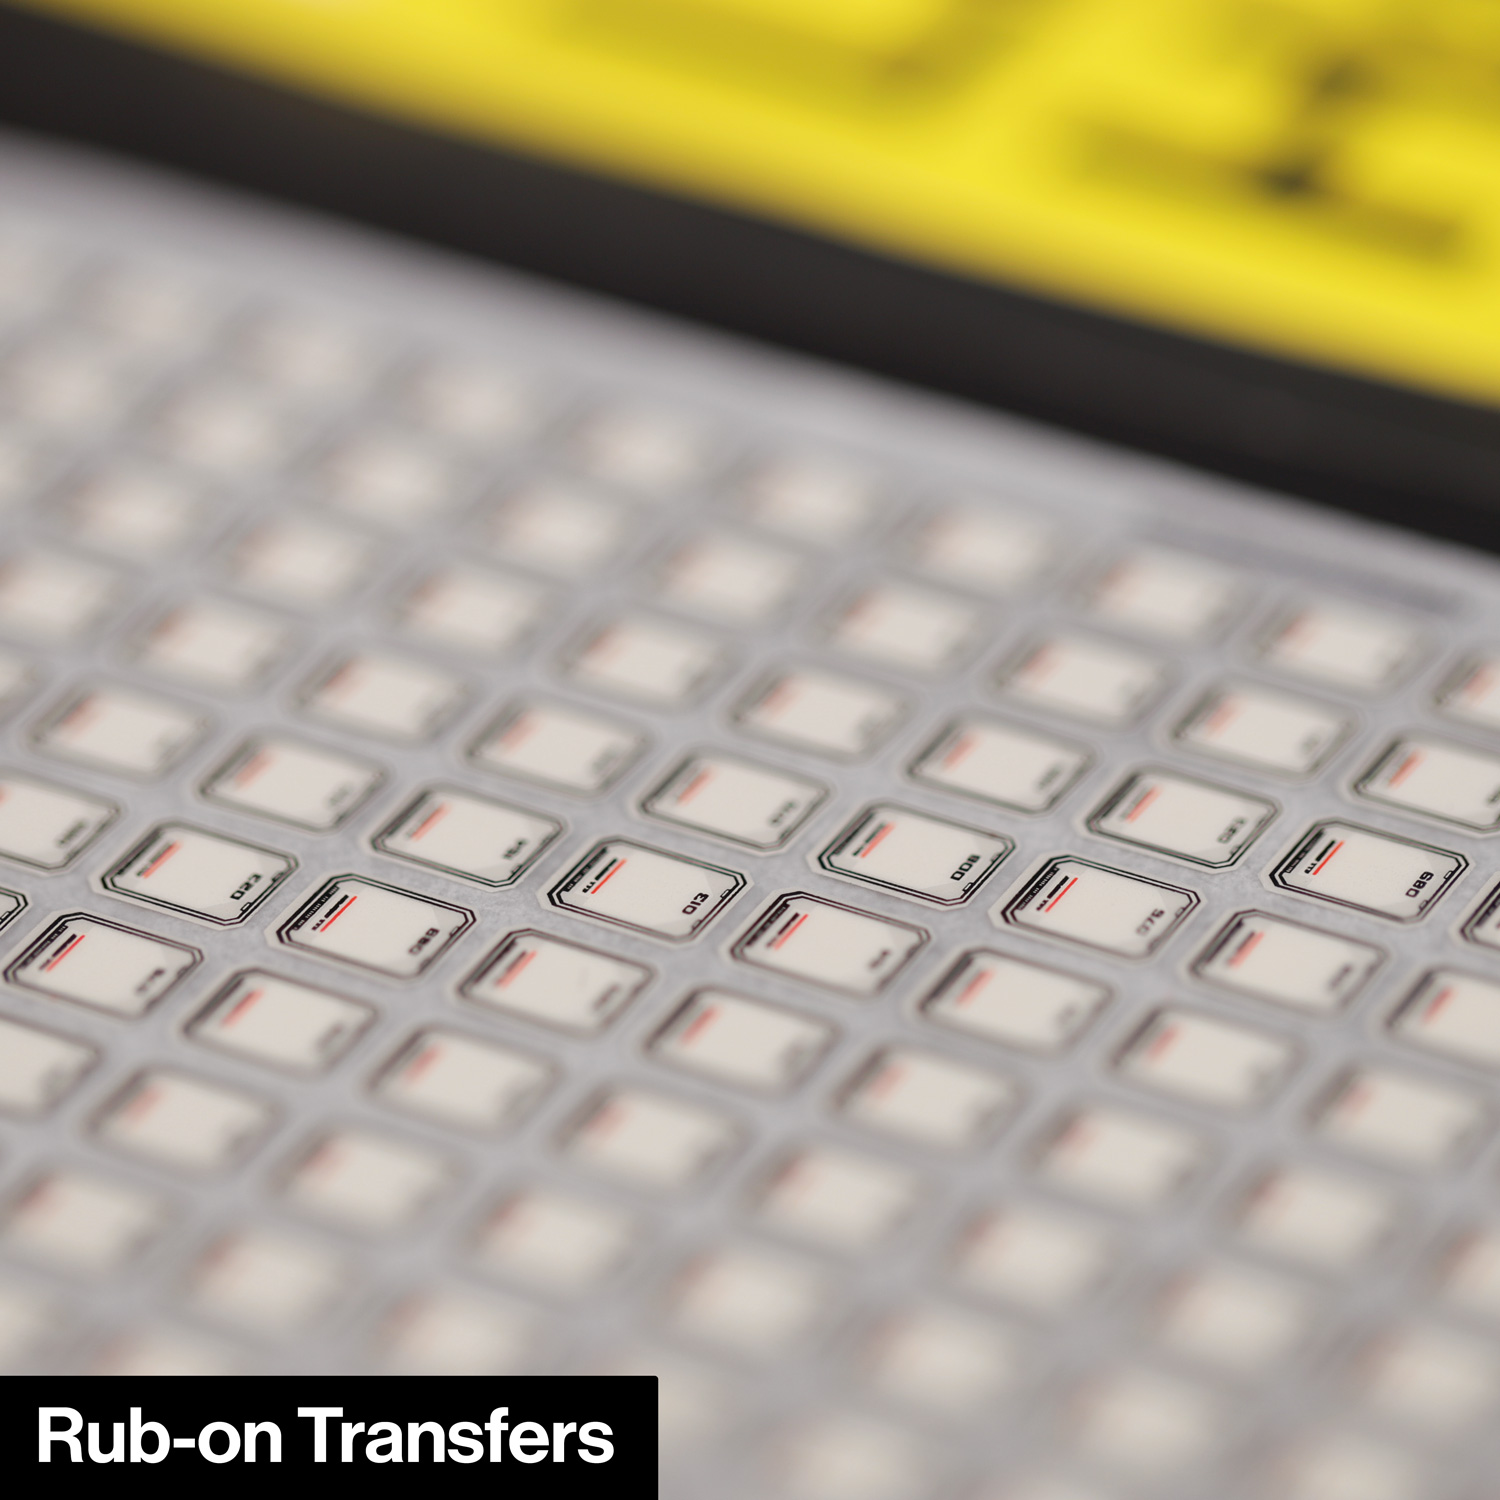
500 hatches are provided within these sets, so plenty of spares for any slip-ups or future repairs.
These updated designs also correct the upside down print on the standard hatches. The red line you see printed on the standard parts is the underline of the U.S.S. Enterprise logo, and should be at the top, not the bottom.
In short, no. The original ILM studio model only had six unique hatch numbers, randomly placed and repeated across the model.
I offer two sets, one matching this repeated style, and the other numbered sequentially from 001 to 500, giving each of your lifeboat hatches a unique number if you prefer. I would however still recommend randomly placing them across the model, as on the original ILM studio model.
Whilst there are blueprints available of the original U.S.S. Enterprise NCC-1701-D, they only show the positions of the six repeated numbers across the original model. So, these are not applicable or helpful here, and not 100% reliable either as there are numerous errors across the blueprints.
So, given that the original studio model never had uniquely numbered hatches, there are no correct or incorrect sequences or positions to place your numbered hatches.
It is advised that you place them randomly across your model rather than following a set sequence, but it’s totally up to you of course! If you do choose to follow a set sequence, bear in mind you risk breaking that sequence if you damage a sticker or transfer during application. By randomly placing the numbered hatches across your model, you avoid this risk.
It could also be argued that a random arrangement is more realistic. If, for example, a hatch or a number of hatches were ejected in an emergency in real life, they may not all be returned to their original positions. They would also likely be swapped around for maintenance or repairs, as the hatches are all uniform in shape. All fantasy of course, but worth considering, and further supporting the case for a random placement.
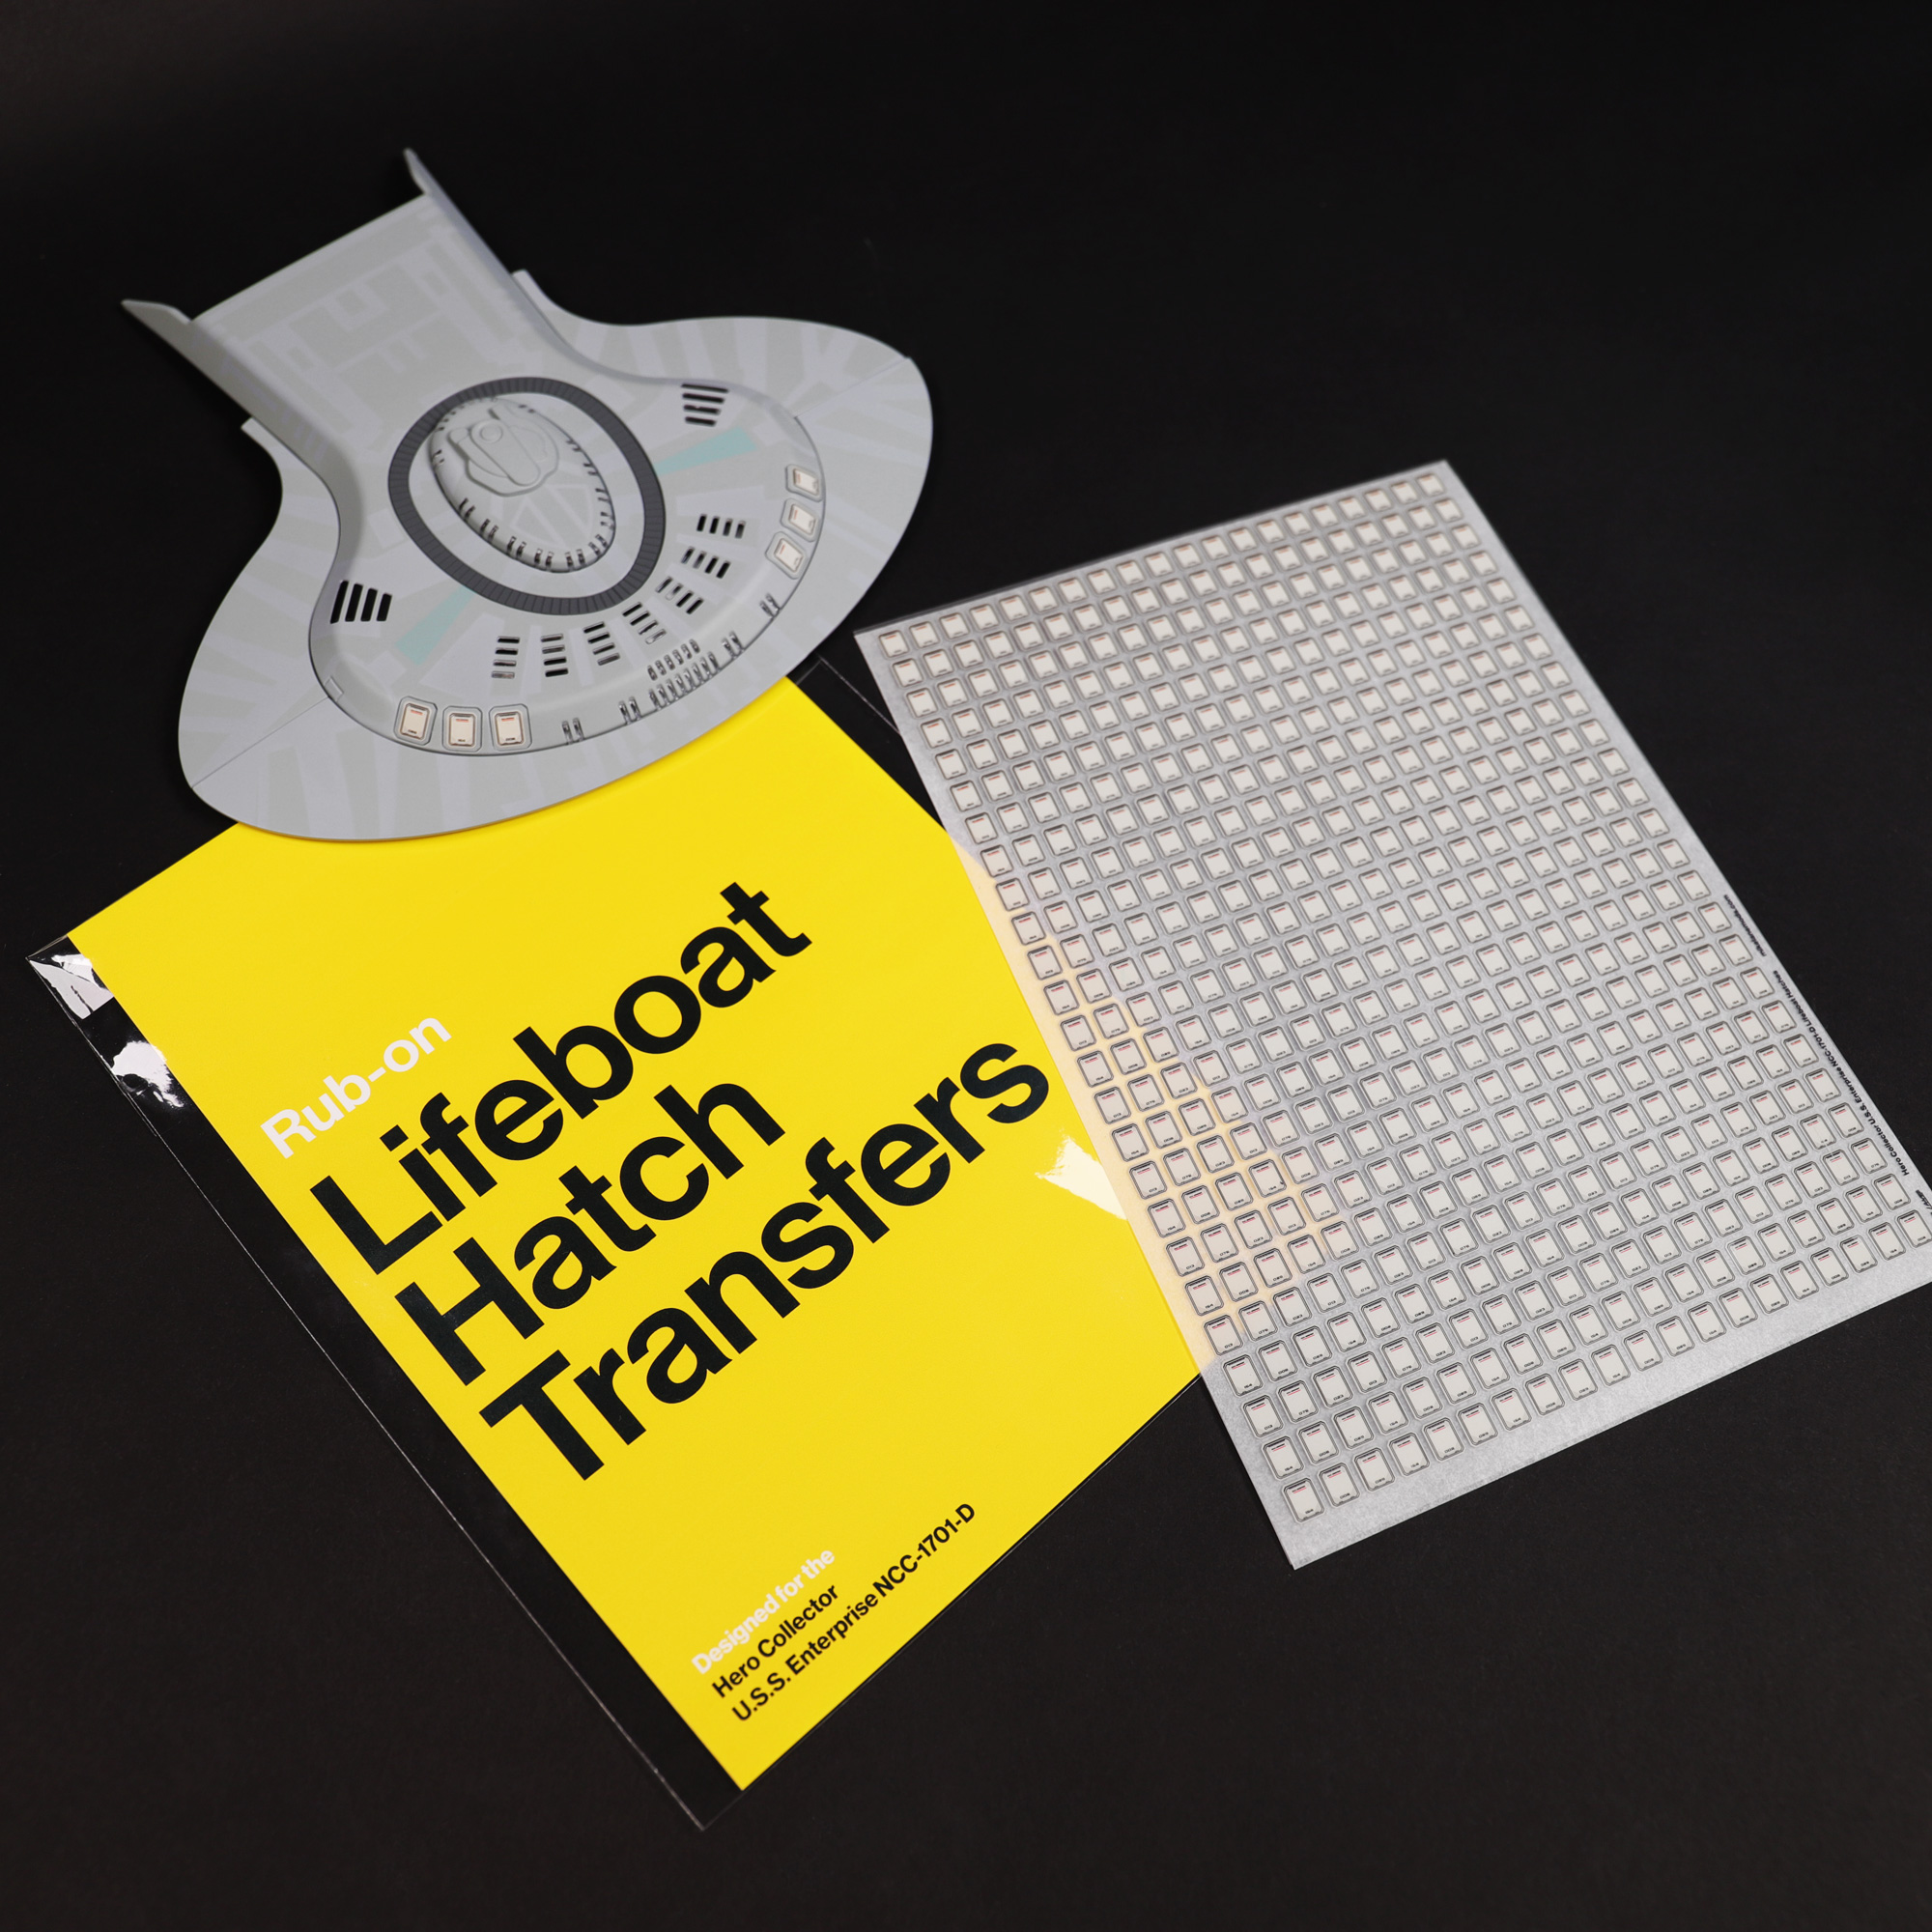
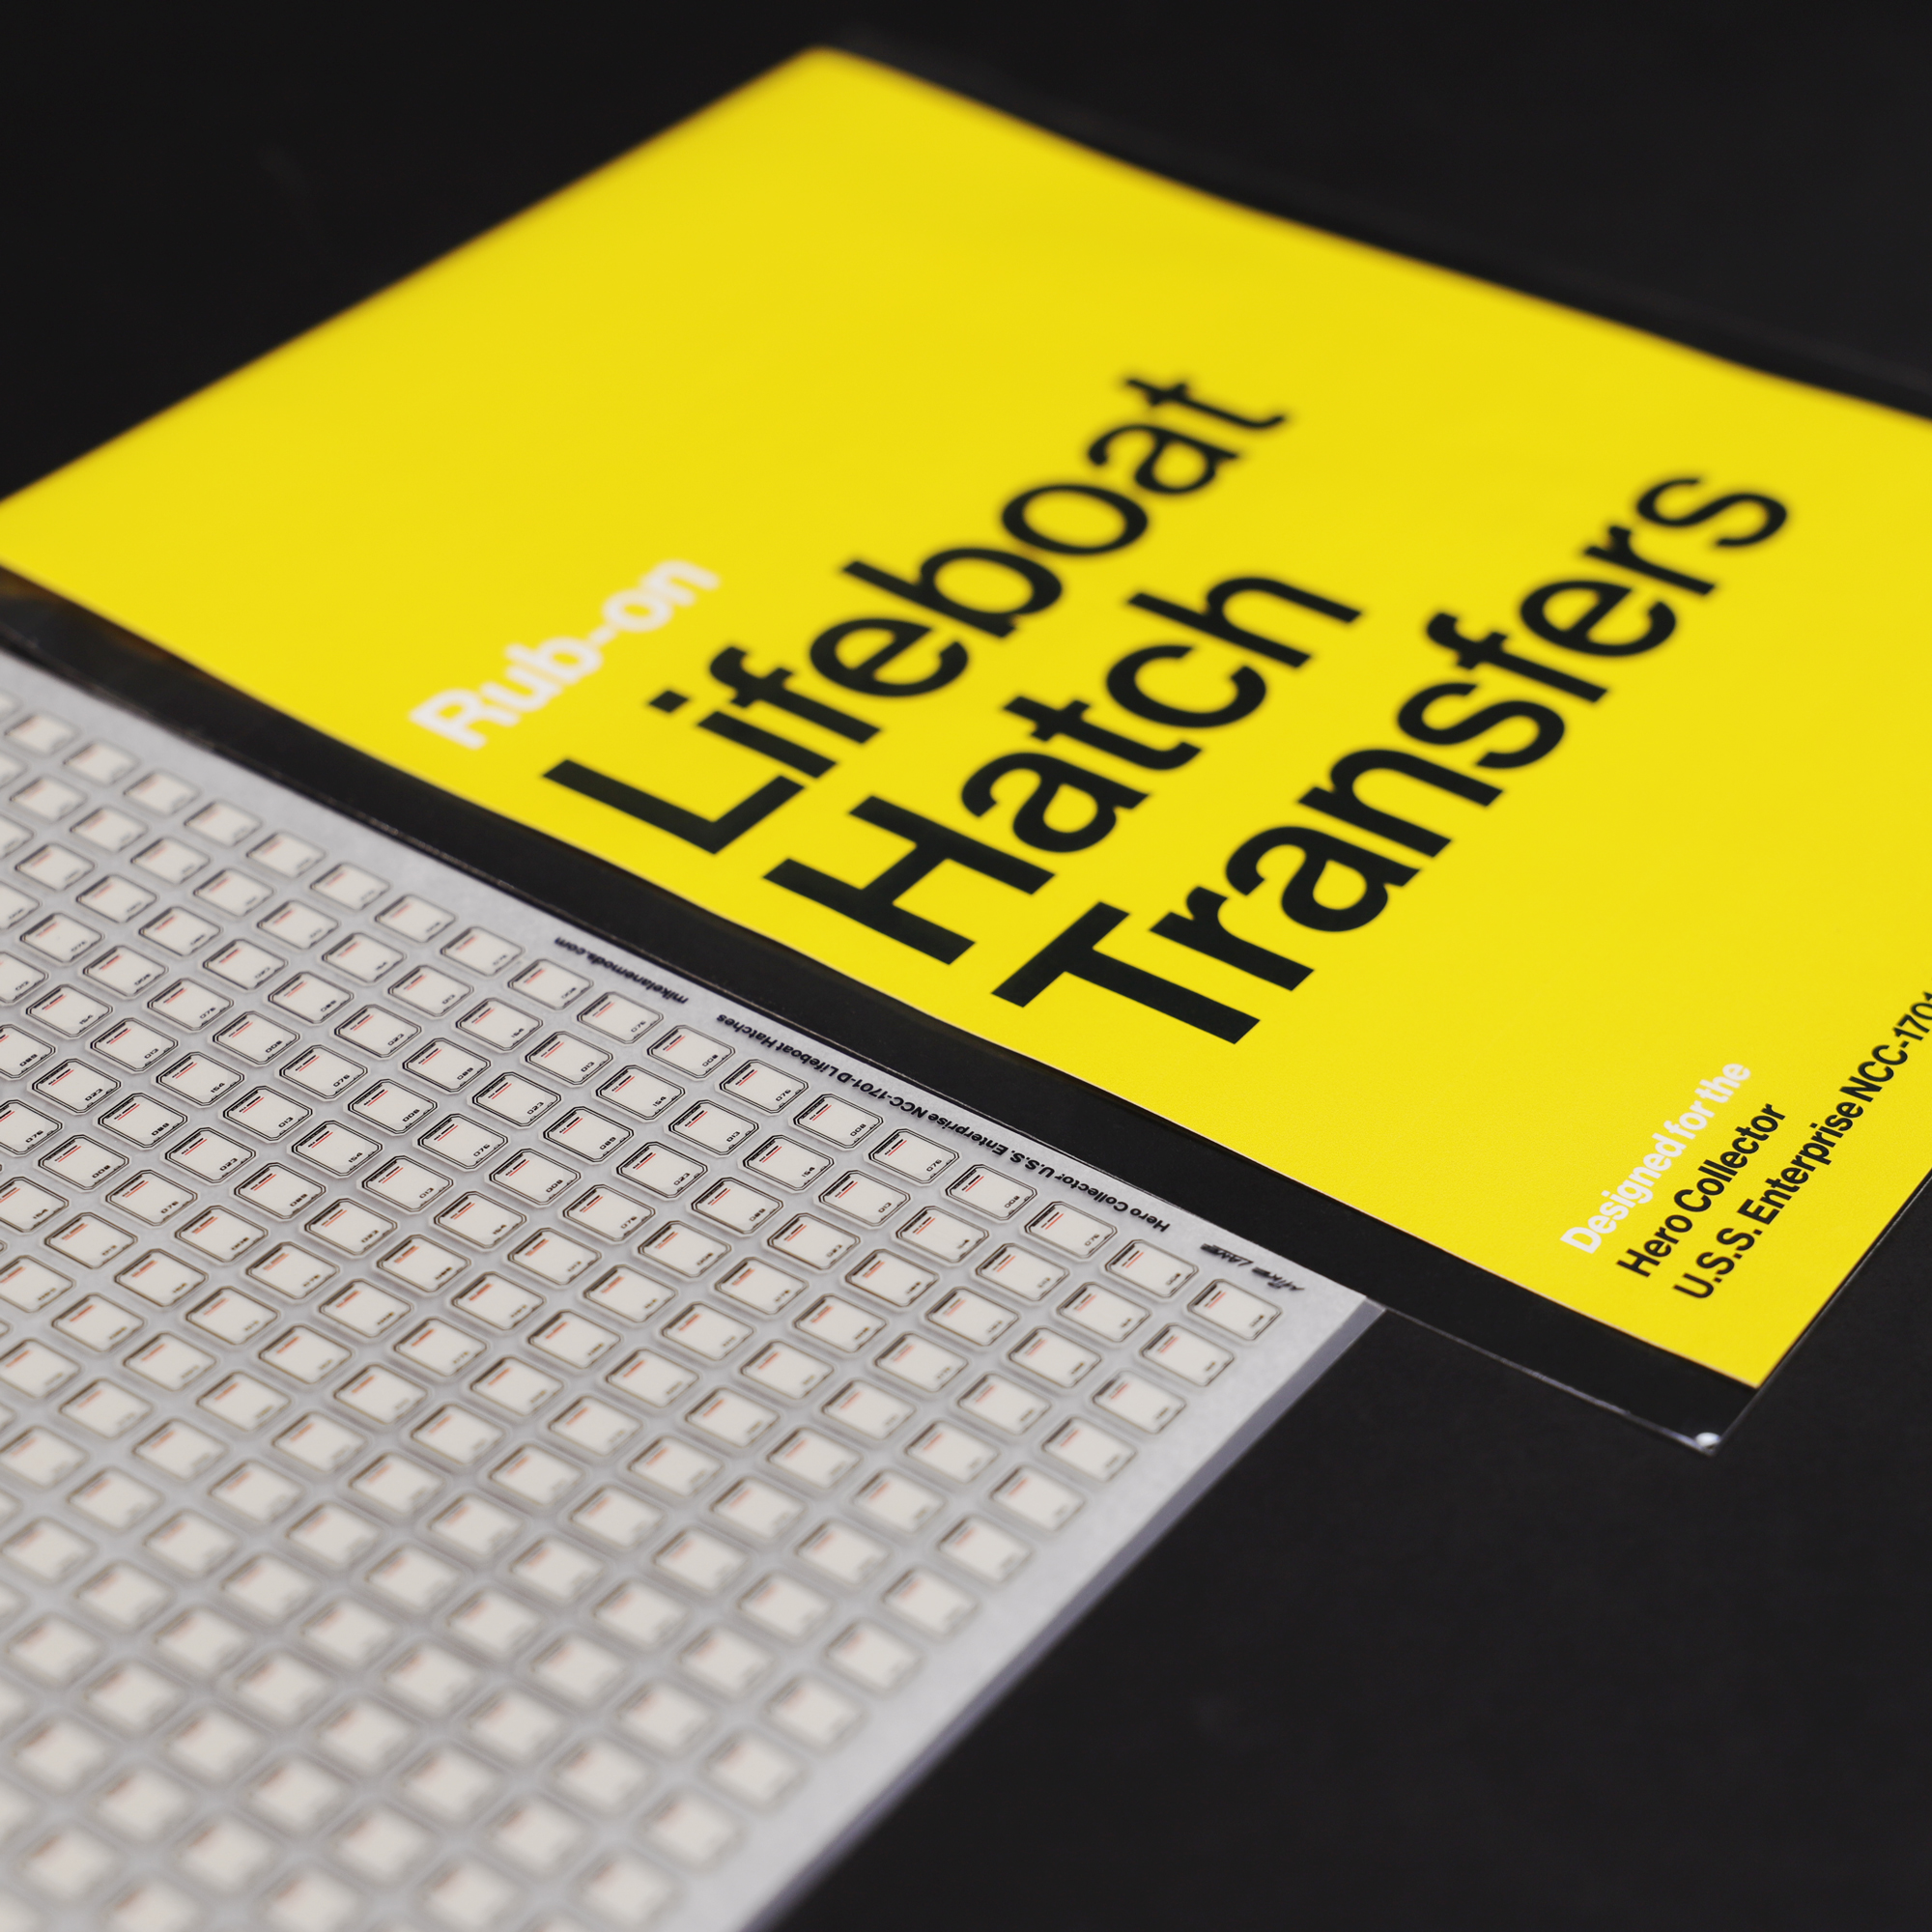
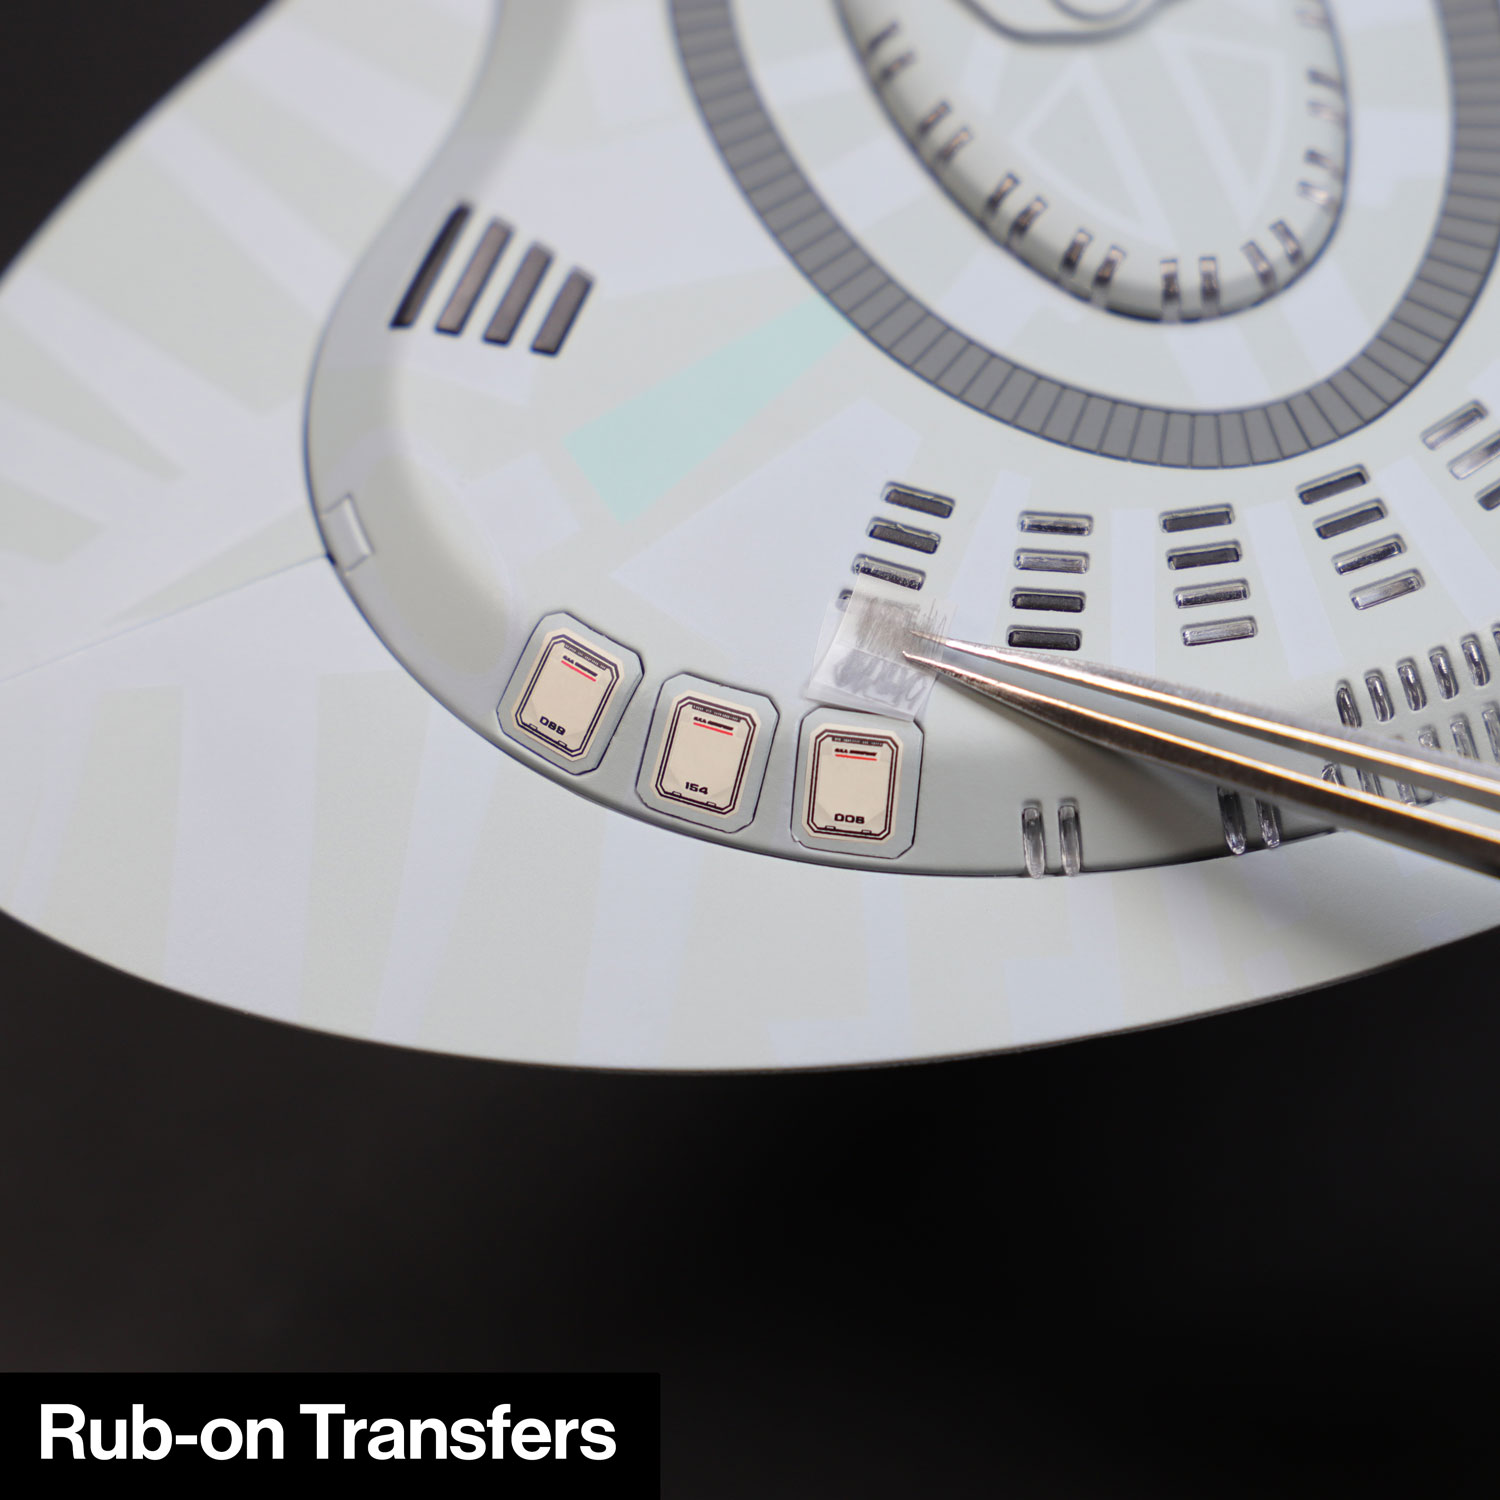
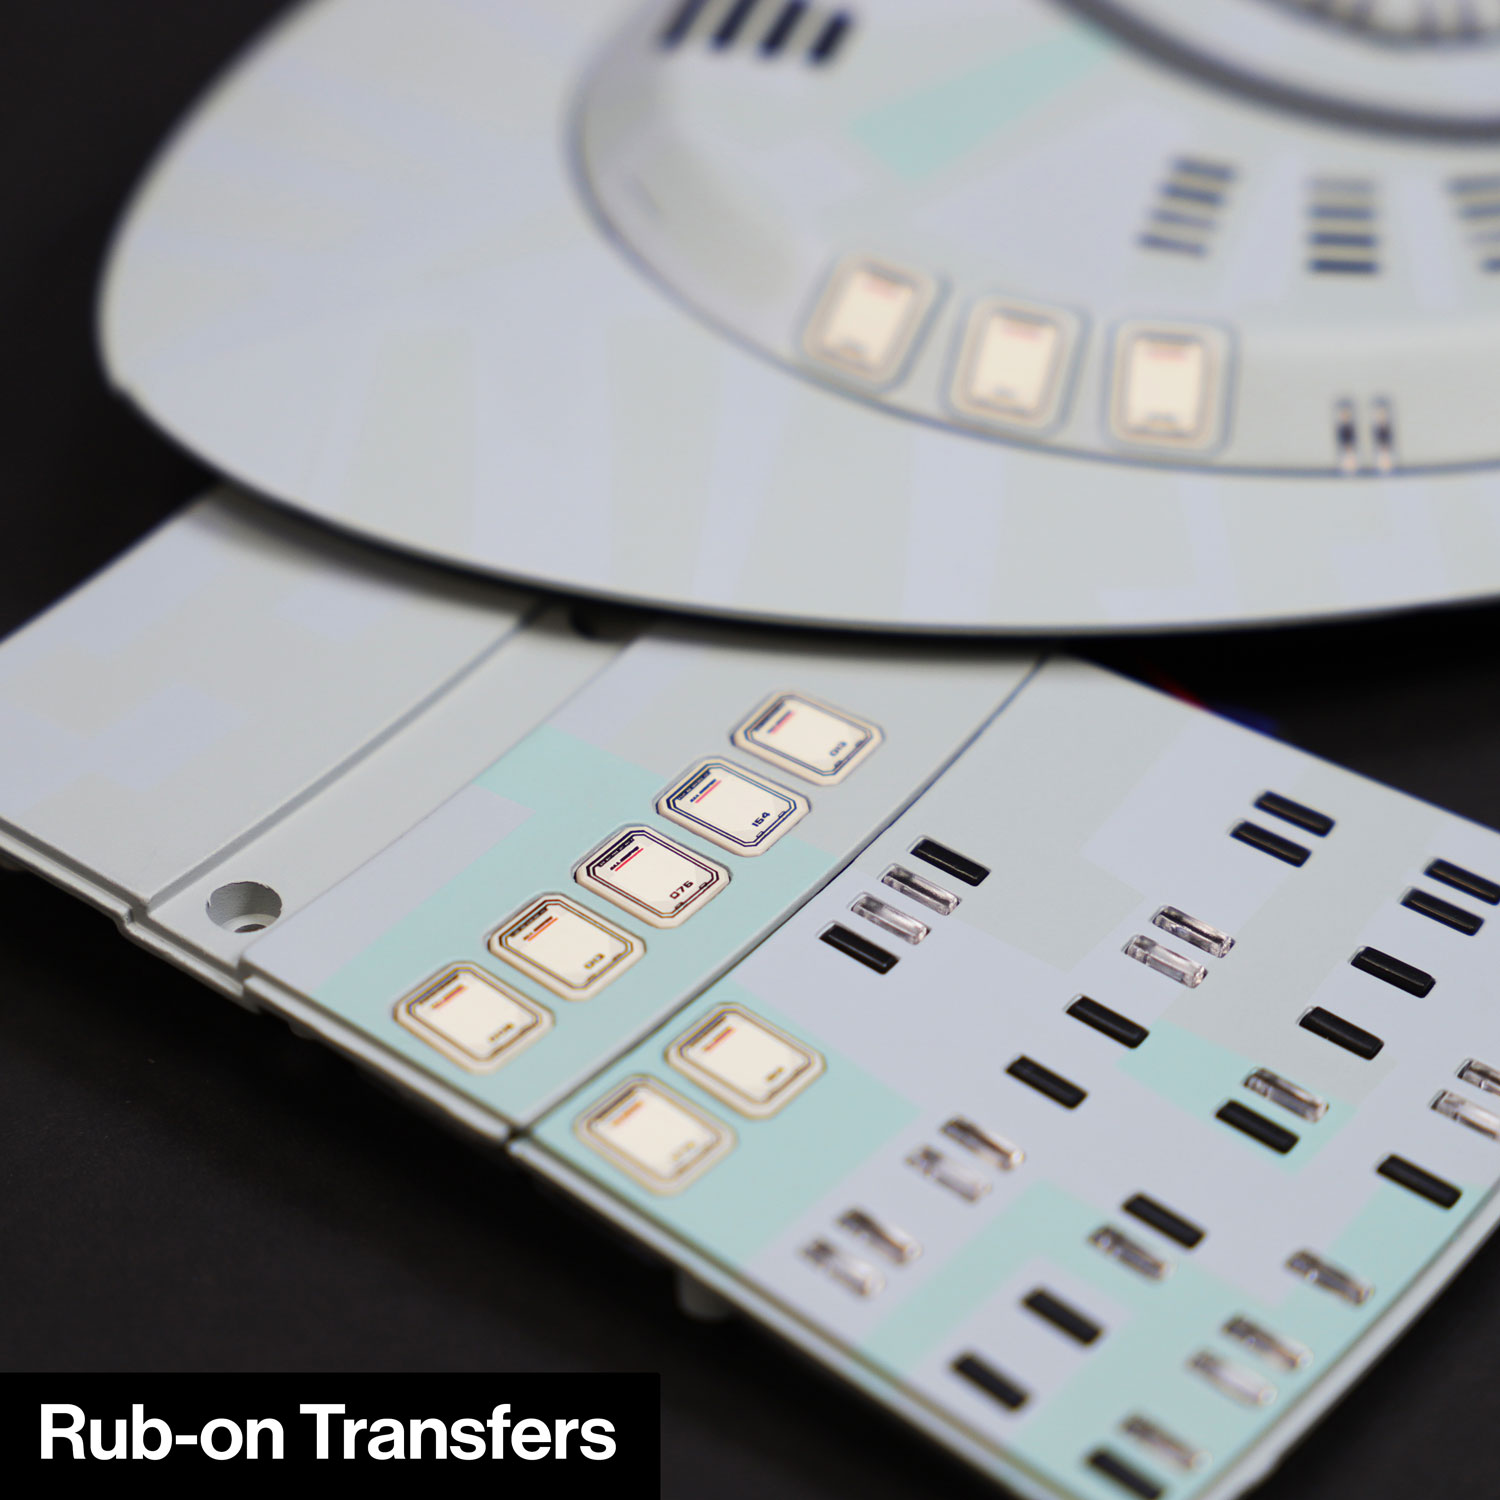
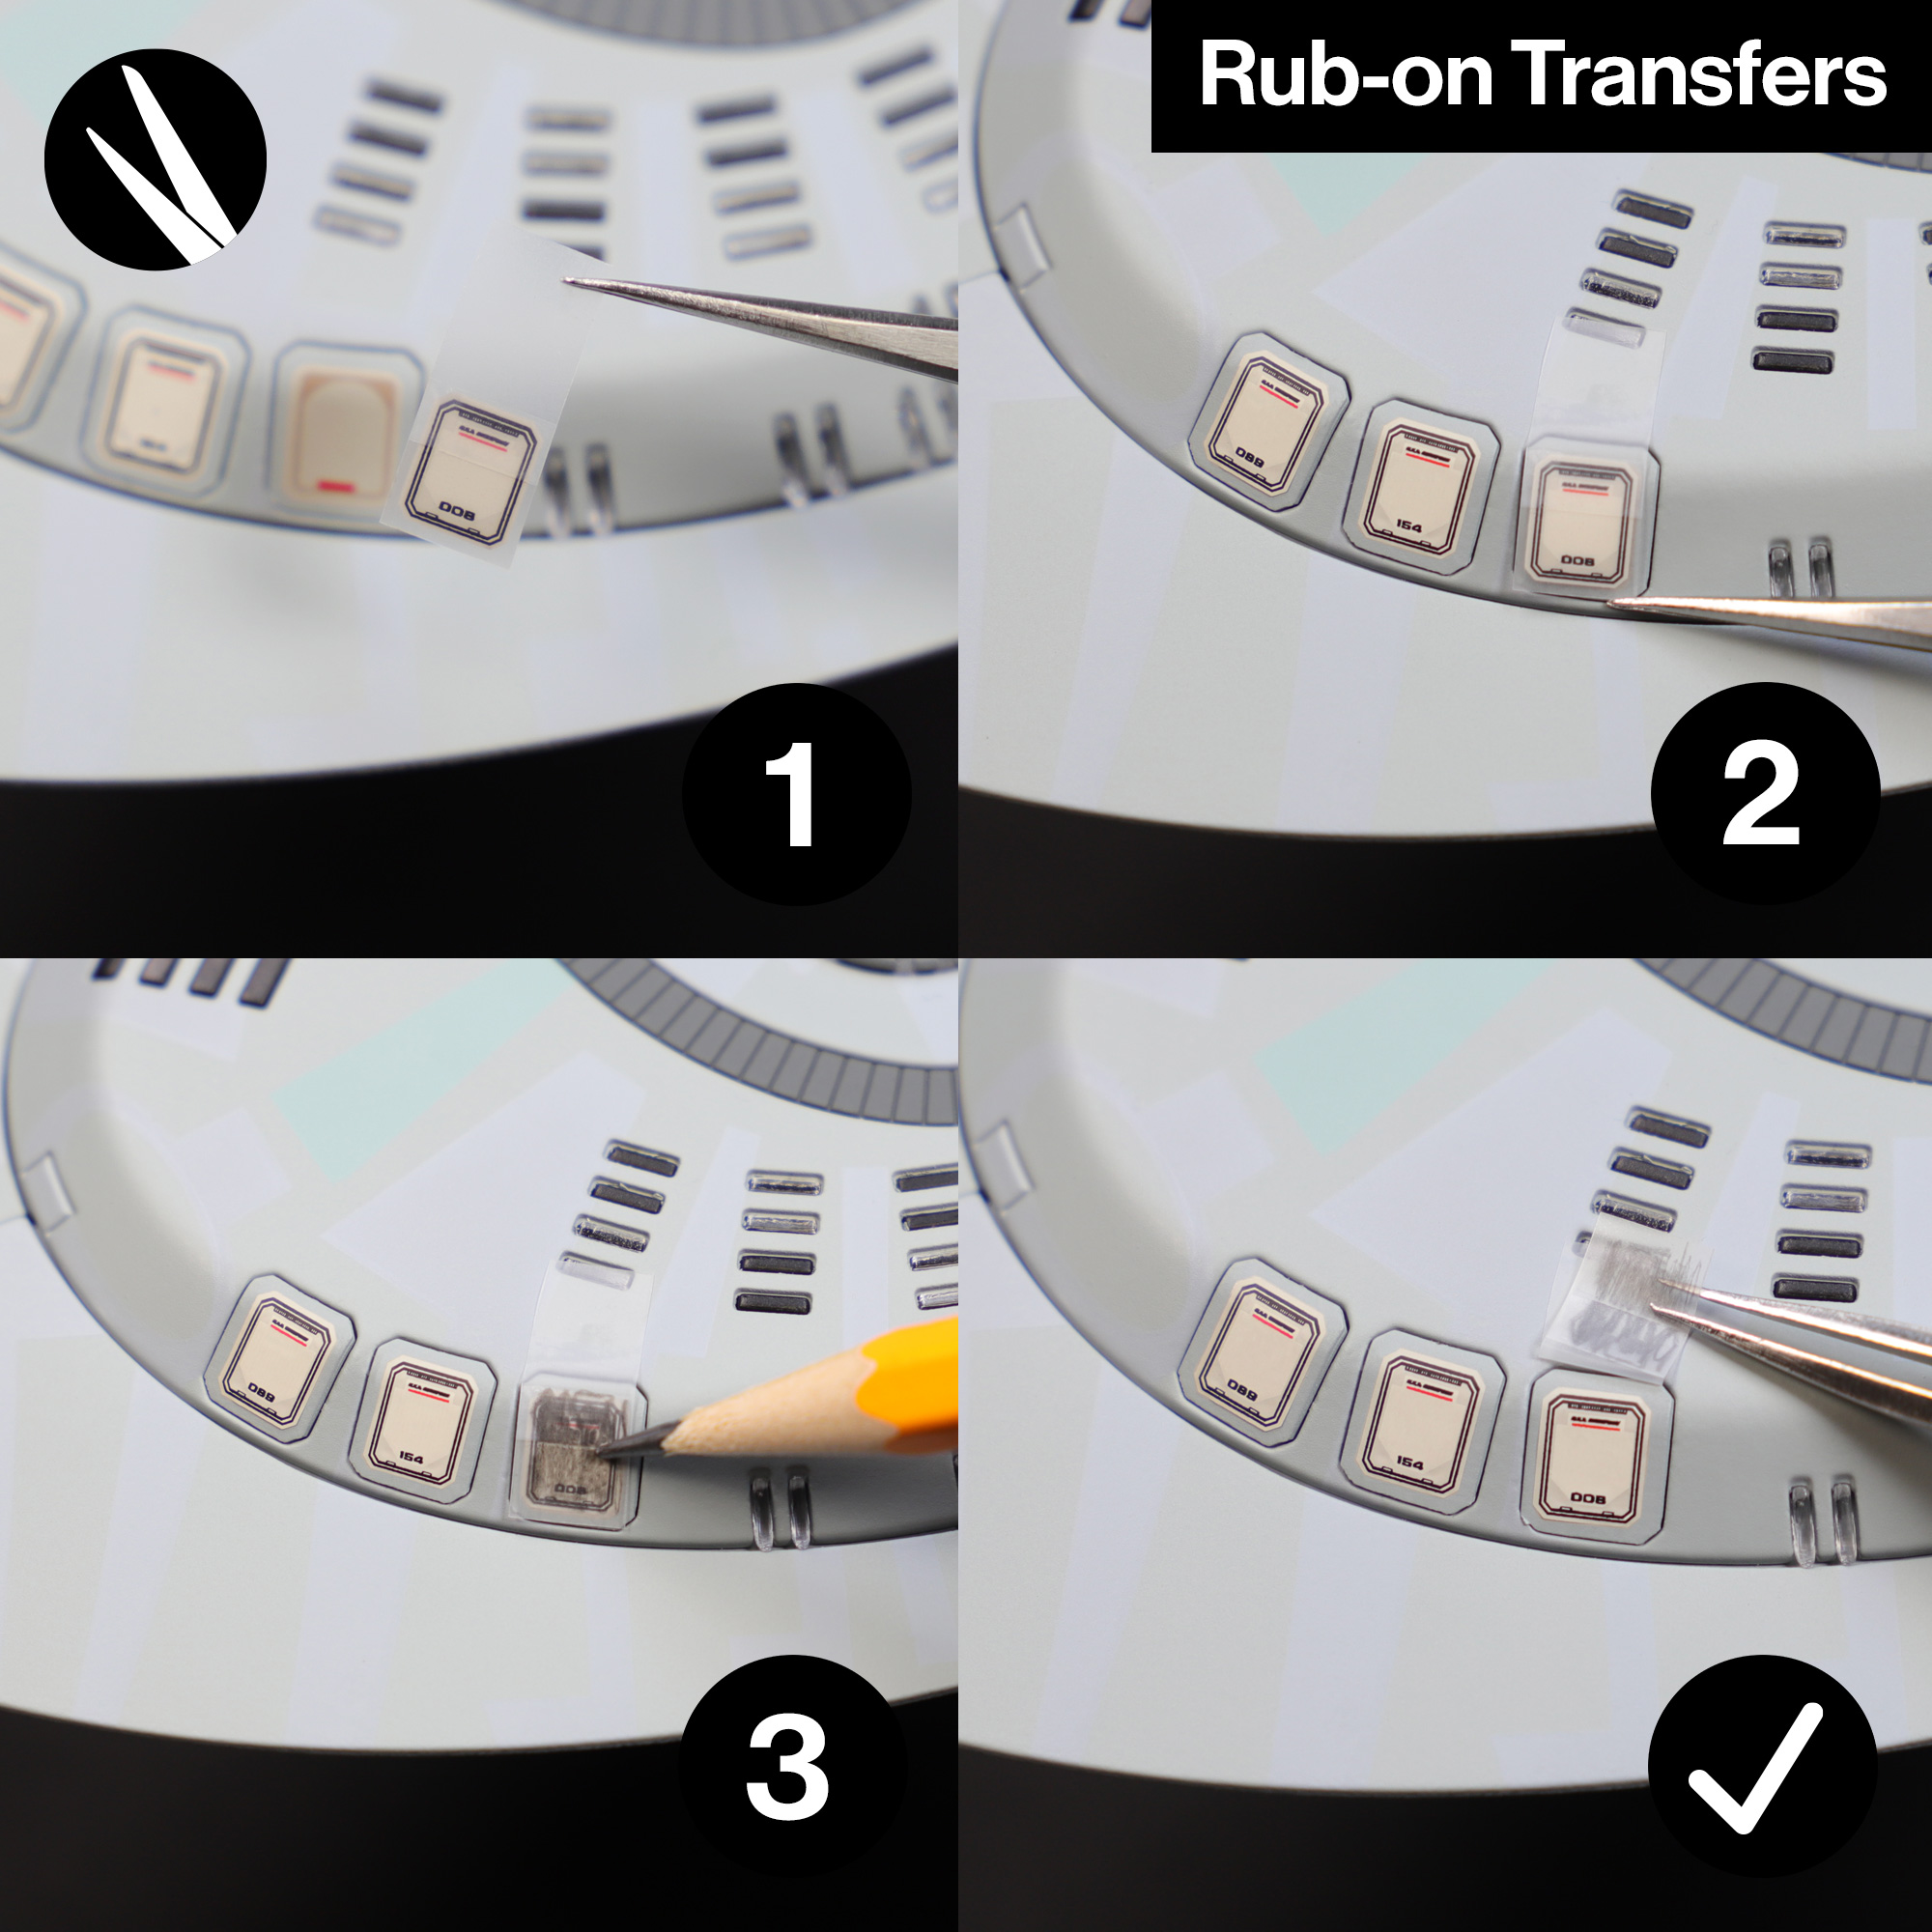
If you’re not already familiar with my rub-on transfer sets, they use specialised Pantone® inks with a high-strength self-adhesive backing, which when rubbed over with a pencil, transfer the designs directly to the surface of your model, looking as if the design is painted directly onto the model. No soaking, no residue, and no raised edges. Just a clean design transferred directly to your model.
Rub-on transfers have a much higher clarity, super-sharp print compared to stickers. They also have the advantage of not having any raised edges.
Because of the specialised process, rub-on transfers are considerably more technical, time-consuming and expensive to produce compared to stickers, but the difference in price is reflected in the finish and print quality.
Depending on the model and application, they generally look much more realistic and impressive when applied, designed to look like they were originally printed on the model parts.
Whilst my vinyl sticker sets are of course still printed in high resolution and to a very high standard, if you’re looking for the ultimate upgrade for your model – rub-on transfers are the way to go!
Using detailed blueprints and hundreds of close-up reference photos to ensure maximum accuracy, these sets add essential detail missing from the standard lifeboat hatches, also known as escape pods.
Easy to apply and hugely transformative, they immediately give the already impressive two-foot long U.S.S. Enterprise NCC-1701-D model by Hero Collector added realism and authenticity.
With over 430 hatches across the starship, the hatch covers are numerous and very prominent, so more than ever the small details really matter.
500 hatches are provided within these sets, so plenty of spares for any slip-ups or future repairs.
These updated designs also correct the upside down print on the standard hatches. The red line you see printed on the standard parts is the underline of the U.S.S. Enterprise logo, and should be at the top, not the bottom.
In short, no. The original ILM studio model only had six unique hatch numbers, randomly placed and repeated across the model.
I offer two sets, one matching this repeated style, and the other numbered sequentially from 001 to 500, giving each of your lifeboat hatches a unique number if you prefer. I would however still recommend randomly placing them across the model, as on the original ILM studio model.
Whilst there are blueprints available of the original U.S.S. Enterprise NCC-1701-D, they only show the positions of the six repeated numbers across the original model. So, these are not applicable or helpful here, and not 100% reliable either as there are numerous errors across the blueprints.
So, given that the original studio model never had uniquely numbered hatches, there are no correct or incorrect sequences or positions to place your numbered hatches.
It is advised that you place them randomly across your model rather than following a set sequence, but it’s totally up to you of course! If you do choose to follow a set sequence, bear in mind you risk breaking that sequence if you damage a sticker or transfer during application. By randomly placing the numbered hatches across your model, you avoid this risk.
It could also be argued that a random arrangement is more realistic. If, for example, a hatch or a number of hatches were ejected in an emergency in real life, they may not all be returned to their original positions. They would also likely be swapped around for maintenance or repairs, as the hatches are all uniform in shape. All fantasy of course, but worth considering, and further supporting the case for a random placement.
If you’re not already familiar with my rub-on transfer sets, they use specialised Pantone® inks with a high-strength self-adhesive backing, which when rubbed over with a pencil, transfer the designs directly to the surface of your model, looking as if the design is painted directly onto the model. No soaking, no residue, and no raised edges. Just a clean design transferred directly to your model.
Rub-on transfers have a much higher clarity, super-sharp print compared to stickers. They also have the advantage of not having any raised edges.
Because of the specialised process, rub-on transfers are considerably more technical, time-consuming and expensive to produce compared to stickers, but the difference in price is reflected in the finish and print quality.
Depending on the model and application, they generally look much more realistic and impressive when applied, designed to look like they were originally printed on the model parts.
Whilst my vinyl sticker sets are of course still printed in high resolution and to a very high standard, if you’re looking for the ultimate upgrade for your model – rub-on transfers are the way to go!
You must be logged in to post a review.
Tony Sandell (verified owner) –
Fast Delivery and well packed, the decals make a huge difference to the look of the model.
Quite easy to apply , my only criticism is they are printed too close together which doesn’t leave much surrounding paper once the decal has been positioned on the hatch so when you try and hold it in place and then rub over the decal with a pencil it makes it more awkward than it should have been.
Kevin Mintmier (verified owner) –
Great mod, excellent quality, and the shipping was prompt. Very satisfied. The hatch transfers just arrived in the United States, quickly and with no damage. Thanks, Mike!
Dallas Haigh (verified owner) –
Delivery was very quick, much quicker than expected. Looking forward to putting these on.
Thanks Mike.
Dan Keating (verified owner) –
Arrived today and am delighted with them. The quality is first class and easy to apply the transfers. Couldn't be happier with them. Thank you Mike Lane.