

Issue 02 – Metal Front Bumper Grilles
Issue 02 – Standalone Ultimate Scanner (also included within Ultimate Electronic Kit)
Issue 03 – Metal Drilled Brake Discs (Driver side front)
Issue 03 – Brake Calliper Transfers (Driver side front)
Issue 03 – Magnetic Hub Cap Conversion Kit (Driver side front)
Issue 04 – Metal Dashboard Grilles
Issue 05 – Standalone Ultimate Scanner (also included within Ultimate Electronic Kit)
Issue 09 – Metal Drilled Brake Discs (Passenger side front)
Issue 09 – Brake Calliper Transfers (Passenger side front)
Issue 16 – Magnetic Hub Cap Conversion Kit (Passenger side front)
Issue 37 – Magnetic Hub Cap Conversion Kit (Driver side rear)
Issue 39 – Magnetic Hub Cap Conversion Kit (Passenger side rear)
Issue 42 Onwards – Ultimate Electronic Kit
Issue 44 – 2-in-1 Electronic Dashboard Monitors and Power Boost
Issue 49 – Front Carpets
Issue 52 – Front Carpets
Issue 52 – Floor Mats
Issue 52 – Heel and Toe Pads
Issue 58 – PMD Seat Badges
Issue 61 – PMD Seat Badge
Issue 66 – Trunk Carpets, Extension Cables
Issue 68 – Door Carpets, Badges and Rear Sail Panel Trims (Felt window protectors)
Issue 70 – Door Carpets, Badges and Rear Sail Panel Trims (Door carpets, felt window protectors)
Issue 71 – Door Carpets, Badges and Rear Sail Panel Trims (Felt window protectors)
Issue 73 – Door Carpets, Badges and Rear Sail Panel Trims (Door carpets, felt window protectors)
Issue 82 – Magnetic Tow Bar Receiver
Issue 103 – Door Carpets, Badges and Rear Sail Panel Trims (Rear sail panel trim)
Issue 106 – Door Carpets, Badges and Rear Sail Panel Trims (Rear sail panel trim)
Detailing tips
Aside from the mods available above, here you’ll find some additional, general detailing tips which will further improve the accuracy of your 1:8 Knight Rider KITT by Fanhome/DeAgostini/Altaya.
Issue 51 – The armrest

 I recommend painting the armrest (part 51D) black to accurately match how it looked in KITT. The cream armrest was an unfortunate inaccuracy carried over from a replica KITT used for the production of this model. To repaint this, I would recommend a thin coat of Tamiya Fine Surface Primer Light Grey, followed by two thin coats of Tamiya TS-6 Matt Black and an optional final coat of Tamiya TS-80 Flat Clear to protect the paint.
Issue 57 and 60 – The seat adjustment levers

 The adjustment mechanisms on the side of the seats (parts 57A, 57B, 60A and 60B) should be tan in colour with a black lever, rather than all black. To repaint these, first mask off the levers (we want to keep those parts black). For the rest of the mechanisms we will repaint them tan. I would recommend a thin coat of Tamiya Fine Surface Primer Light Grey, followed by two thin coats of Tamiya Acrylic Mini XF-78 Wooden Deck Tan and an optional final coat of Tamiya TS-80 Flat Clear to protect the paint.
Spray painting tips
When spray painting, ensure that all parts are disconnected from the model and are painted in isolation. Ensure you are in a well-ventilated area and have made suitable preparations to avoid any overspray on to surrounding objects.
For small projects like these, a portable modelling spray booth such as this one is highly recommended, and is also great value.
However, if you don’t have access to one of these, spraying into a humble cardboard box outside in dry weather will suffice!

If you’re new to spray painting, always test and practice on something other than your model first. Use thin coats and start your spray before and end it past the piece you are painting – rather than just blasting directly at the piece.
Multiple thin coats will always be better than one thick coat – thin coats will give a better finish and will avoid paint runs and cracking. It’s also easier to control the paint and stop if you’re unhappy with anything. If you spot an imperfection or any dust in your paint for example, stop, let it fully dry and then you’ll be able to lightly sand it back using a fine 1000/1800 sanding sponge and then continue where you left off.
I would always recommend giving Tamiya aerosol paints 30 minutes between coats, and at least an hour before you fully handle the finished piece. The longer you leave it to dry the less risk there is of marking the paint or leaving finger prints.
Forward thinking
My Build Planner is designed as a handy reference if you’re thinking about incorporating some of my mods into your own KITT model build-up. It enables you to plan ahead and to think about the upgrades you might want to order as you go along.
The installation of some of my mods will of course need to be carefully scheduled to coincide with a specific stage of the build. In some cases, adding the next components on the partwork journey makes it very tricky – or even impossible – to backtrack to accommodate a mod. So it’s well worth planning for these additions in advance.
This also means it can make sense to hold off from proceeding with the project at some stages, and letting a few issues collect before continuing – this ensures you can allow time for mods to be ordered and delivered. I find that this delayed gratification can even make the process more enjoyable. A partwork model project like the K2000 can include some stages that don’t provide many new parts. Saving a few up to work on at once can make for a fun extended building session.
Taking it up a gear
The 1:8 KITT model is a brilliant replica of the futuristic car we all love from the original Knight Rider series. The construction quality is great and the features really bring a smile – from the red scanner lights to the opening doors and all the details inside this legendary 80s car.
Working through the build-up issues without deviating from the manufacturer’s design is a perfectly good approach, and will be enough for many modellers. But for me, an extra level of satisfaction can be found in upgrading, tweaking and correcting components of the model as I go.
So, if you too are looking forward to giving your KITT model an added touch of luxury and realism by adding my products, I hope you find this Build Planner a useful companion. It should help you blend your modding schedule with the official KITT build. And to whet your appetite for what’s in store as your very own K2000 takes shape over the months to come.
Latest K2000 KITT Knight Rider mods
-
In Stock
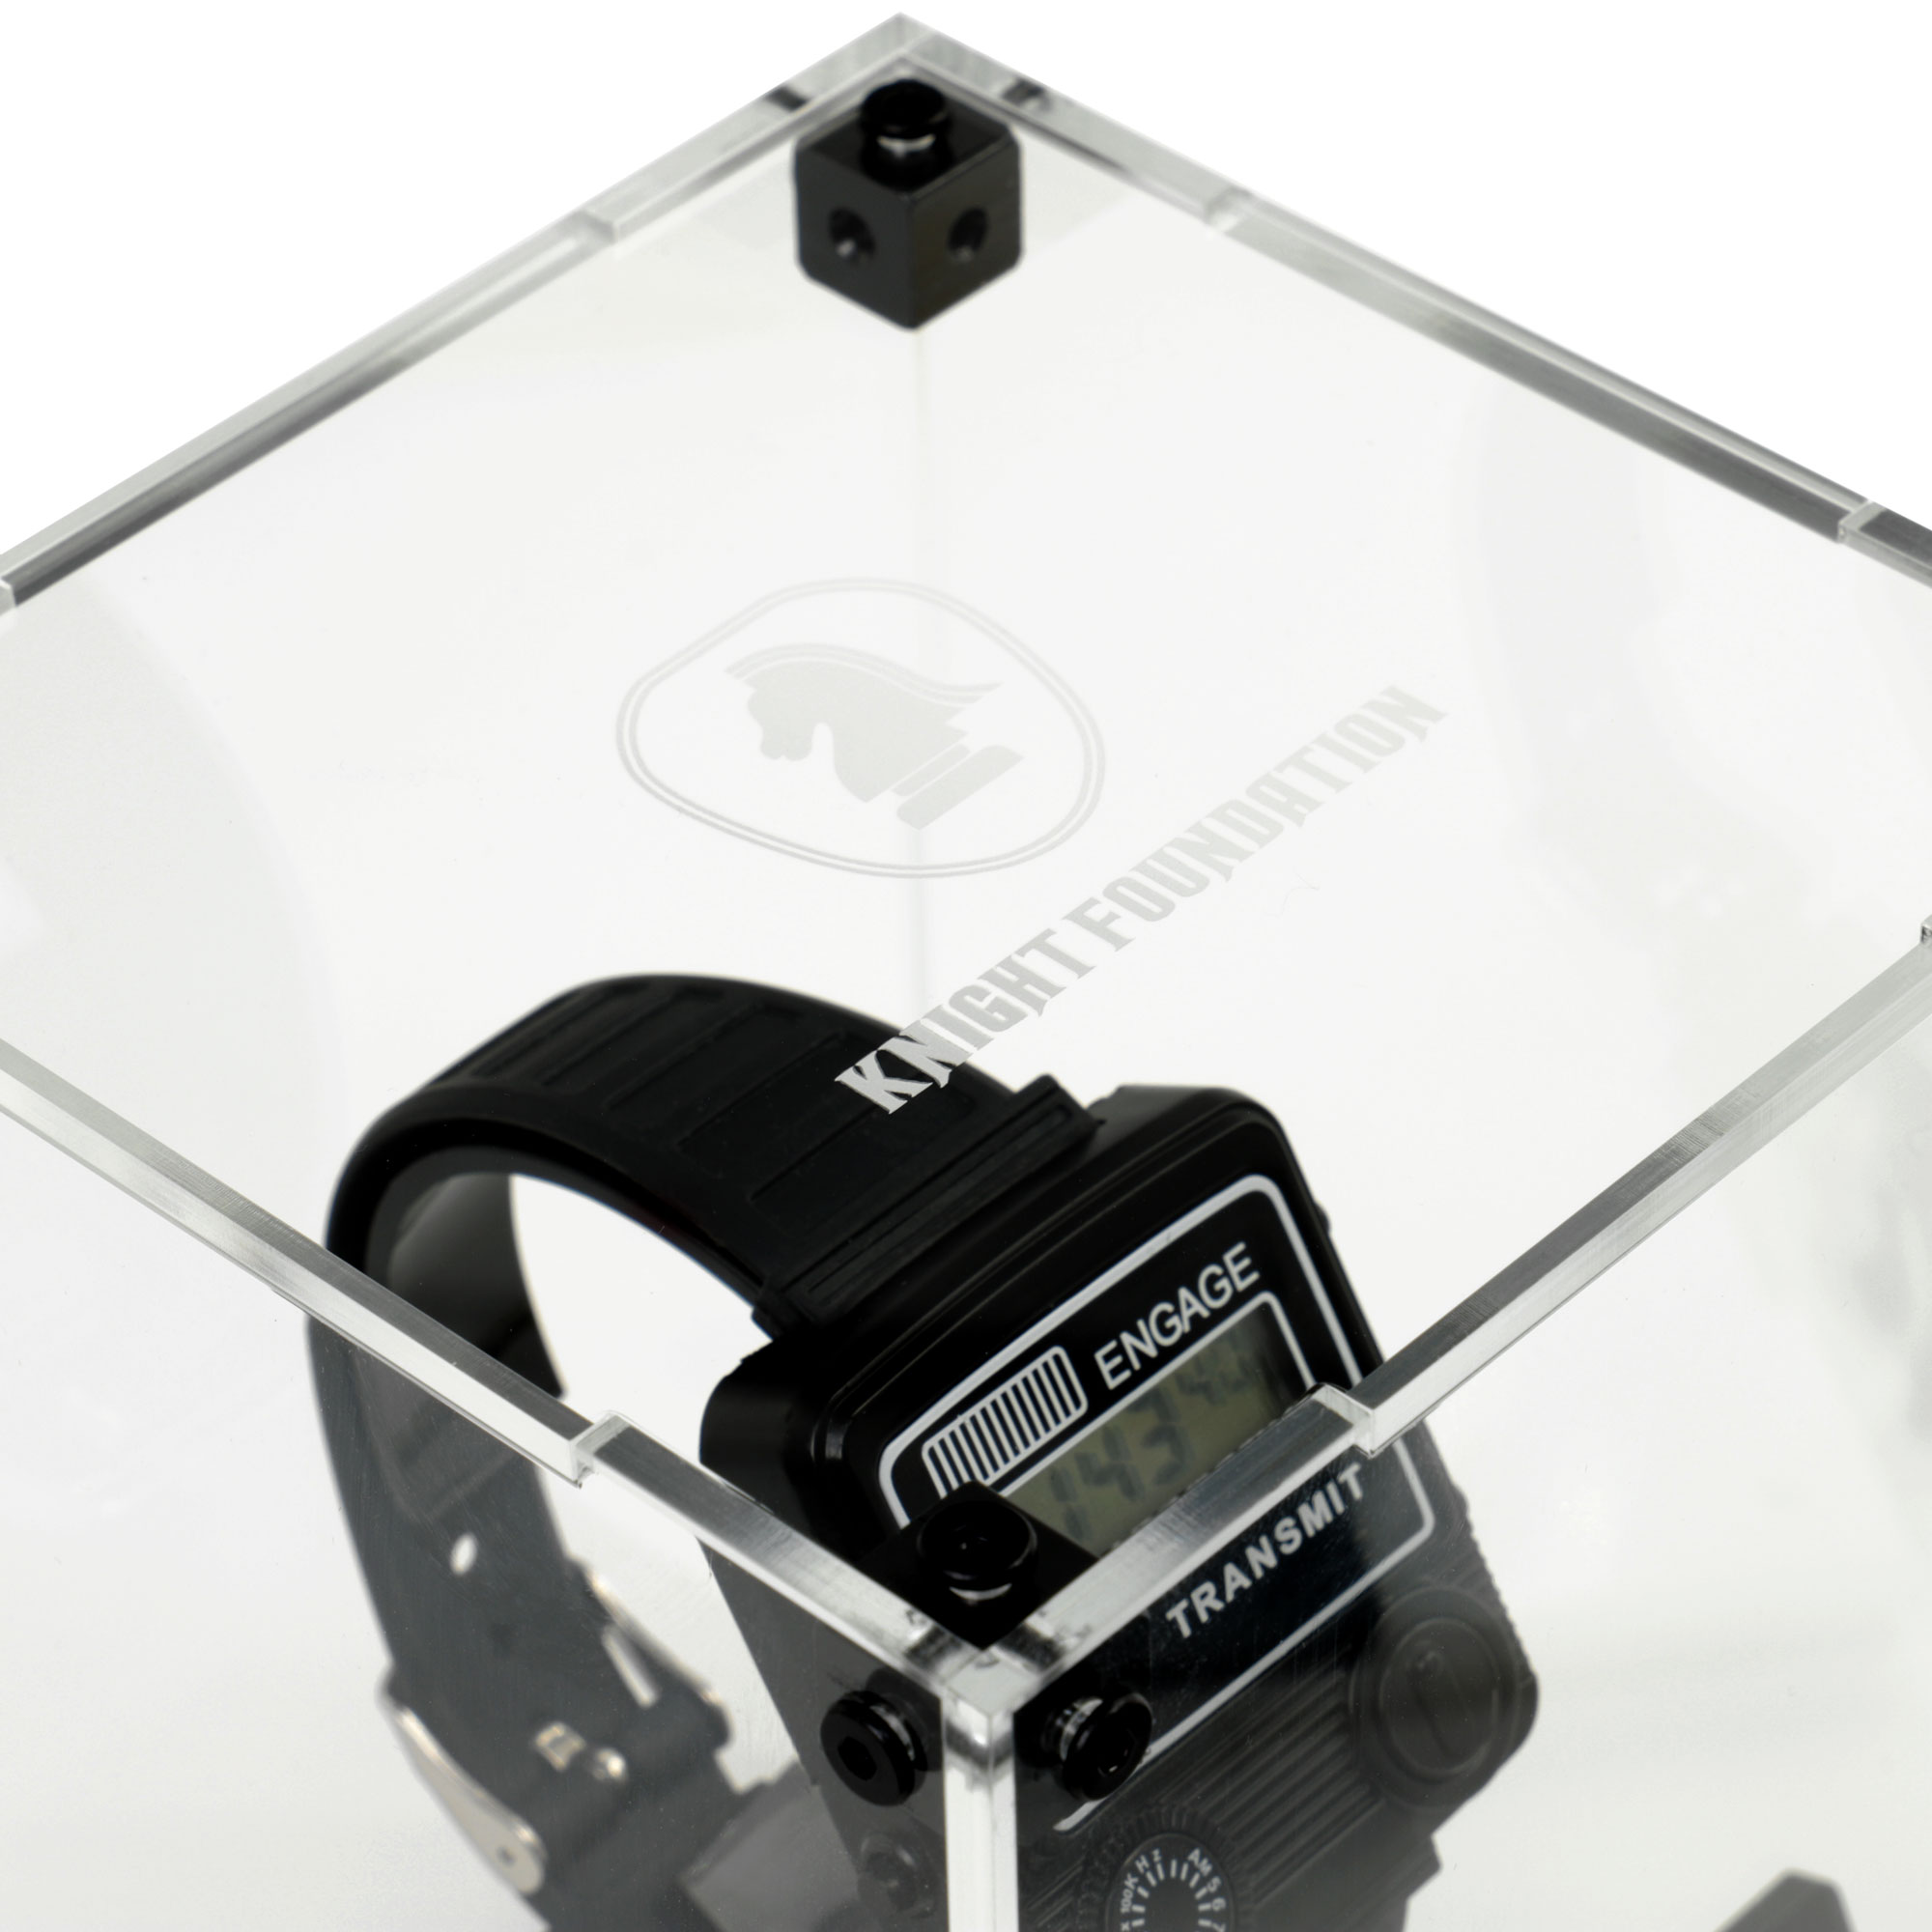
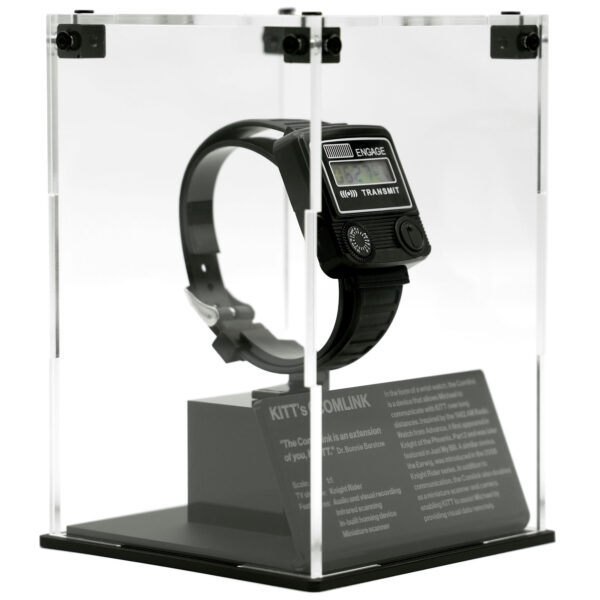
KITT Comlink Display Case with Watch Stand and Plaque
£60.00 incl VATAdd to basket -
Popular
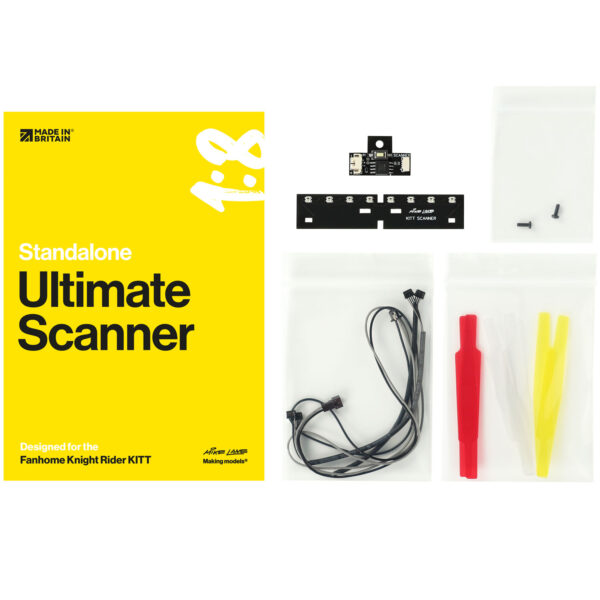
Ultimate Scanner – Standalone Kit
£38.40 incl VATAdd to basket -
In Stock
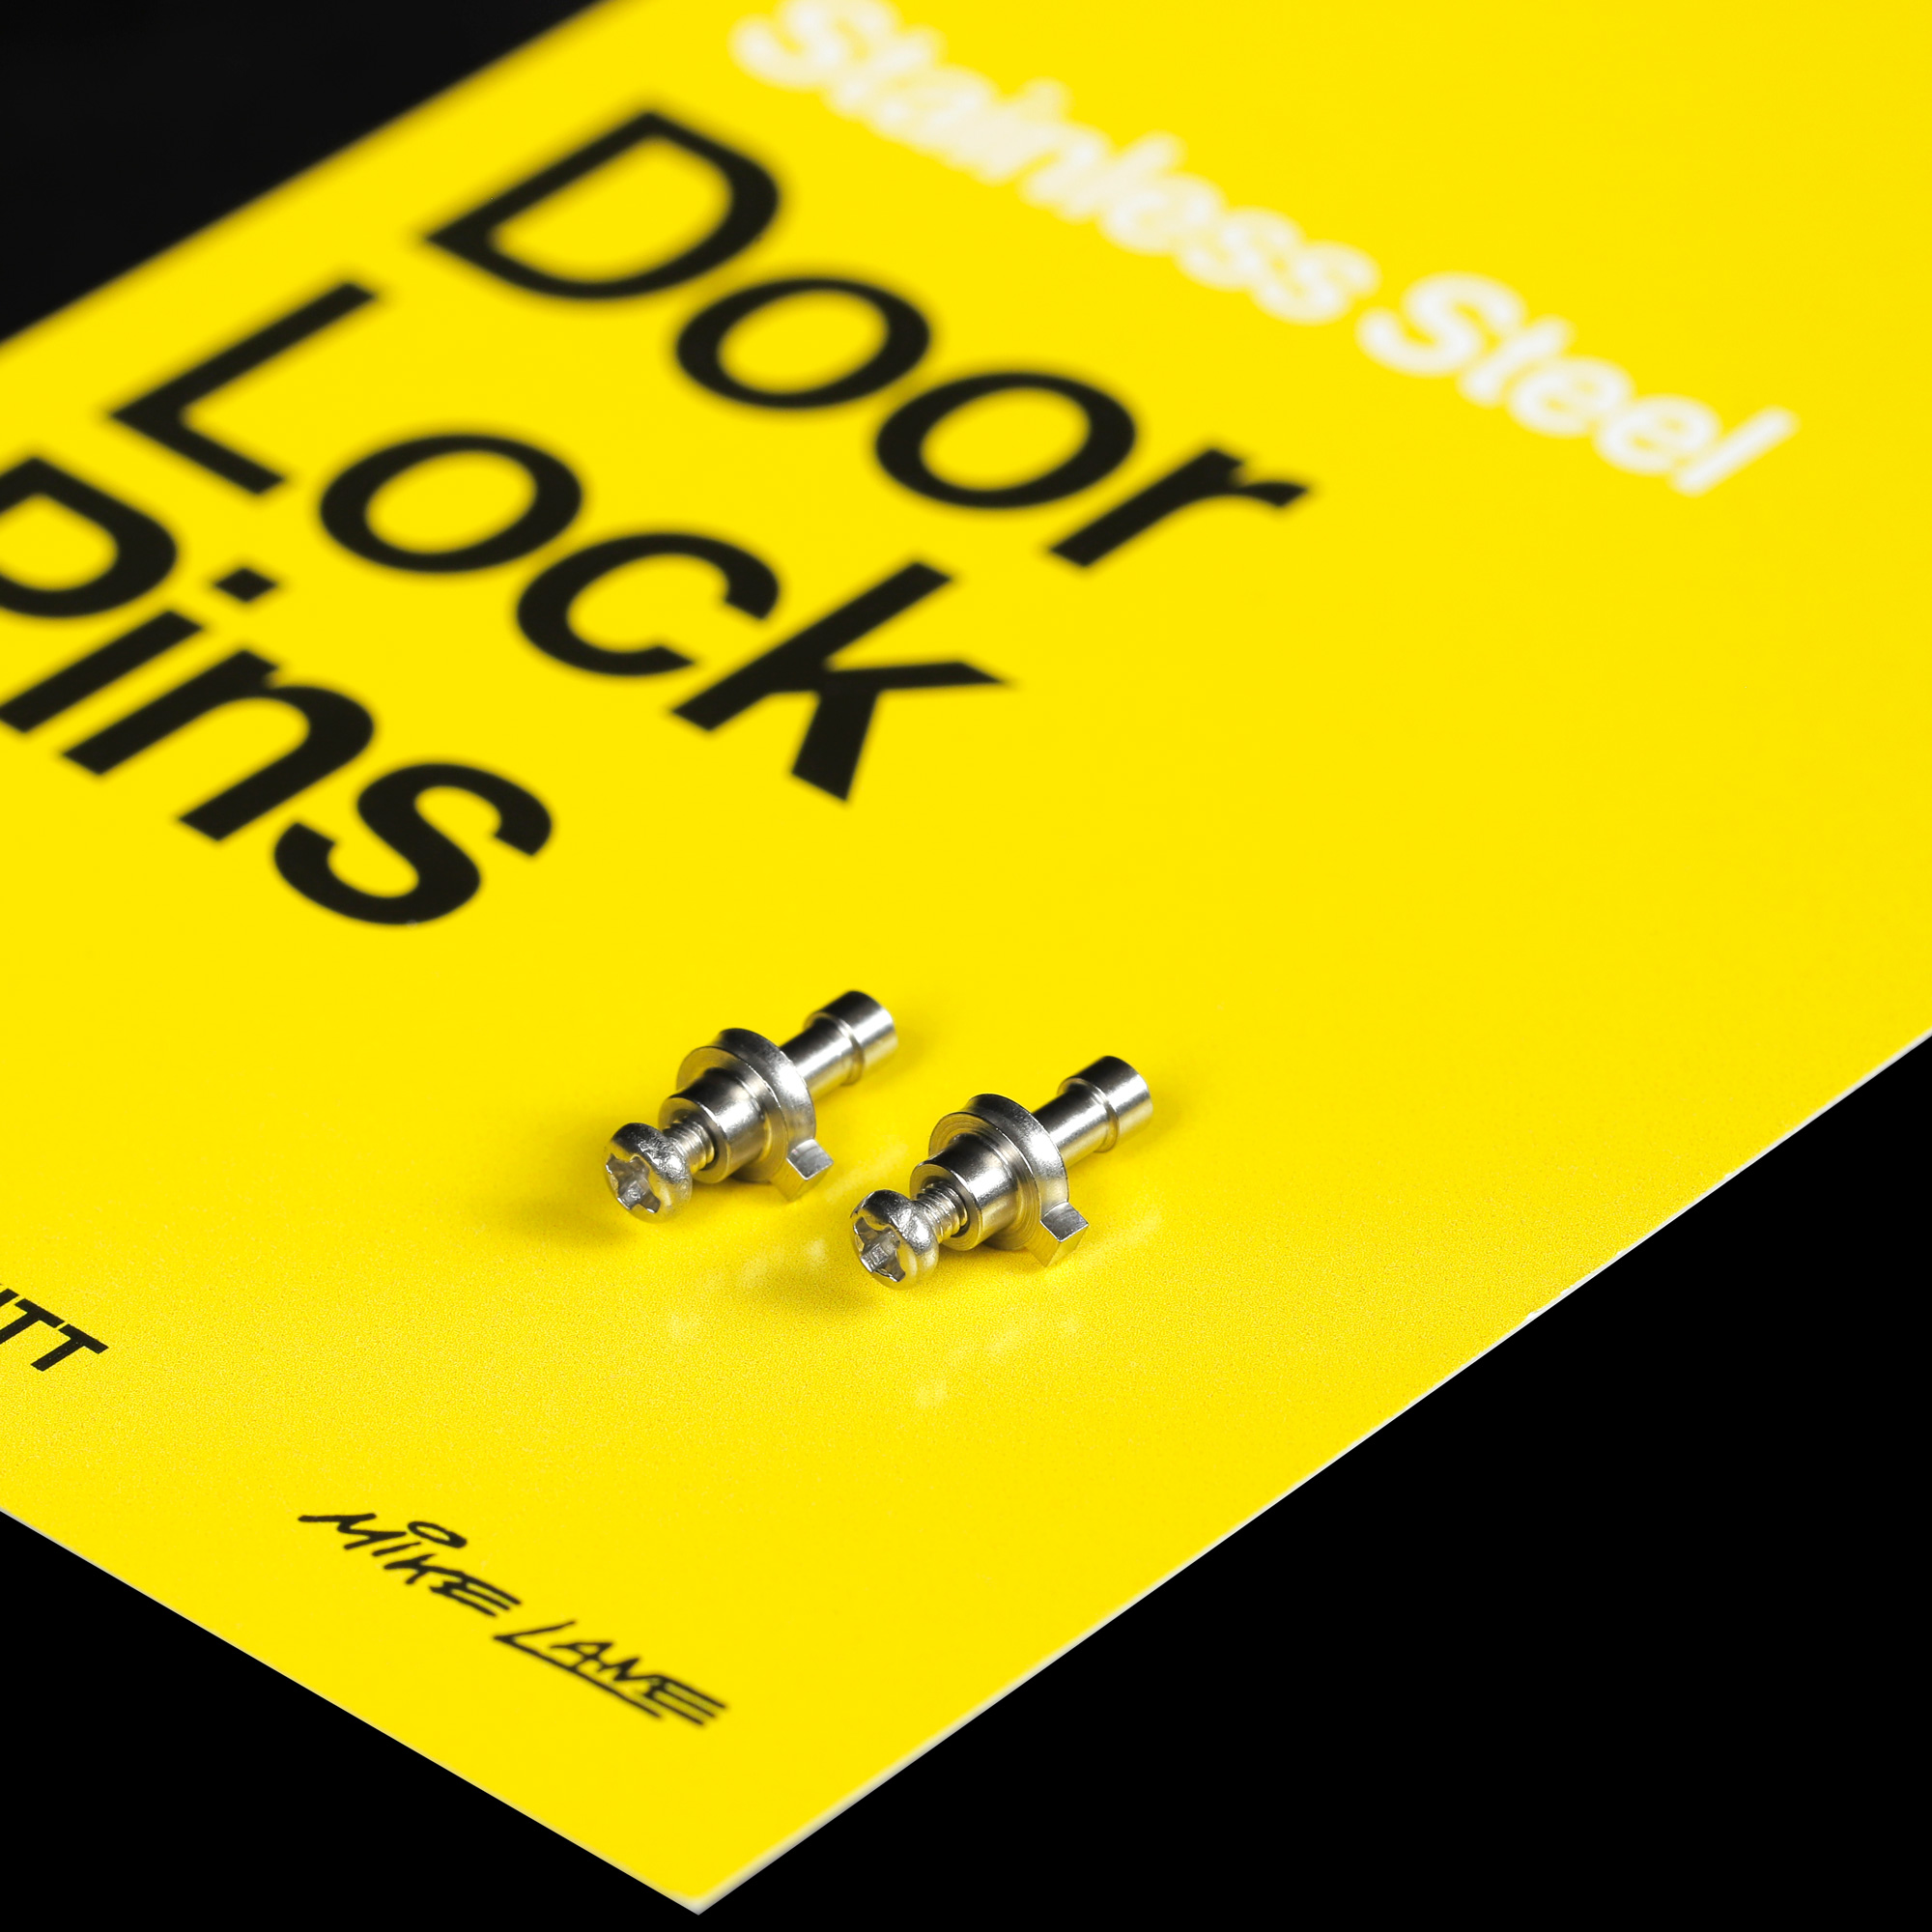
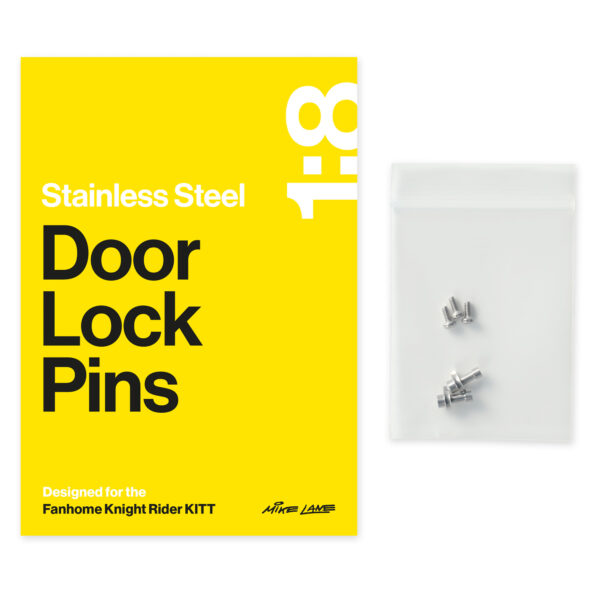
Stainless Steel Door Lock Pins
£14.40 incl VATAdd to basket -
In Stock

KITT Ultimate Electronic Kit
£414.00 – £638.99 incl VATSelect options This product has multiple variants. The options may be chosen on the product page