
The following step-by-step guide explains how to create and use your own animations on the Mike Lane ‘Dashboard Monitors and Power Boost‘ mod for the 1:8 Knight Rider KITT build.
We’ll cover how to convert video to animated GIFs, along with how to use existing animated GIFs that you may have produced yourself or found online.
Disclaimer: The following examples are for demonstration purposes only. Mike Lane Mods does not encourage the download or use of content that may be protected by copyright by their respective owners, is not associated with and does not endorse any of the third-party content, websites or online tools referenced in this guide.
The process
Once you’ve familiarised yourself with the process, it typically only takes a few minutes to produce each custom GIF for your monitors.
Step 1 Creating animated GIFs
Step 2 Cropping and resizing
Step 3 Combining two GIFs
Step 4 Optimising your GIFs
Final Step Saving your GIFs
At the end of this guide, there are also some troubleshooting tips and some examples and resources for you to use and experiment with.
Troubleshooting
Examples and resources
Step 1 Creating animated GIFs
The dashboard monitors are designed to play animated GIFs, therefore, to play videos we will first need to convert them to GIFs.
Converting a YouTube video to an animated GIF
There are a wealth of tools available that provide the ability to convert video to GIF. However, here I will cover the most common scenario (converting from YouTube to GIF) with the fastest and safest method – without the need for expensive software.
Top tip
For the best results, keep your videos and animations short. Short video clips will also keep your dashboard monitor sequence more interesting and varied.
Please note: Knight Rider Historians have kindly granted me permission to use their video content for the purposes of this demonstration. Always seek permission from the original content creator before using any material that may be subject to copyright.

- To convert a YouTube video to GIF, first you will need to be using Google Chrome and will need to install a free Google Chrome extension called GIFit! – a very straightforward and easy-to-use conversion tool. Click here to install Gifit!, click ‘Add to Chrome‘ and then ‘Add extension‘.

- In this example, I’ll show you how I converted the Knight Rider Historians animated logo from one of their YouTube videos into an animated GIF for playback on the dashboard monitors. To familiarise yourself with the process, I would recommend following this tutorial before creating your own GIFs. With their permission, I’ll be using this video from their channel: https://youtu.be/ywrIqXAEHQQ. If you haven’t already, I would highly recommend subscribing to their channel for fantastic, original Knight Rider content.

- Rather than converting the entire video to GIF, we will use GIFit! to trim a 4 second section of the video which we wish to become an animation for our dashboard monitors. Drag the current position cursor on the video timeline to where you want your GIF animation to start. In this example, we can see that our GIF animation will start at around 1:40 (the start of the animated Knight Rider Historians logo sequence).

- Click the GIFit! icon, which, if you have the extension installed correctly, should be to the right of the ‘Full screen’ icon in the bottom-right corner of the video player. Within the GIFit! panel, enter the start time of your GIF animation into the START field. In this example, we’ll enter 1:40.

- Continue to play the video until you reach the end of the sequence you wish to use for your GIF. In this example, the end of the animated Knight Rider Historians logo sequence ends at 1:44, so we’ll enter 1:44 into the END field within the GIFit! panel.

- Use the following settings for your GIF:
HEIGHT: 76
QUALITY: 100%
FRAMERATE: 10

- Click the red GIFit! button to begin converting your video sequence to GIF. It should say ‘GATHERING FRAMES…‘.

- Once complete, click ‘Save GIF‘. This will download your trimmed and converted GIF to your computers download folder. You can repeat this step for any additional video sequences that you’d like to convert to GIFs for use on your dashboard monitors.
Step 1 Demo
Next step
Your GIFs aren’t ready to use just yet. We will need to crop, resize and optimise it before it will play on the dashboard monitors. But first, we’ll cover how you can also use existing GIFs from websites such as GIPHY and Tenor.
Finding and using an existing animated GIF
You can also use existing animated GIFs that you may have created yourself or found online. And of course, you’re not limited to Knight Rider themed GIFs, you can use whatever you like within reason. The possibilities are endless!
You can find lots of pre-made animated GIFs on websites such as https://giphy.com/ and https://tenor.com/ for example.
Cool fact
Did you know that all of the animations provided with the ‘Dashboard Monitors and Power Boost’ mod were illustrated and animated from scratch by Mike Lane – pixel-by-pixel, frame-by-frame. Hundreds of hours went into recreating the scenes you see on the monitor screens. No screen captures here! Animations include some of his own unique creations, such as ‘Ski Mode’ and completing sequences you never got to see in the TV show.

Step 2 Cropping and resizing your GIFs
Before you can play your GIFs on the dashboard monitors, you will first need to crop and resize them to the correct aspect ratio and size.
Here we’ll use a free online tool called EZGIF to get everything looking and working like it should – without the need for any additional software.
Using your own design software?
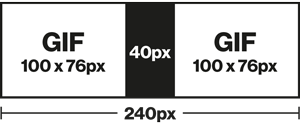
If you’re confident using your own design software to create GIFs, you can skip this step and jump to ‘Step 4: Optimising your GIF‘. You will need to ensure your GIFs are created at a size of 100px x 76px per monitor and then combined into a single wide GIF at 240px x 76px. This must include a 40px blank space in the centre of the GIF to compensate for the monitor bezel.

- First we need to crop the GIF to the correct aspect ratio (3:2). Open https://ezgif.com/crop. Here you can upload any GIFs that you saved in the previous steps to your computer using the ‘Choose file‘ button. Alternatively, you can paste a GIFs URL into the image URL box.

- Once you’ve chosen your GIF file, or pasted it’s URL, you can click ‘Upload!‘. Once your GIF has uploaded it’s time to crop it to the correct aspect ratio.

- In this example you’ll see that the GIF is too big for the cropping box. Click the ‘Extend canvas size (add transparent area around the image)‘ button. This will give us a bit more space (padding) around the GIF to play with.

- Click 3:2 to lock to the correct aspect ratio. Next, drag and scale the cropping box to position the GIF nicely in the middle and at a good size. Click ‘Crop image!‘.

- Your cropped GIF will appear below the original GIF, under ‘Cropped image:‘. It might look like the GIF hasn’t changed size or that there’s no extra padding around it, but a transparent space will have been added around your image.

- Now that your GIF has been cropped to the correct aspect ratio, we need to resize it to fit the monitors. Click ‘Resize‘ and move to the next step.

- Enter a Width of 100 and a Height of 76. Click ‘Resize image!‘.

- Your resized GIF will appear below the original GIF, under ‘Resized image:‘. We now need to add some blank space (padding) to the left or right of your GIF, depending on which monitor you intend to display it on. This is to compensate for the monitor bezel that sits over the screens. Within the resized image section, click the ‘crop‘ button and move to the next step.

- Here we’ll add some padding to the left or right of the GIF to compensate for the dashboard monitors bezel. Click the ‘Extend canvas size (add transparent area around the image)‘ button.

- If your GIF is to be displayed on the LEFT dashboard monitor, enter the following settings and click ‘Set‘:
Left: 50 Top: 38 Width: 120 Height: 76

- If your GIF is to be displayed on the RIGHT dashboard monitor, enter the following settings and click ‘Set‘:
Left: 30 Top: 38 Width: 120 Height: 76

- Click ‘Crop image!‘. Your cropped GIF will appear below the original GIF, under ‘Cropped image:‘. Again, it might look like there’s no extra padding to your GIF, but a transparent space will have been added to the right or left side of your image.

- Right-click the GIF and ‘Save Image As‘ to your computer. It’s best to name the GIF for the left monitor L1.gif and the right GIF R1.gif for example. This will make it easier to track which GIF is for which side of the dashboard monitors.
You can repeat this step for any additional GIFs you’d like to create, by returning back to https://ezgif.com/crop and calling your next GIFs L2.gif, L3.gif and so on.
Step 2 Demo
Next step
Your GIFs aren’t ready to use just yet. Next, we will combine your left and right GIFs, placing them side-by-side and saving as a single GIF ready for the dashboard monitors.
Step 3 Combining two GIFs side-by-side
Rather than playing individual GIFs for each monitor, the dashboard monitors work by playing a single, combined GIF containing two GIFs across both monitors. So, before you can play your GIFs on the dashboard monitors, you will next need to combine your left and right monitor GIFs.
Top tip
Did you know that you can also use static images as GIFs, such as family photos or TV show logos? Simply use https://ezgif.com/maker to convert static images to GIFs.

- To place two GIFs side by side, open https://ezgif.com/combine. Click ‘Choose files‘ and select your left and right GIFs that you created in the previous steps. It should now say ‘2 files‘ next to ‘Choose files‘. Click ‘Upload!‘

- You will now see both uploaded GIFs side by side. Drag each uploaded GIF to the correct position in the space beneath. The left side being the left monitor, and the right side being the right monitor. Once dragged into position you should see a space in the middle separating the two GIFs. This is the padding we added earlier to compensate for the TV bezel. If you see no space, you have most likely dragged the RIGHT GIF to the LEFT side in error, and vice versa. Once you’re happy, click ‘Combine!‘

- Your combined GIF will be playing beneath ‘Output image:‘ in the results section. Keep this window open, there is no need to save your GIF yet.
Step 3 Demo
Next step
Your GIFs aren’t ready to use just yet. Next, we will need to optimise them.
Step 4 Optimising your GIF

- Once you’ve placed your GIFs side-by-side, click ‘optimize‘ in the ‘Output image:‘ results section.

- Within ‘Optimization method‘, select ‘Coalesce (unoptimize)‘ then click ‘Optimize GIF!‘.

- In the results section, under ‘Optimized image:‘, choose ‘optimize‘ again.

- Now select “Optimise Transparency” and set ‘Fuzz‘ to 0%. Click ‘Optimize GIF!‘.

- This is now your final GIF, scaled and optimised for playback on the dashboard monitors, In the results section, click ‘save‘ to save your completed GIF to your computer.
Step 4 Demo
Final step
For the final step, we will need to name your GIFs correctly and save them to the dashboard monitors MicroSD card.
Final Step Saving your GIFs to the MicroSD card


Troubleshooting, tweaks and enhancements
Using https://ezgif.com/effects, you can further enhance your GIFs if required, using tools such as ‘Colorize’ to add more colour/saturation, or ‘Speed’ and ‘Optimize’ to improve playback performance.
Some examples where further enhancements may be required are as follows:
Example 1 – Colour
If your animations look a little washed out on the dashboard monitors, increase the ‘Saturation’ to 200 in the ‘Colorize’ settings within the effects tools. Whilst the colours may look a little intense or extreme on your computer screen, you may find they look a lot better on the dashboard monitors.
Example 2 – Slow Playback / Horizontal Banding
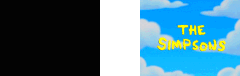
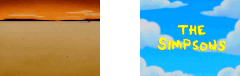
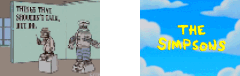
If you notice horizontal banding on your animations, or the animation plays back too slowly on the dashboard monitors, it’s most likely that your animation is too complex or too long to run on both sides of the screen at the same time. Simple, short, slow-paced animations with minimal detail and colour will always work best, such as cartoons or graphic-based animations as opposed to fast-paced video with lots of colour and detail. The fix for this in most cases is to only run the animation on one side, and have a static image on the other side. This reduces strain on the dashboards processor. If you’re stuck for what to use for your static image on the other side, I have provided some example static GIFs for you to use in the resources section below, such as the Knight Rider title screen and logos. These have all been created and designed for use on the RIGHT monitor screen. You can simply right-click them and save them to your computer to use opposite your custom GIF when following ‘Step 3: Placing two GIFs side-by-side (Combining)‘.
Example 3 – Your custom GIFs look scrambled/corrupted or don’t play at all
This is most likely because you haven’t optimized your GIFs correctly before saving, or you haven’t resized your GIFs to the correct height of 76 pixels. Or both! Please refer back to ‘Step 2: Cropping and resizing your GIFs’ followed by the ‘Coalesce’ and ‘Optimize Transparency’ steps within ‘Step 4: Optimising your GIFs’. Following the resizing and optimizing steps are critical to getting your GIFs to play correctly on the dashboard monitors.
The only other issue that may prevent your GIF from playing is if it hasn’t been named correctly in sequence with other GIFs on the MicroSD card. Please refer back to ‘Final Step: Saving your GIFs to the MicroSD card‘.